How to Work with Tickets in Upservice
A ticket system is a tool for organizing and managing customer requests from various communication channels that you can connect in the system. Each customer request turns into a separate "ticket" (or application), which is tracked from its creation to its complete resolution. Such a system allows you to structure communication, improve service quality, and ensure no request is ever lost.
Tickets can be created from any channel you set up in Upservice, specifically: Website Form, Website Chat, Email, Telegram, WhatsApp, and Telephony.
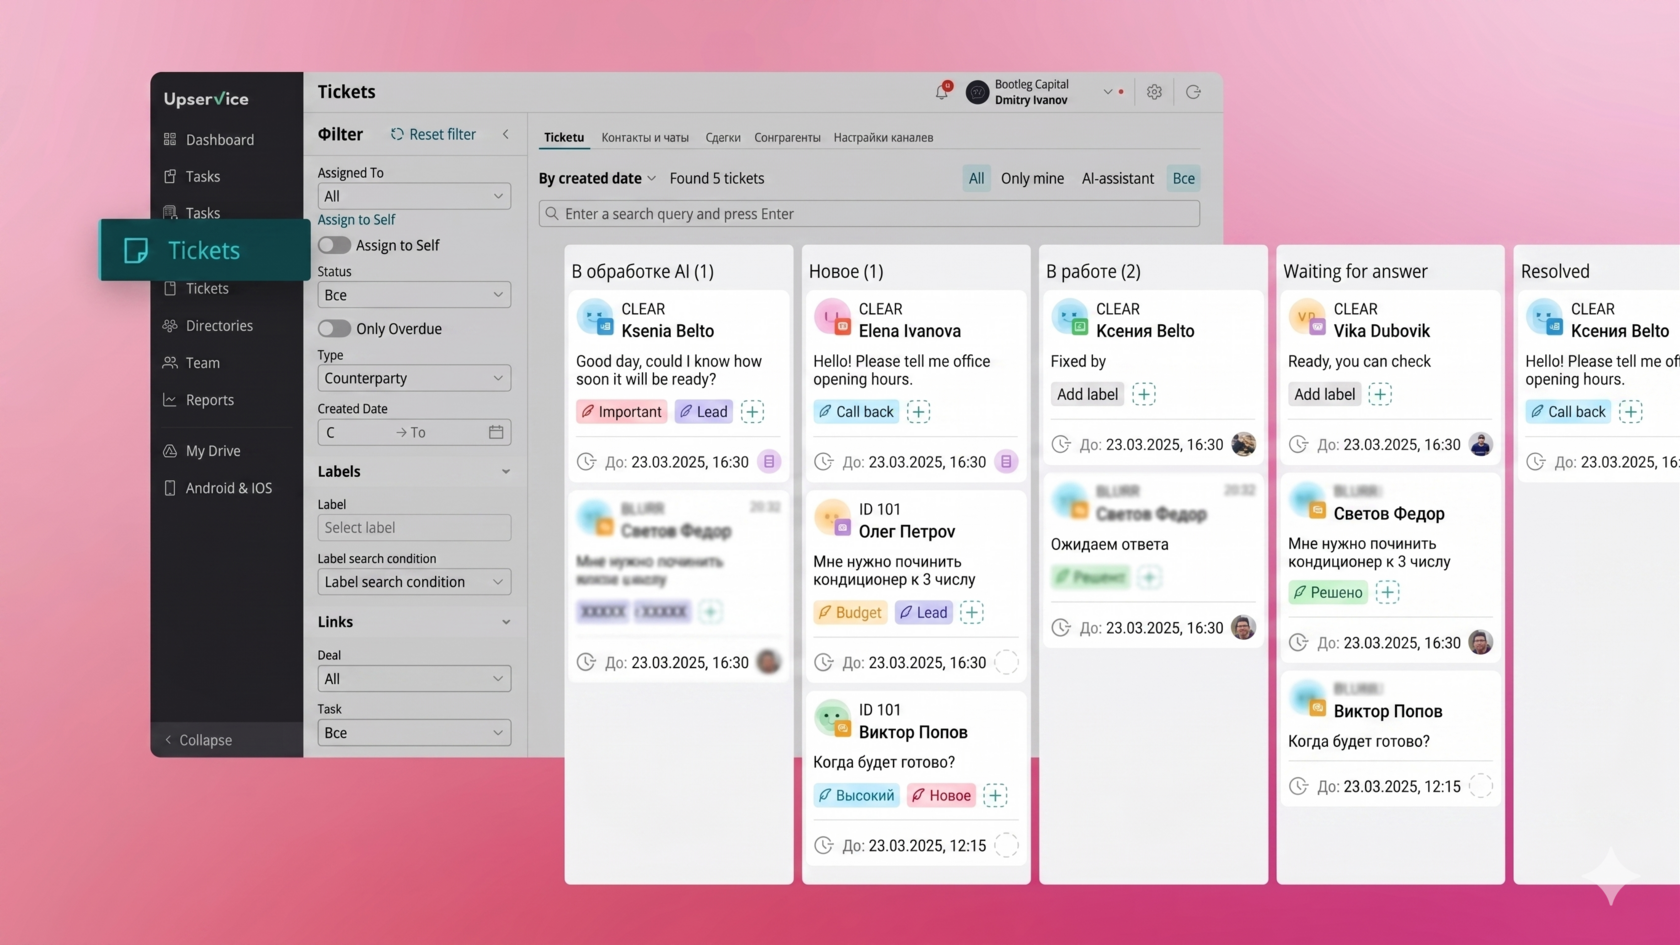
To configure your Ticket system within Upservice, navigate to the Tickets tab located in the left-hand menu.
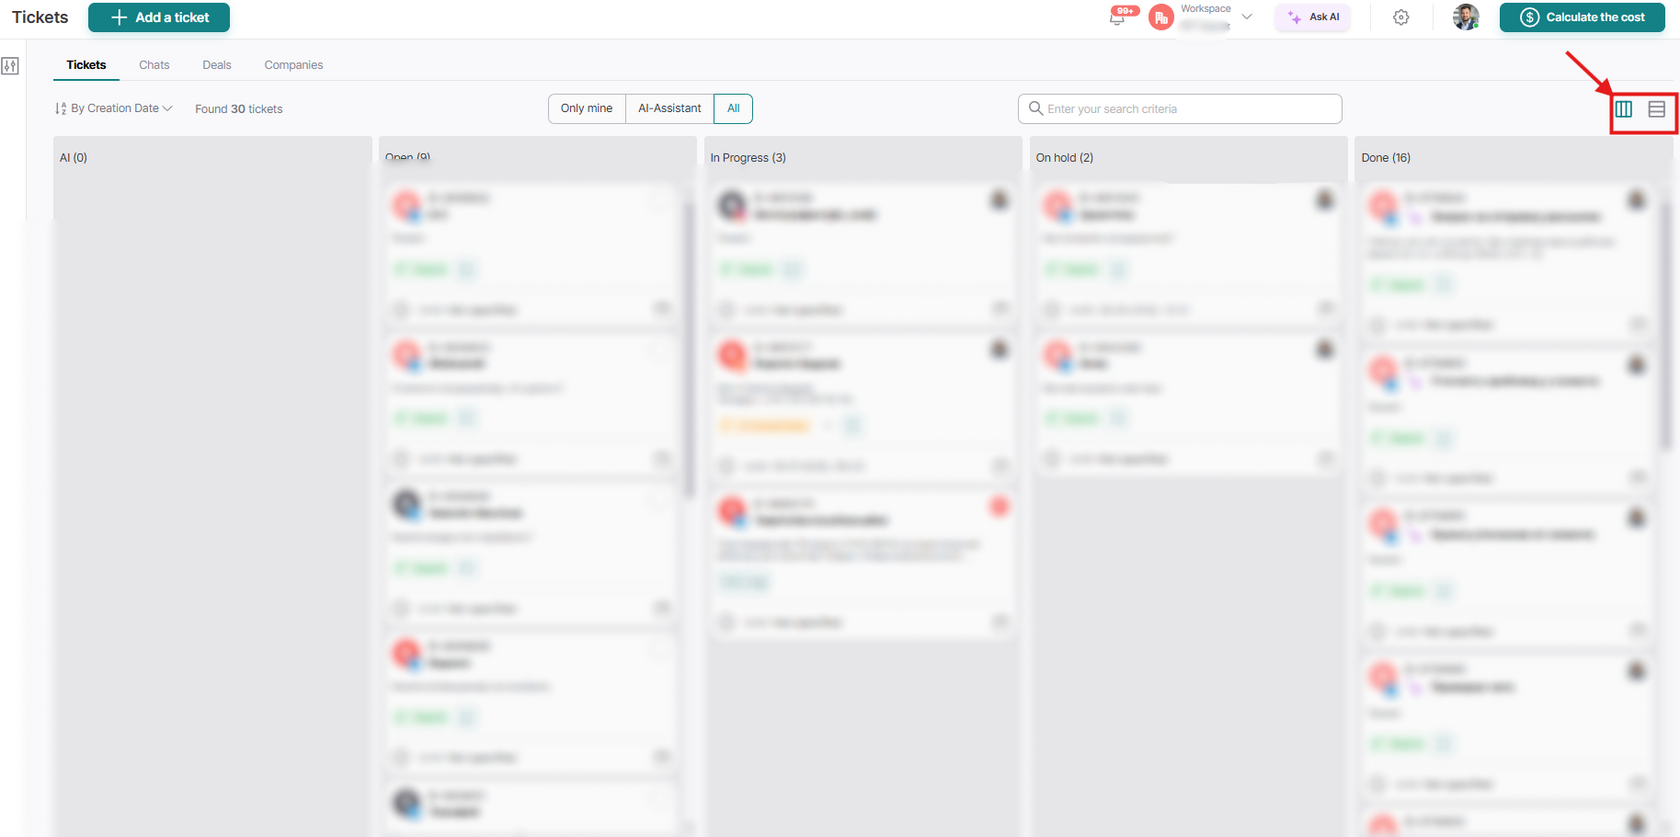
By default, the tickets page in Upservice is displayed in the "Kanban" view.
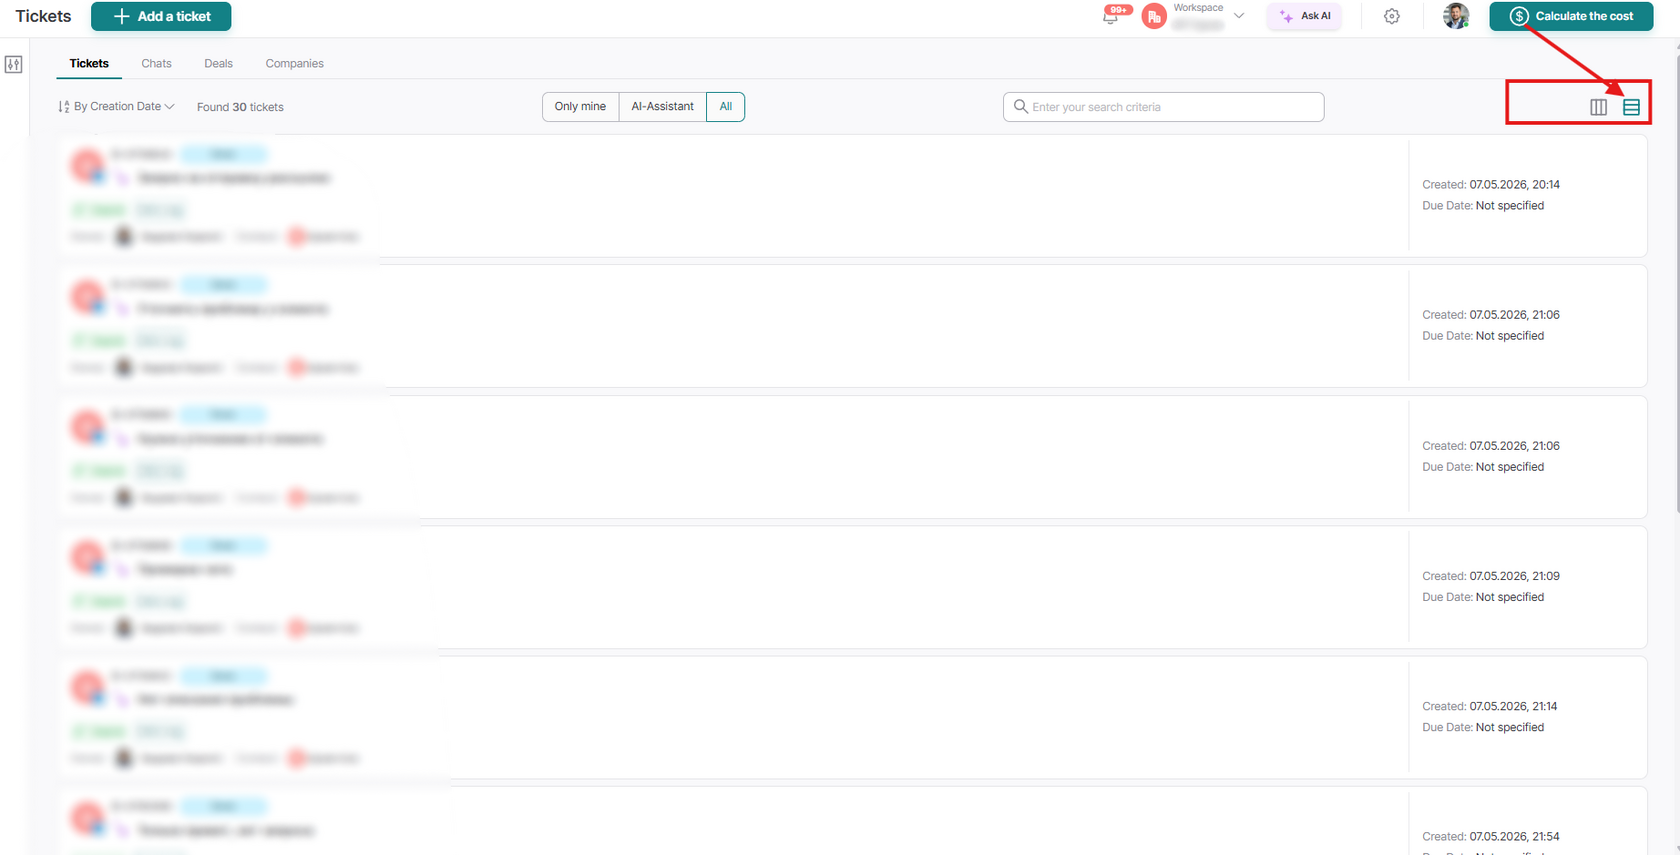
Users can switch to the "List" view using the "List" icon — similar to how view switching works in tasks.
This allows you to choose a comfortable working format: visual (Kanban) or tabular (List).
List view:
There are two ways to create a ticket:
- First method — create a ticket manually by specifying a contact;
- Second method — create a ticket through a communication channel.
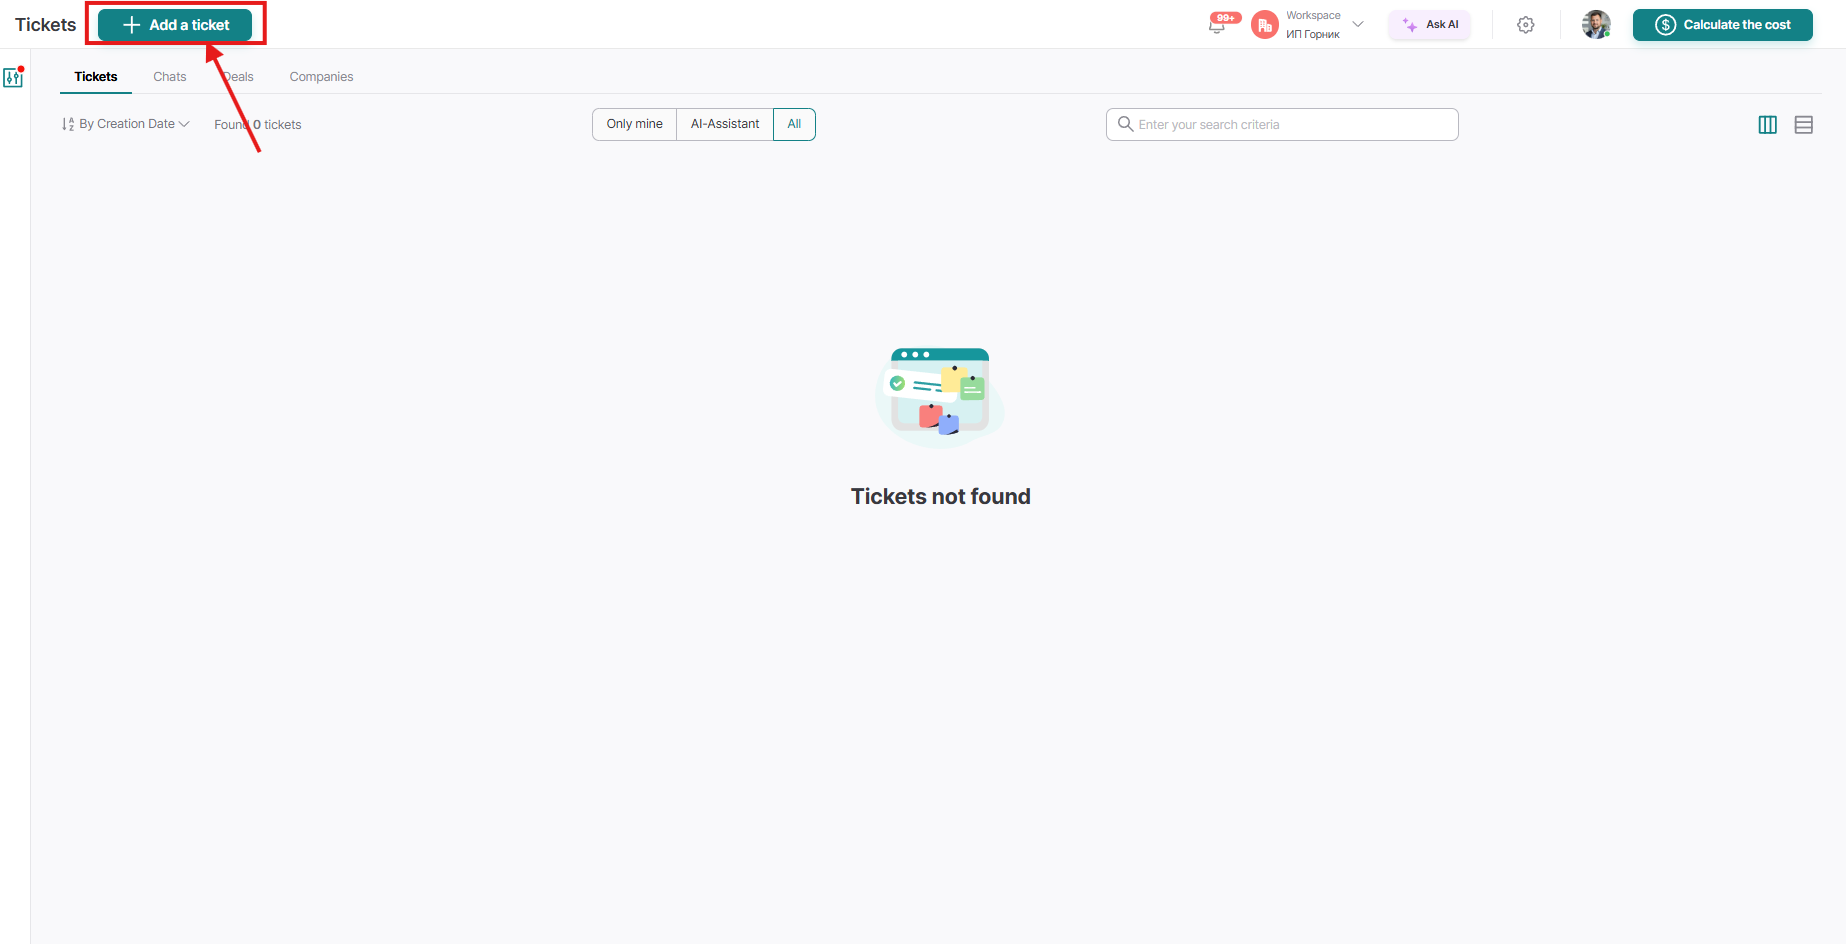
First method: Creating a ticket manually
To create a ticket manually, we need to go to the "Tickets" section and click the "Add ticket" button:
After creating the ticket, a form will open with fields that need to be filled out for proper registration and further work with the request. Below is a description of each field:
- Name — it is recommended to indicate the client's Last and First Name for quick identification. You can supplement the title with a brief summary of the problem to simplify searching through the ticket list.
- Description — a field for recording key details of the request. Here you should describe the problem, attach necessary context, or specify the exact goal of creating the ticket so any employee can quickly understand the situation.
- Due Date — the deadline set for resolving the issue. Specifying an exact date and time helps monitor SLA compliance and guarantees the task will be closed on time.
- Responsible — the employee assigned to handle this ticket. This specialist will deal with resolving all related issues and act as a single point of contact for the client.
- Contact — a field where information about the client who initiated the request is recorded. The data in this field links the ticket to a specific profile in the system.
- Channel — the communication method through which the request was received. Specify the actual source (for example, Email, Telegram, WhatsApp, or Phone) to know exactly where to continue the dialogue with the client.
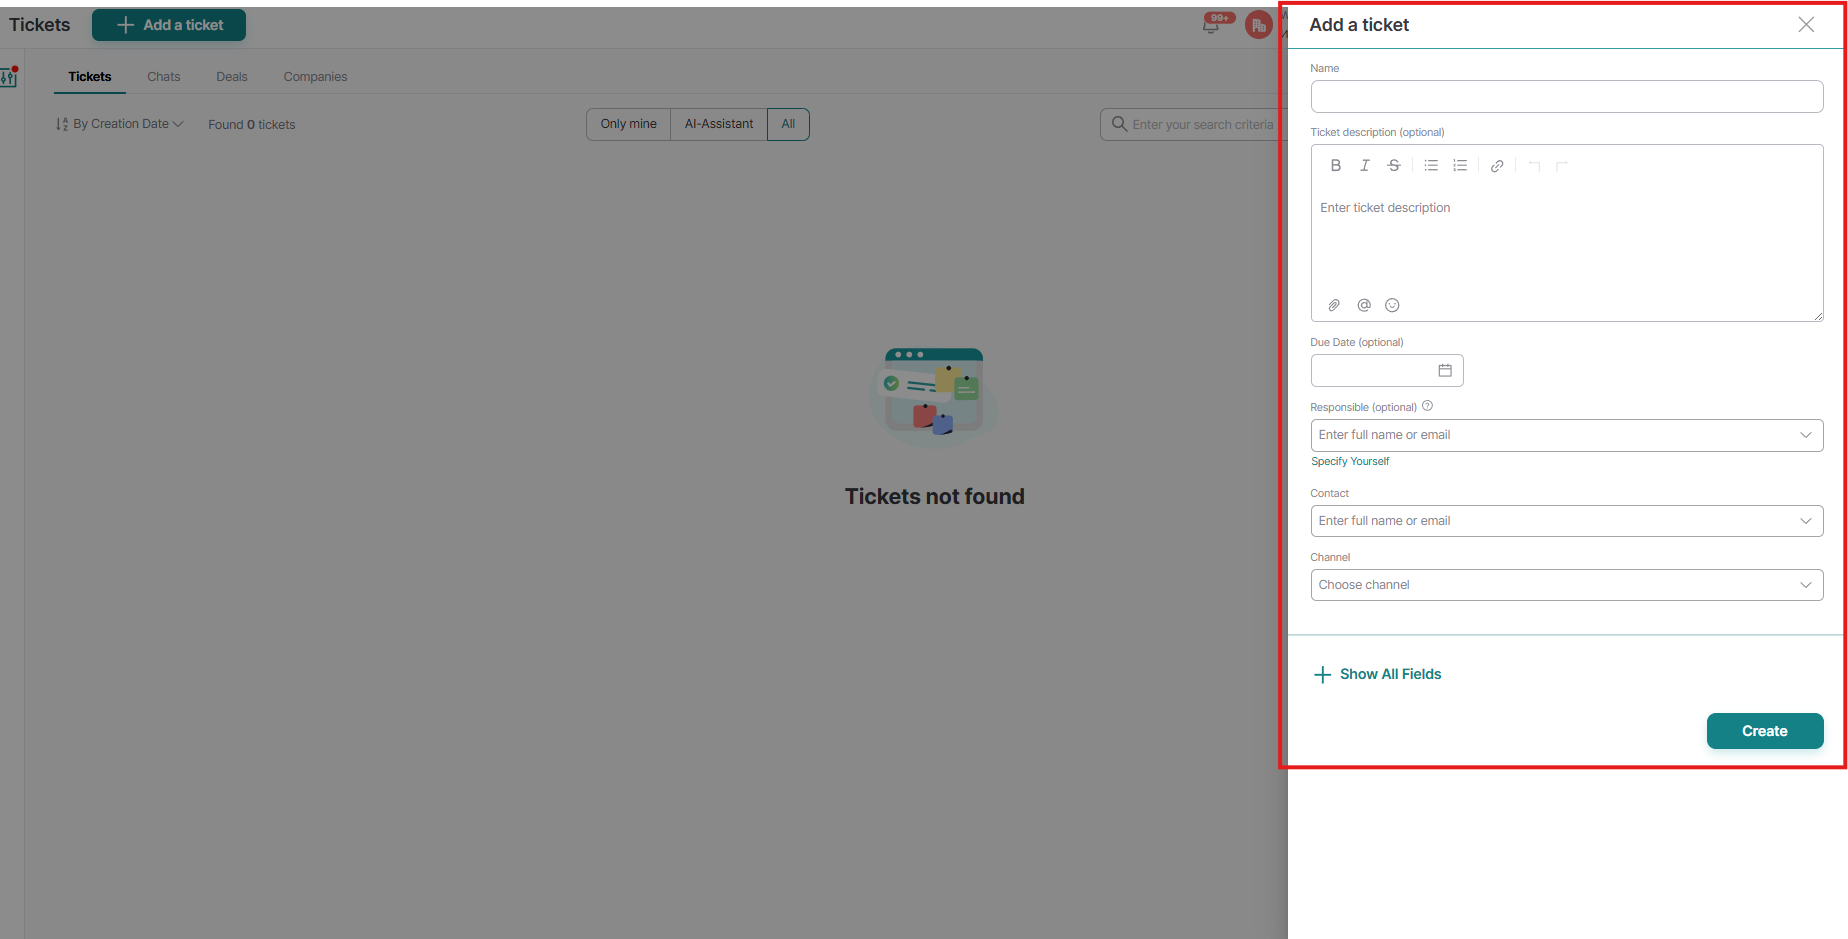
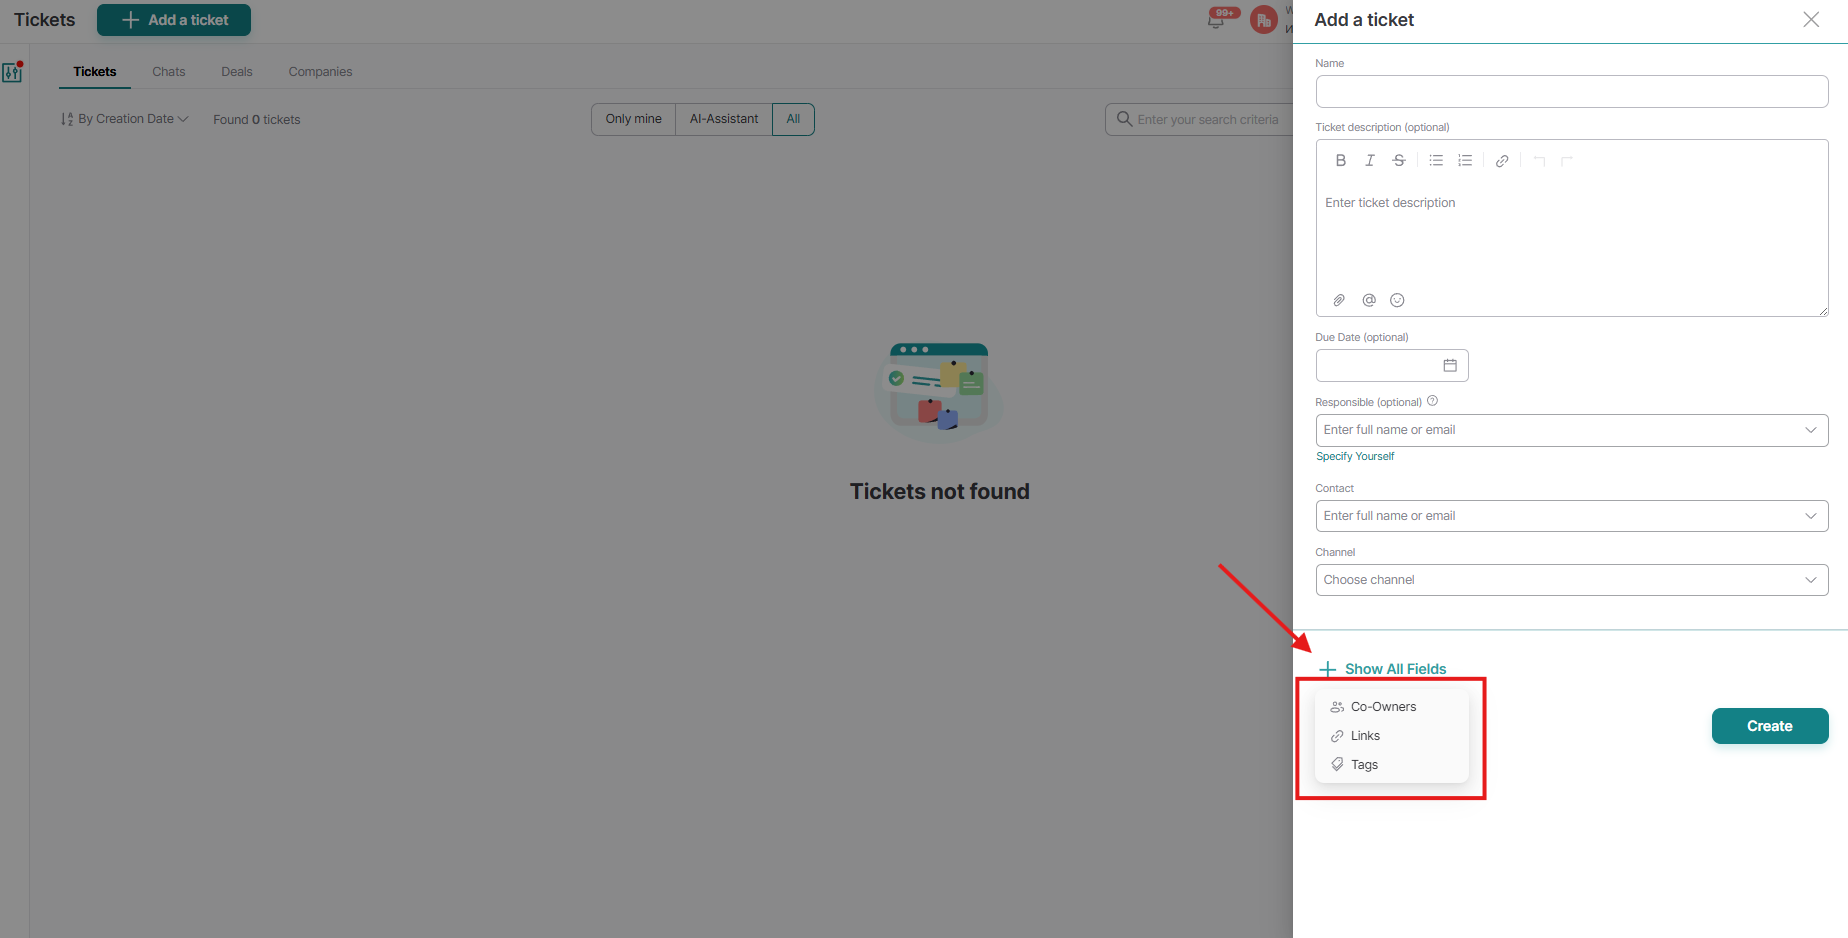
We can also select additional fields:
Second method:
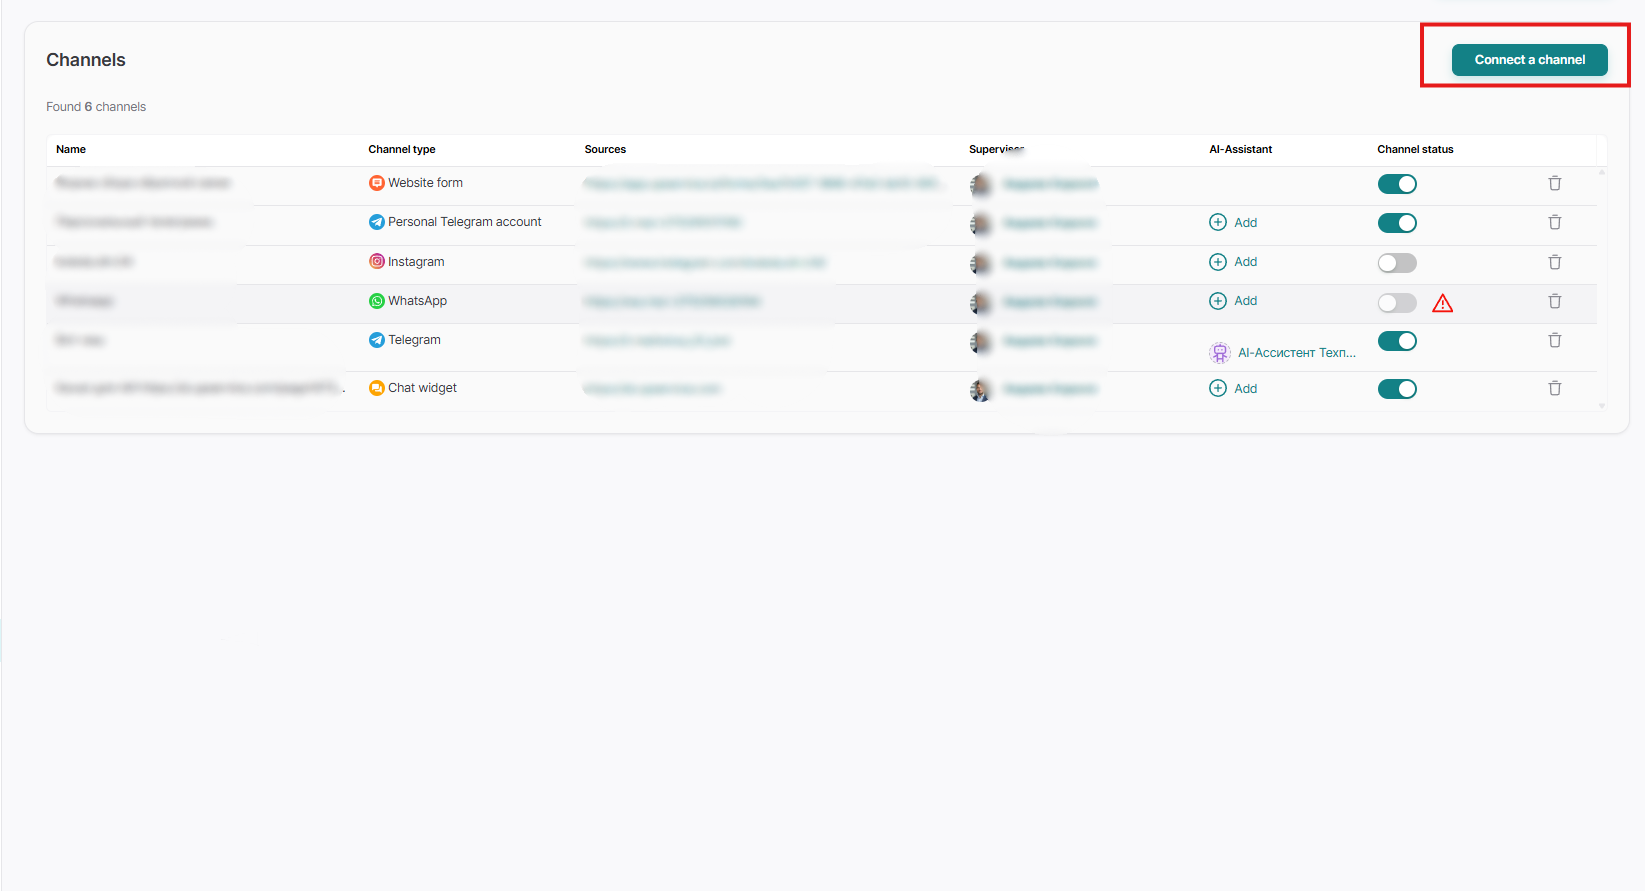
To create a ticket via a communication channel, make sure that in the "Settings" → "Channels" section, you have at least one communication channel connected:
You can find out how to create various communication channels in our Channels:
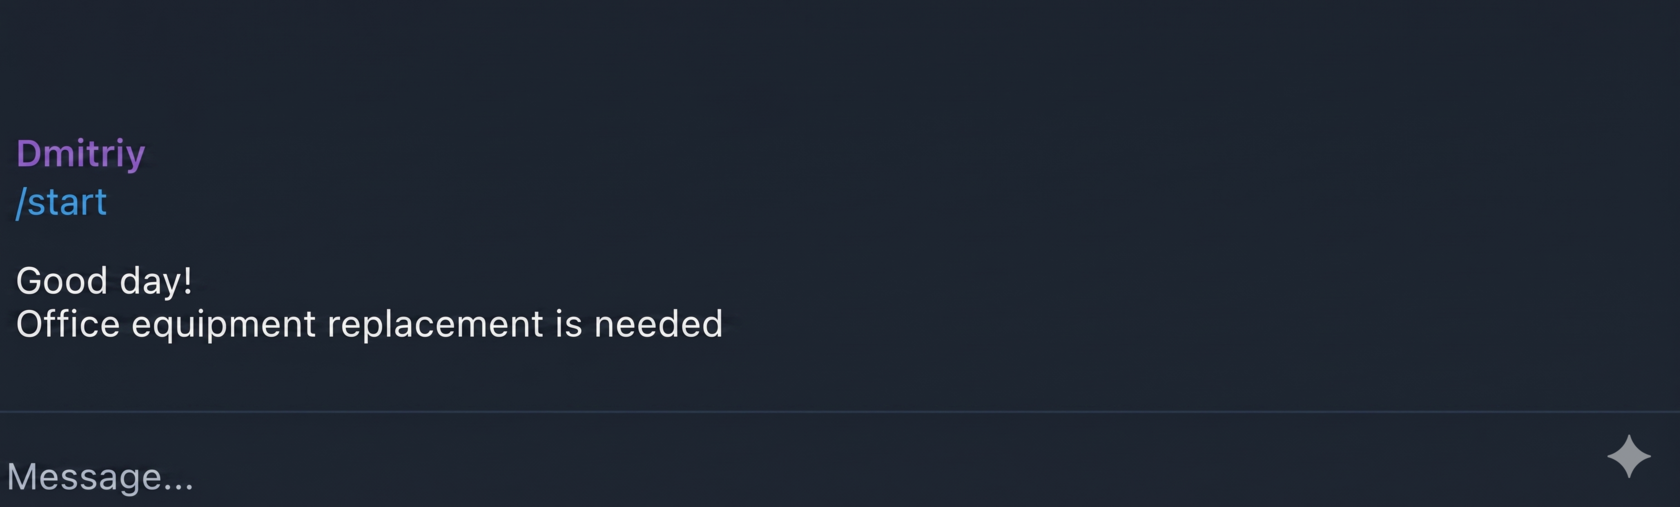
Let's write our test application from a client in the Telegram channel:
Afterward, let's go to Upservice and we will see our newly created ticket:
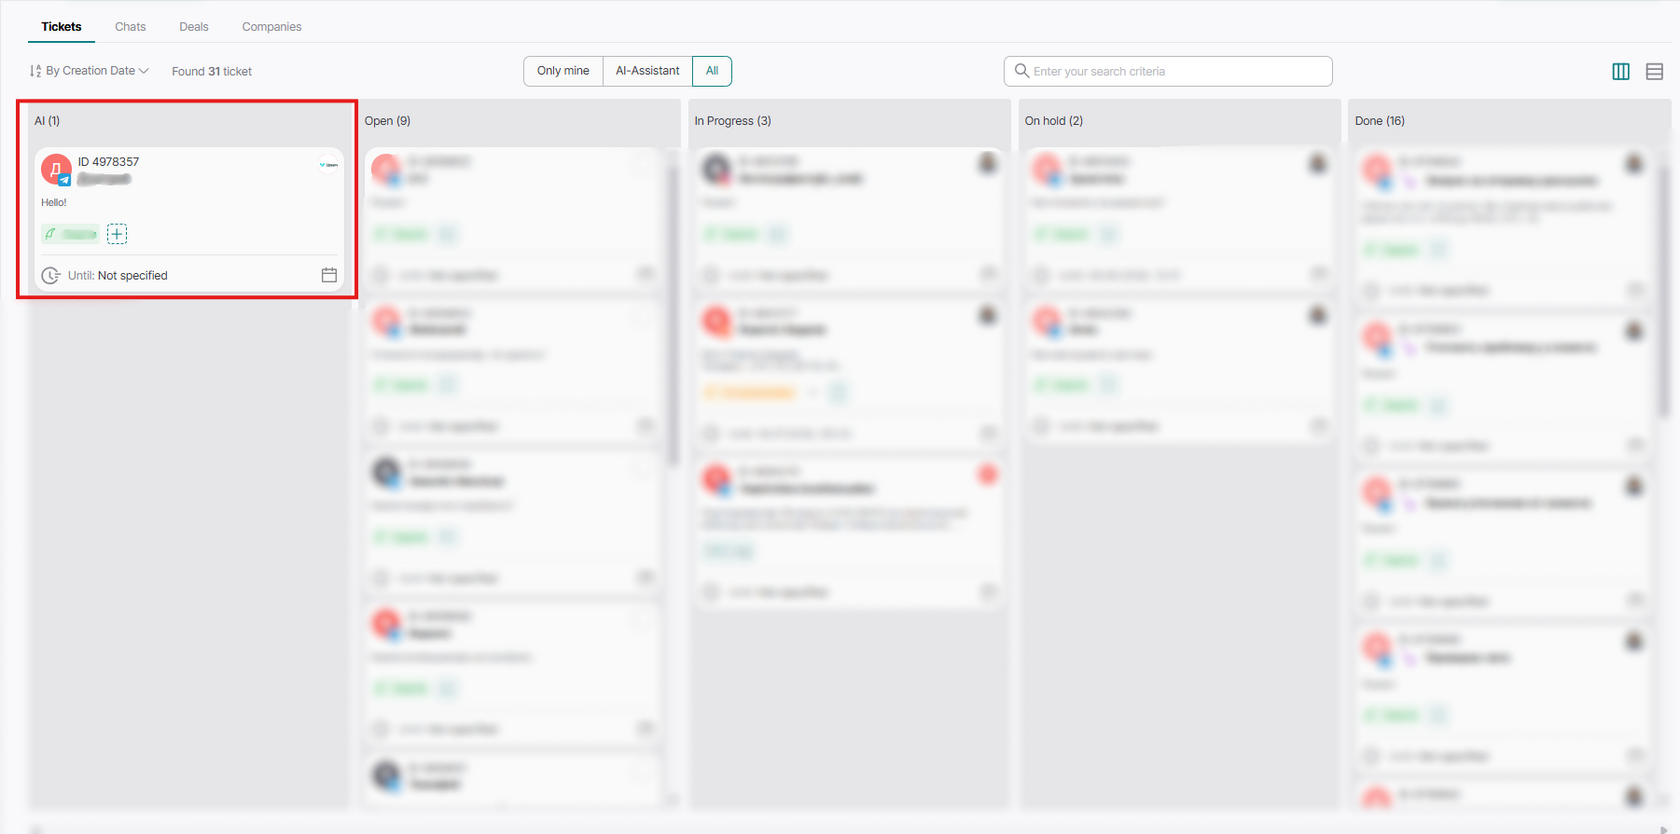
Where we can also see the ticket creation date with you without going inside the ticket itself:
Automatically, our new ticket gets the "New" status. In total, there are 5 statuses in our ticket system:
1. AI - requests that are being processed by the tech support AI assistant on the first line of support fall into this status. That is, the AI assistant helps answer the client's questions without involving a channel operator; if it cannot handle it, it will then transfer it to an operator. You can read more about how to set up the tech support AI assistant in Upservice here.
2. Open - all new requests written by users across all channel types fall into this status.
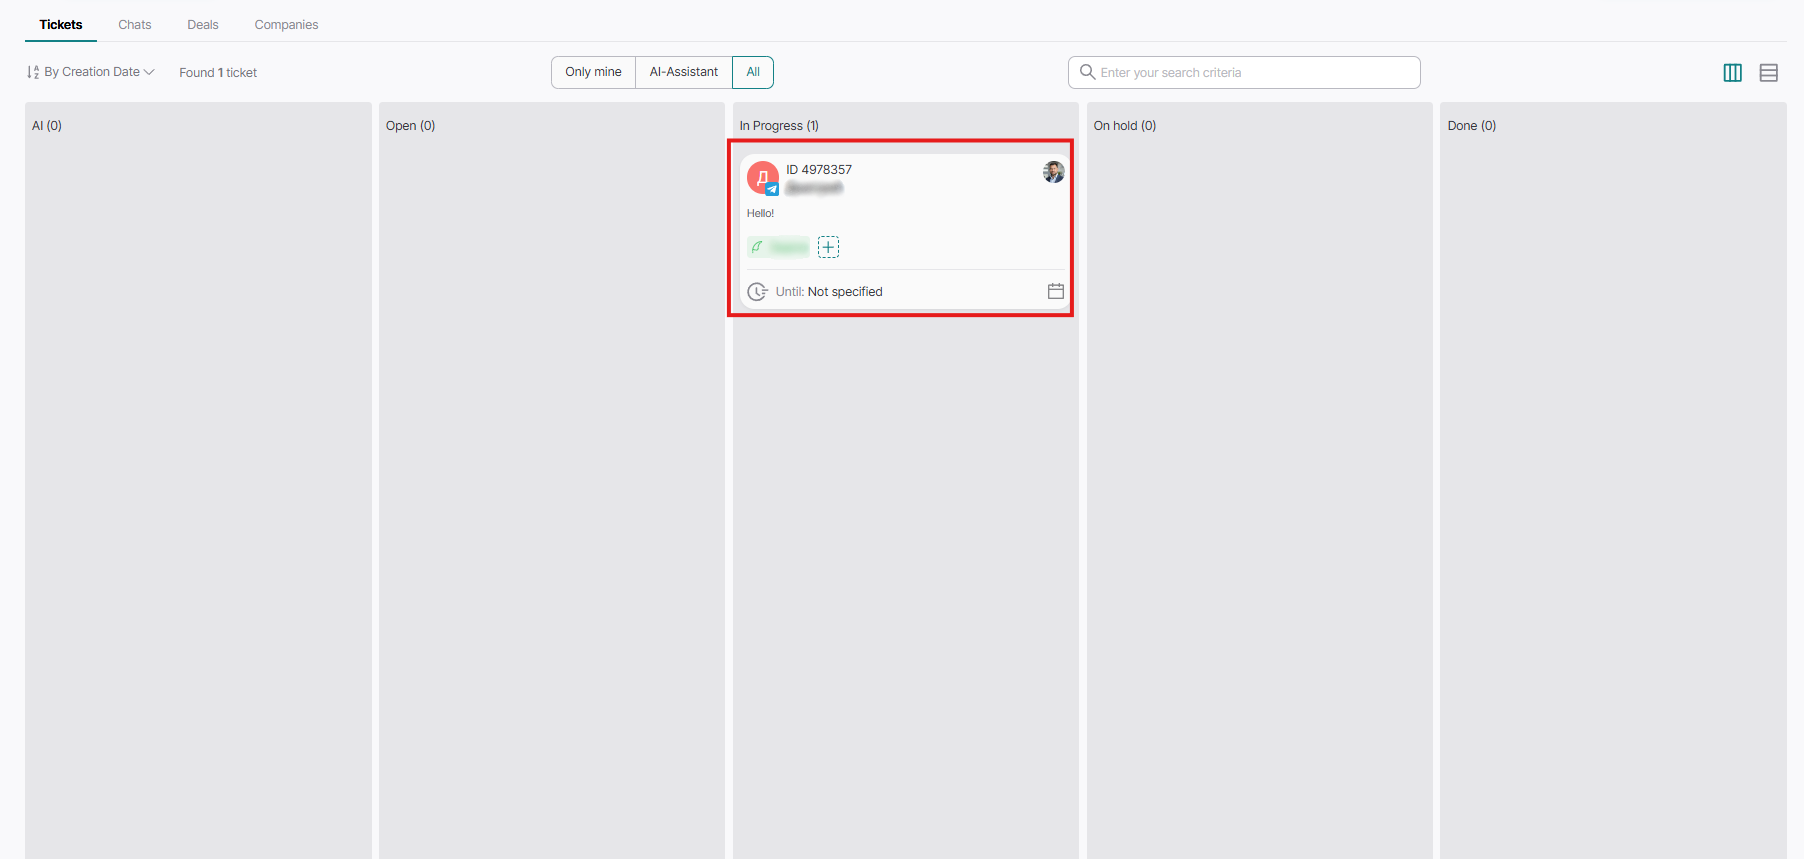
3. In Progress - tickets that the operator has taken to work and is communicating with the user (see below for how this works).
4. On hold - user requests where the operator has already given an answer (for example, requested additional info) and is waiting for the user's response.
5. Done - this is the final status of a ticket, when the request was successfully processed by the operator, the result of which is either the creation of a task/application based on the user's request, or the request was resolved through correspondence with the operator.
To take a ticket into work, you first need to go into the ticket itself by clicking on it:
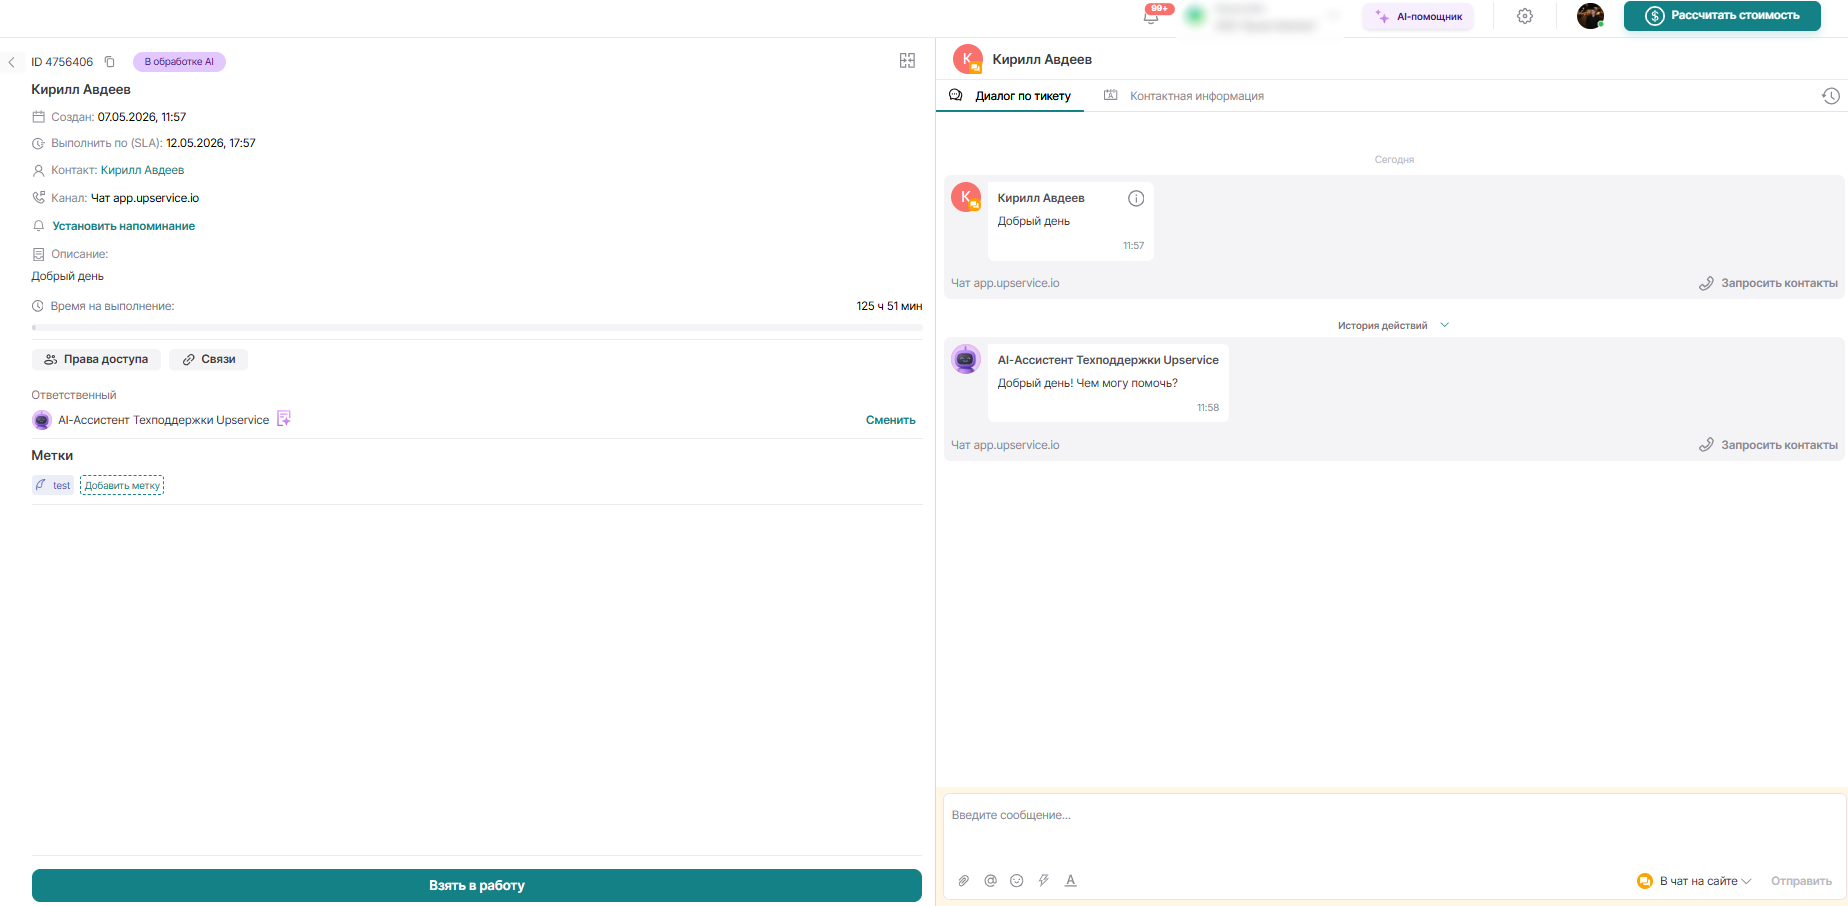
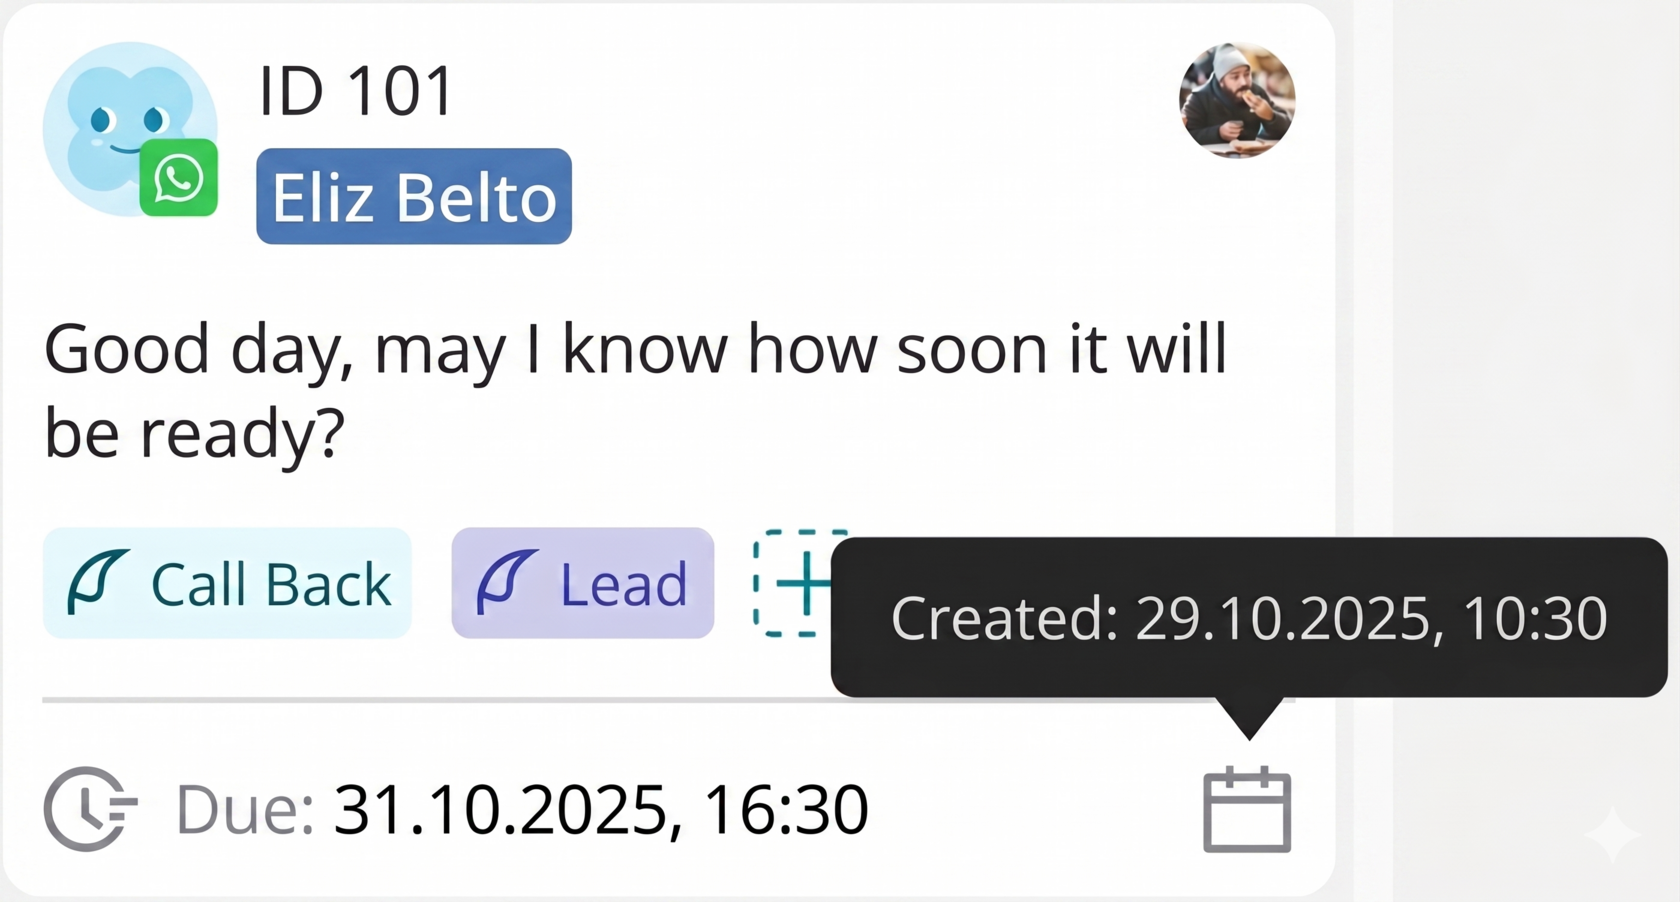
After we have gone into our ticket, we can see the following information located inside the ticket itself, namely:
1. Ticket information:
- Created
- Due Date: (SLA, if specified in the settings) configured in the channel settings itself.
- Contact based on which our ticket was created
- Channel through which the user request came
- Ticket description - this is the actual message of the user who wrote to us.
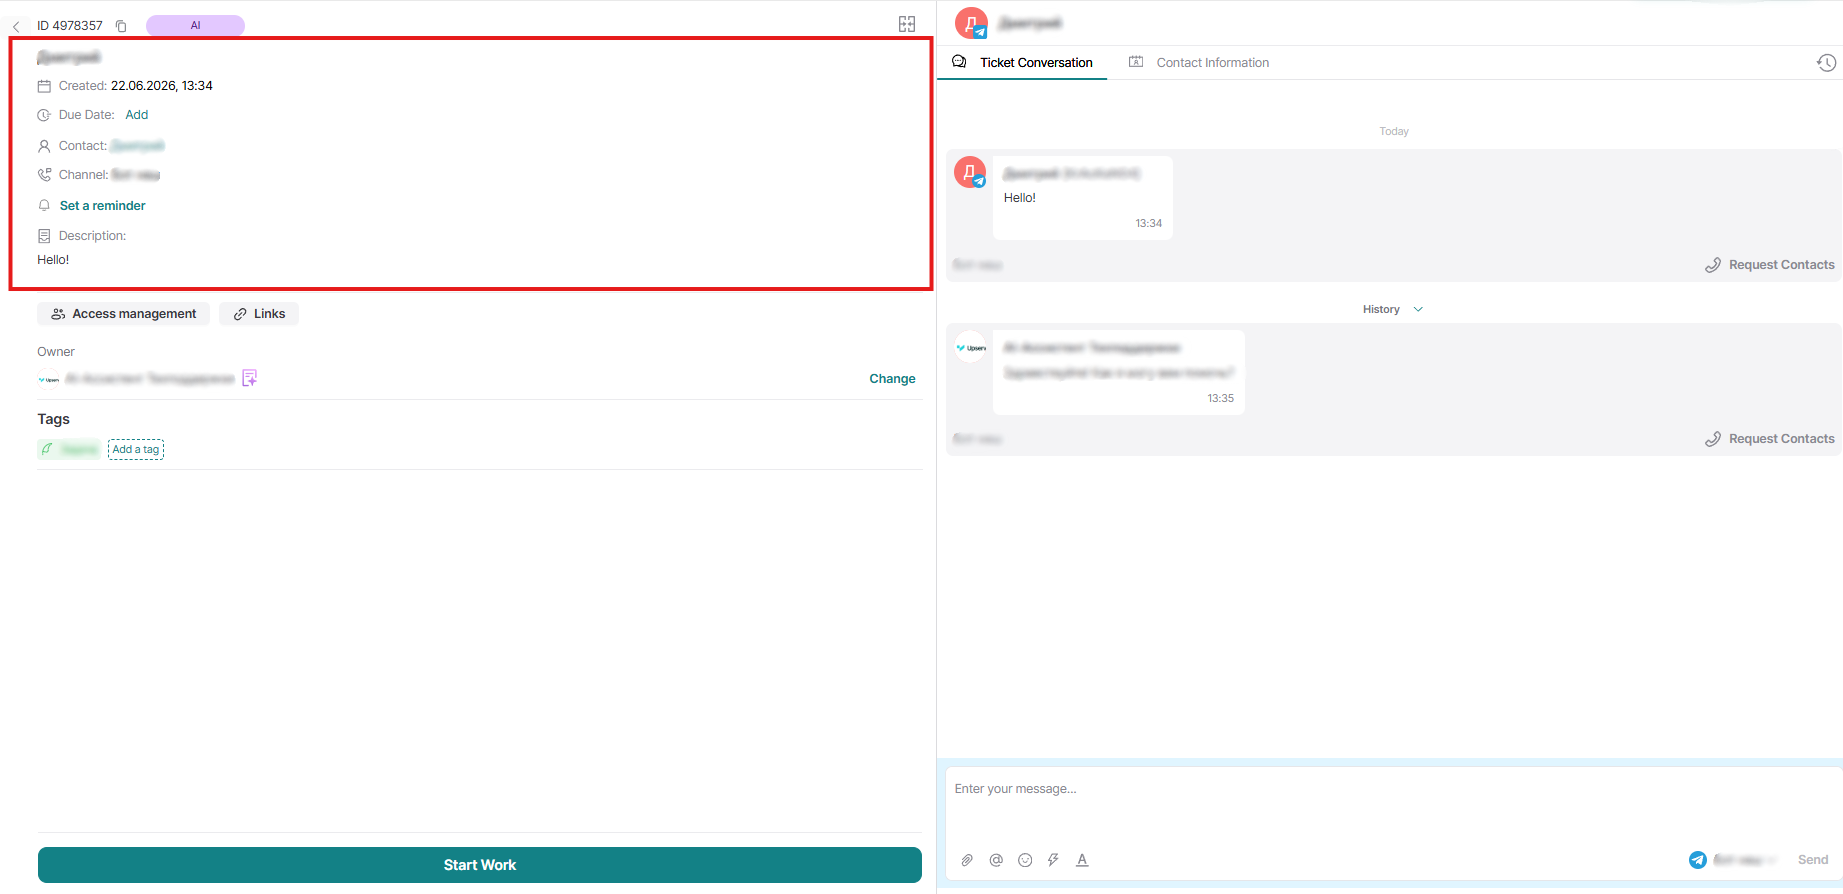
Also, we see a live "Time to complete" timeline for the ticket's completion.
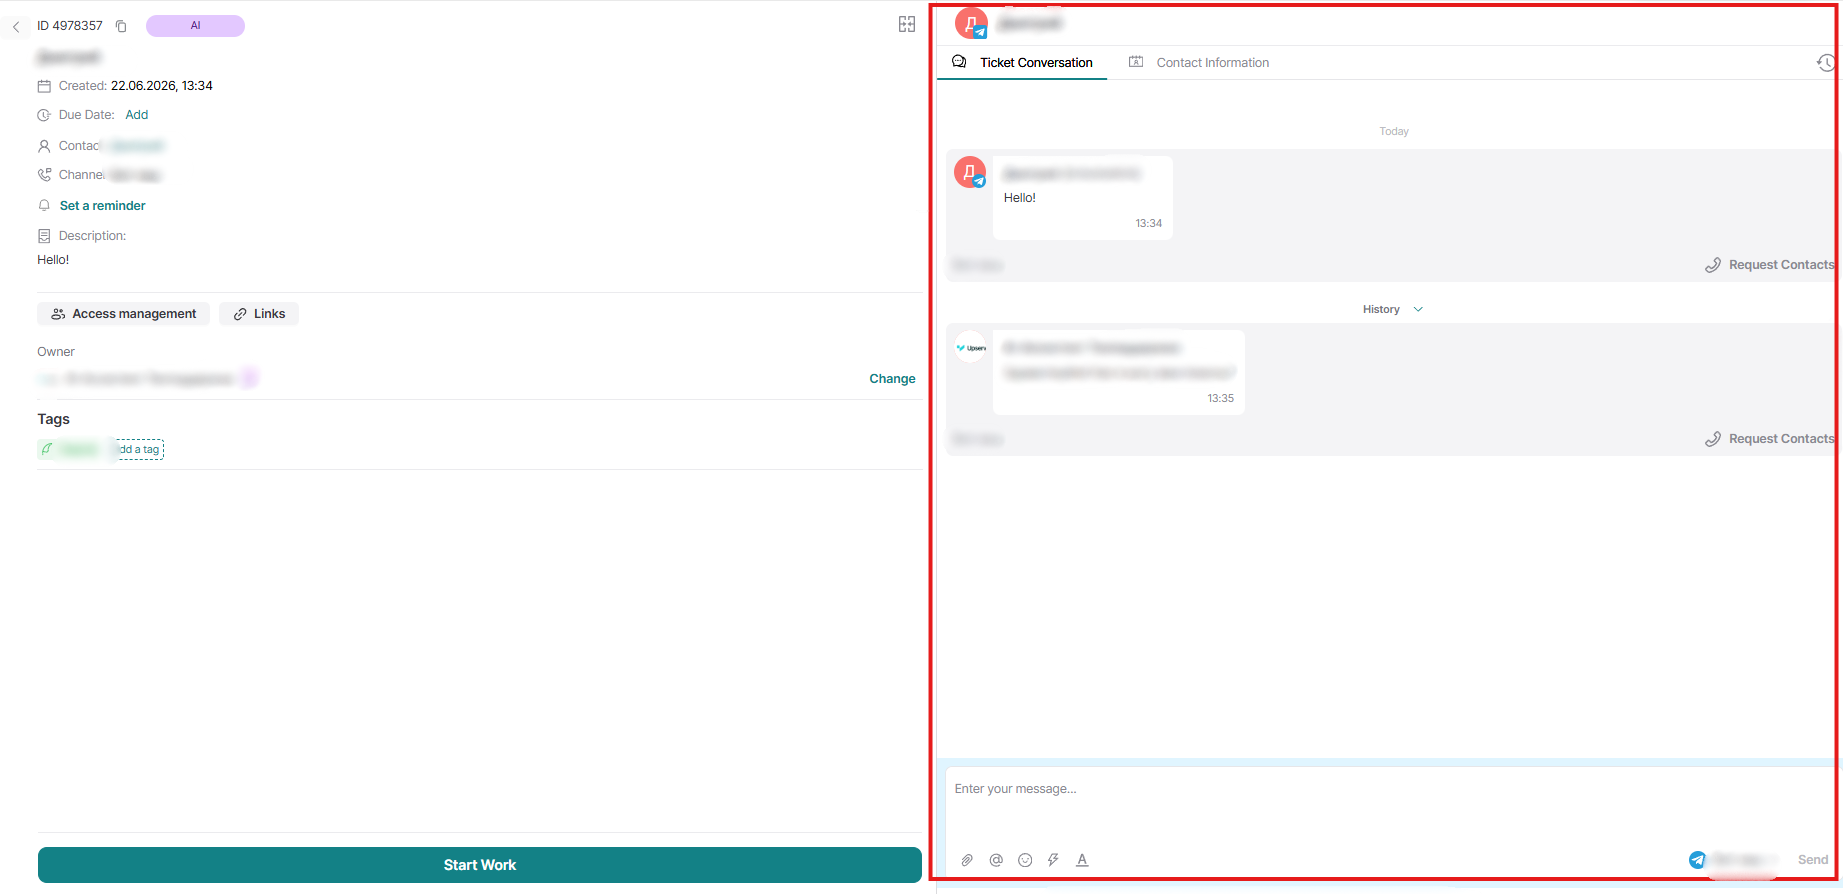
2 . Standard entity settings, such as:
- Access rights - employees who have access to the ticket. Access to the ticket is automatically granted to all channel operators and Administration department employees.
- Links - connection with other entities the ticket can be linked to.
- Responsible for the ticket
- Tags

3. Ticket dialogue - the main window where the operator can see and conduct all correspondence with the contact:
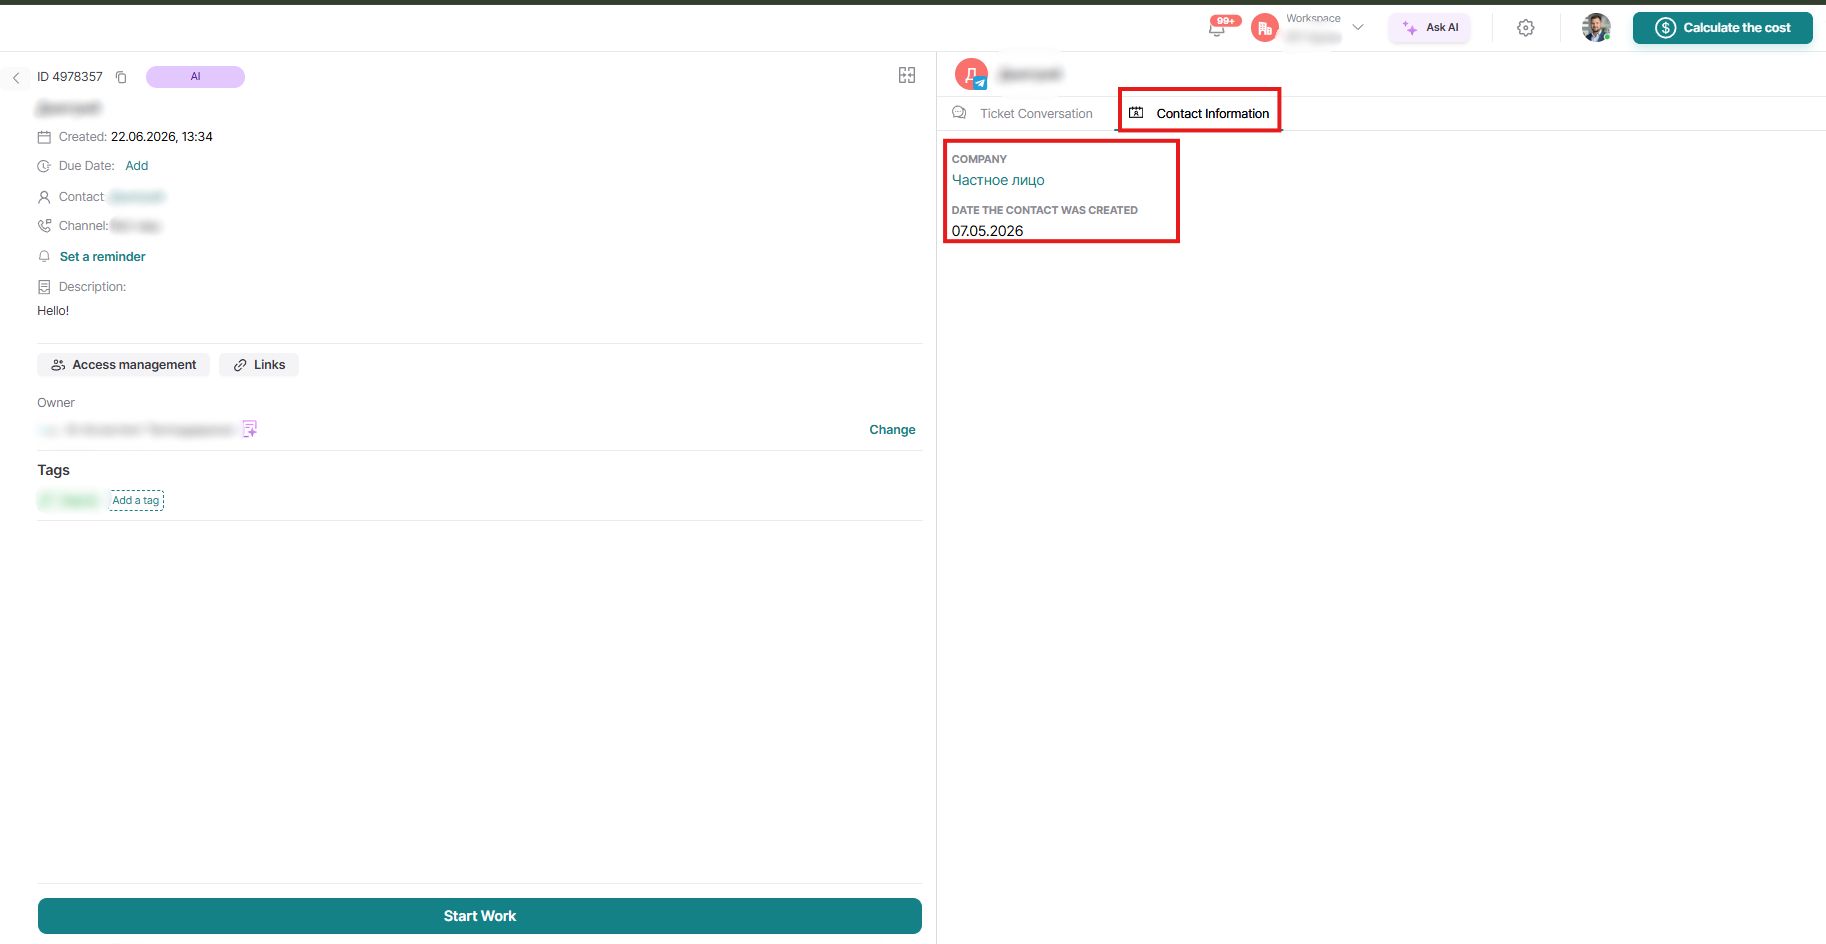
Also, if you go to the "Contact Information" tab further to the right - here we can see additional information about the contact, if any:
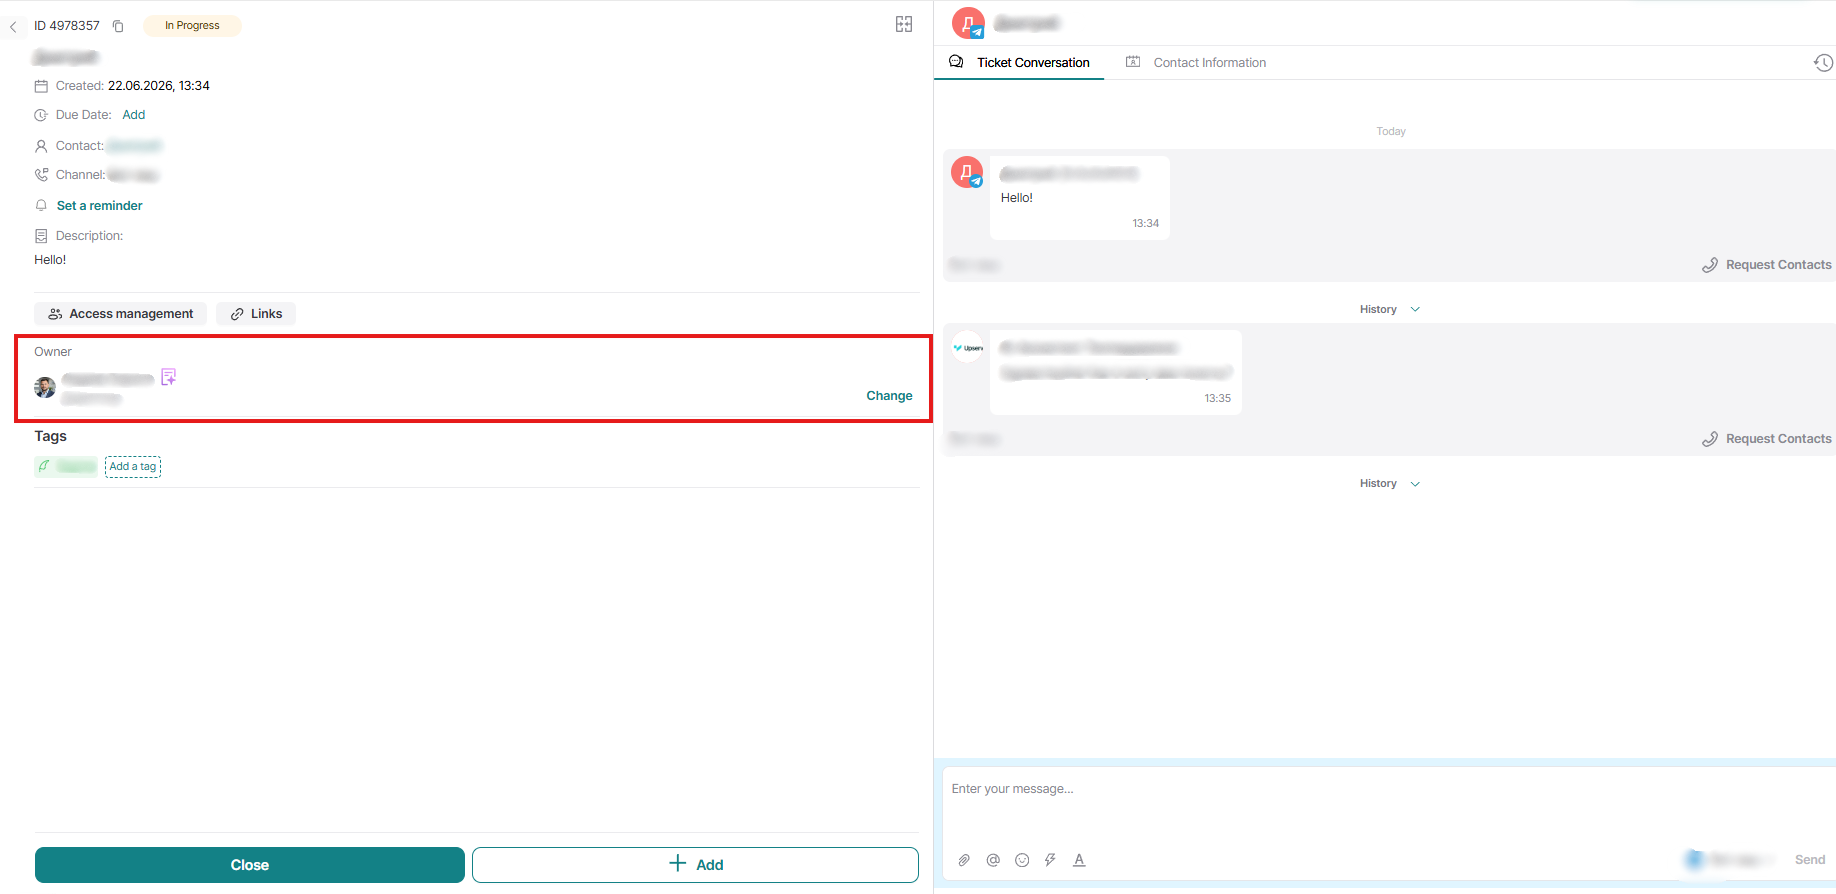
After we have familiarized ourselves with the main tools within the ticket itself, let's take our ticket into work; to do this, from the operator's side, we click the "Start work" button, after which our ticket will automatically assign us as the responsible person and change its status to 'In progress'; in the ticket itself, it looks like this:
And on the kanban board, we see that our ticket has moved to the "In Progress" status:
Our next step could be various actions, but first, let's reply to our user that we have taken their request into work:
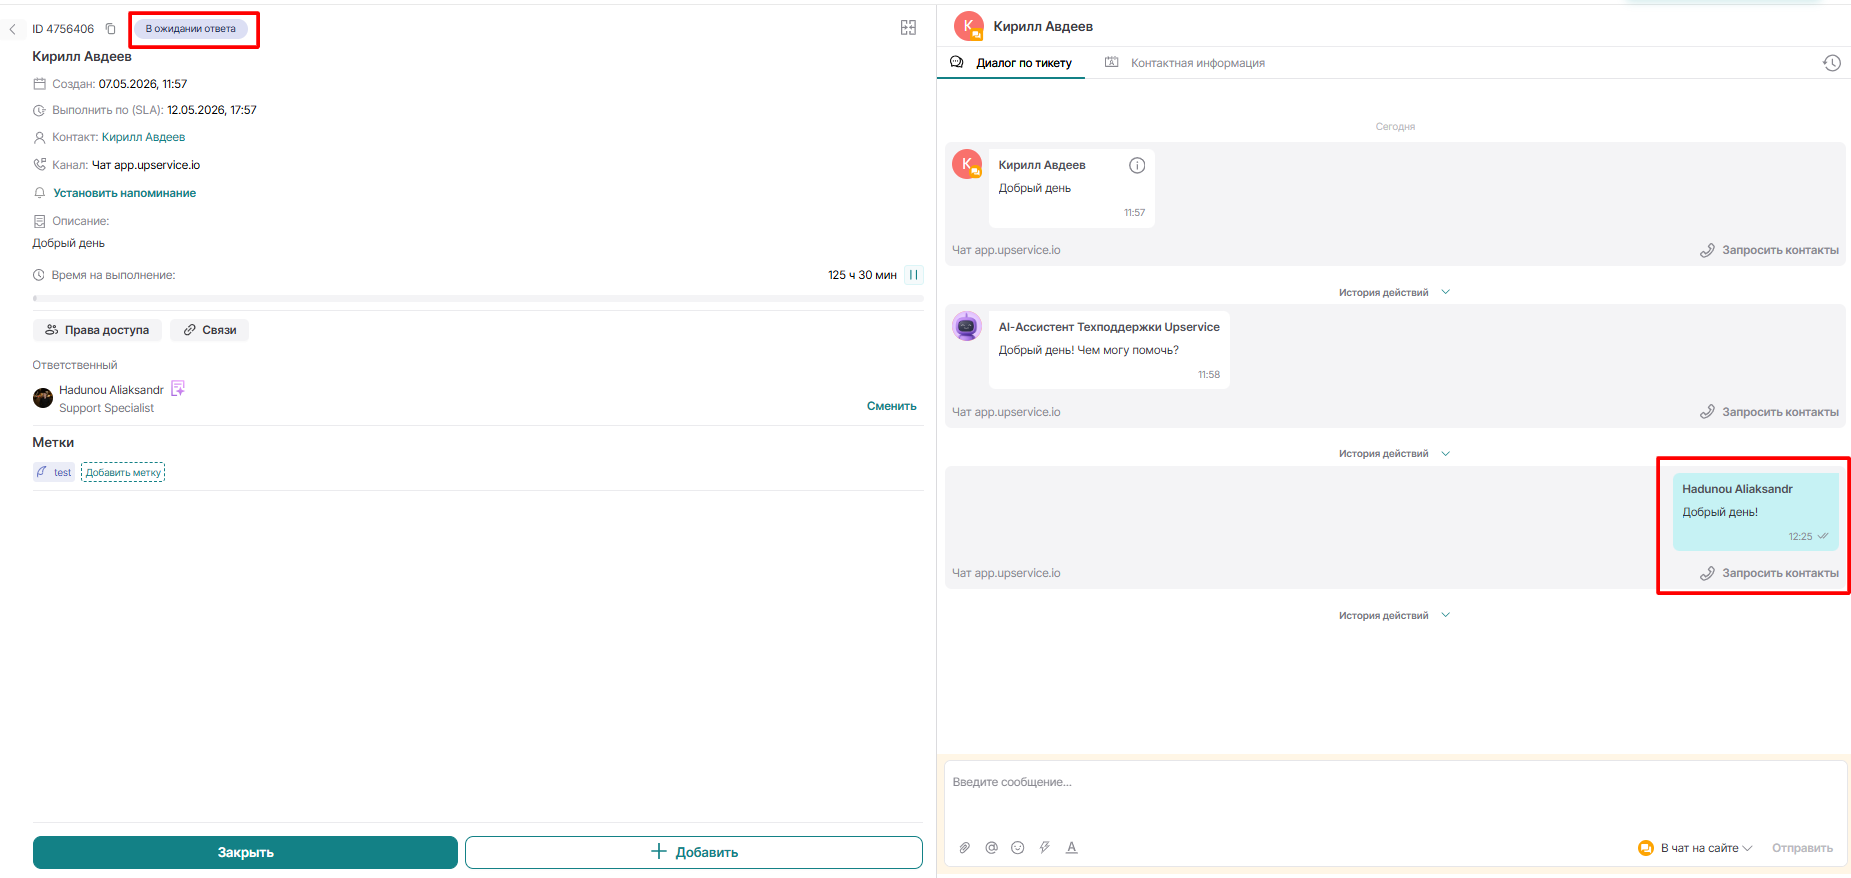
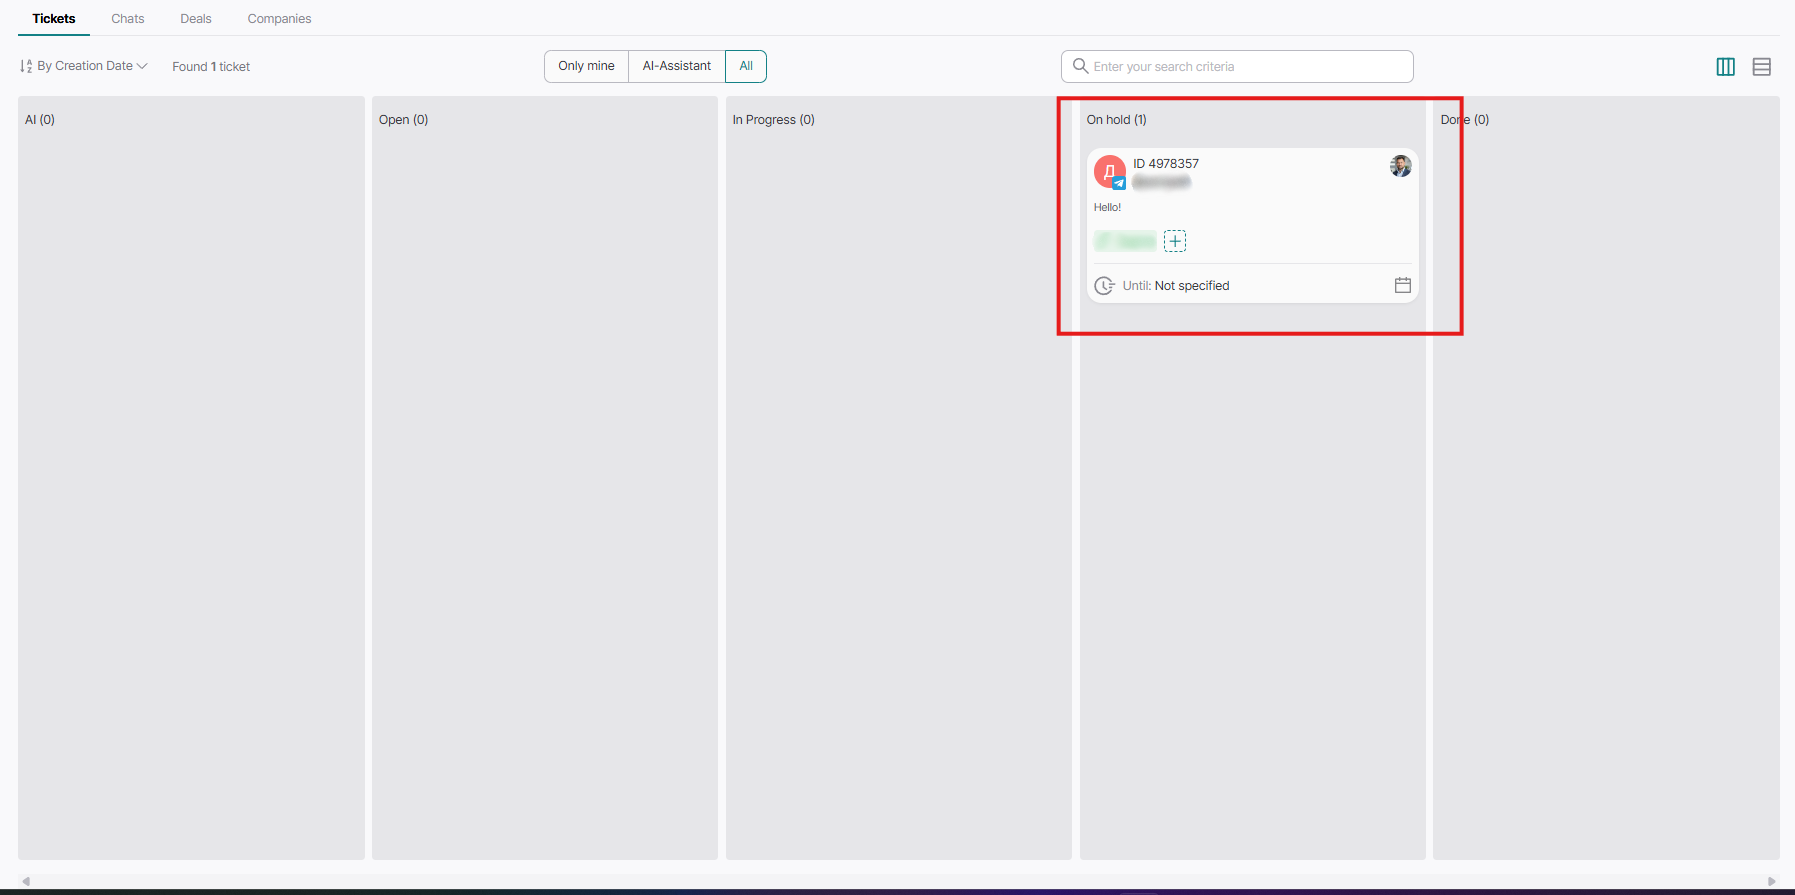
After our reply, we see in the ticket that it has changed to another status, namely "On hold", this is how it looks on the kanban board:
Now let's continue using the website chat channel as an example. Our ticket is in the 'in progress' status because the client replied "Thank you" to us, thereby transferring the ticket to the "In Progress" status. Next, we need to create a task for their request. This can be done in several ways. The first, specifically adapted for tickets, is located in the "Add" button:
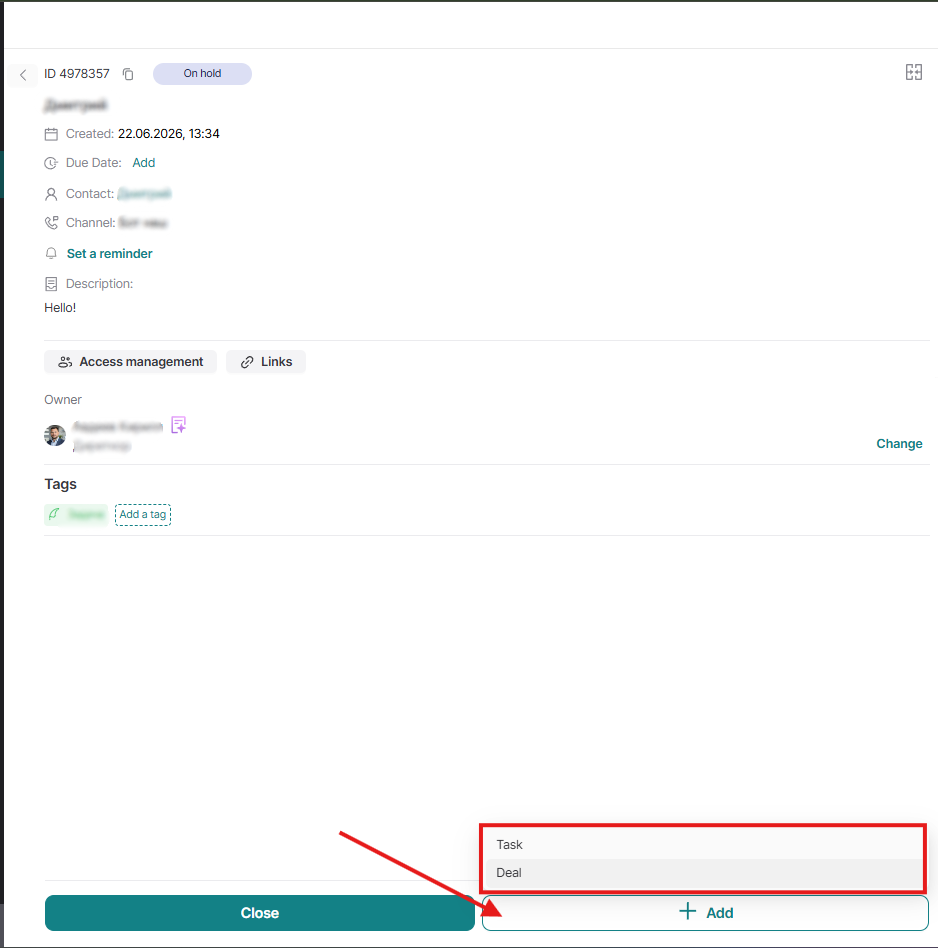
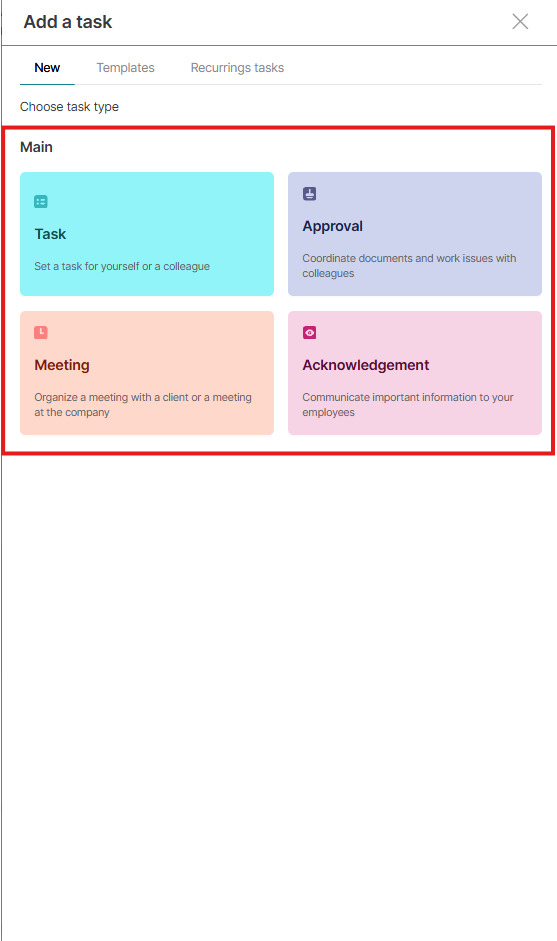
Here we can select the operation we need, namely to create:
- Task
- Deal
Let's select a task, for example. We select the required task type:
For example, a Simple type task, and we fill in all the necessary fields:
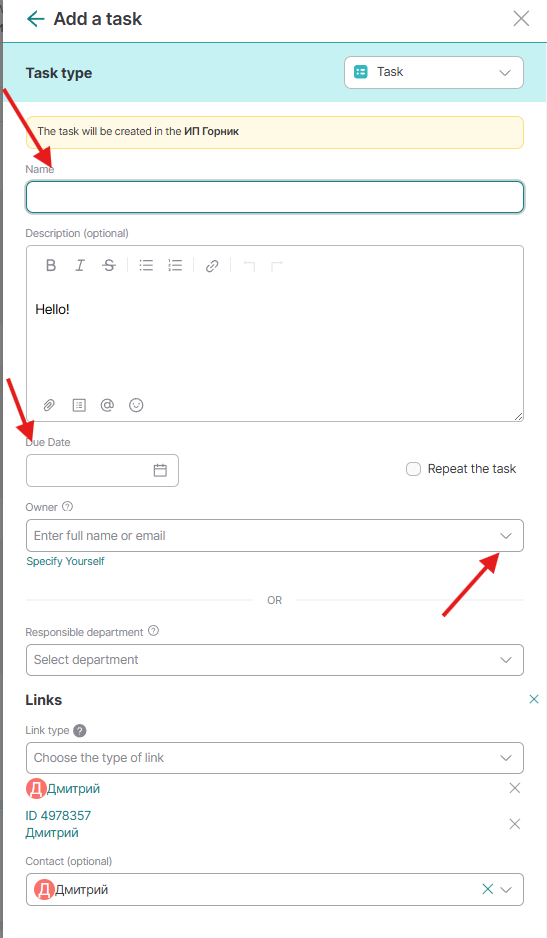
The task description (the message the user contacted us with) is automatically thrown into the task, and a link is added with the contact and the ticket itself.
After we have filled in all the fields we need, we click the "Create" button, and we are automatically transferred to the task we created:
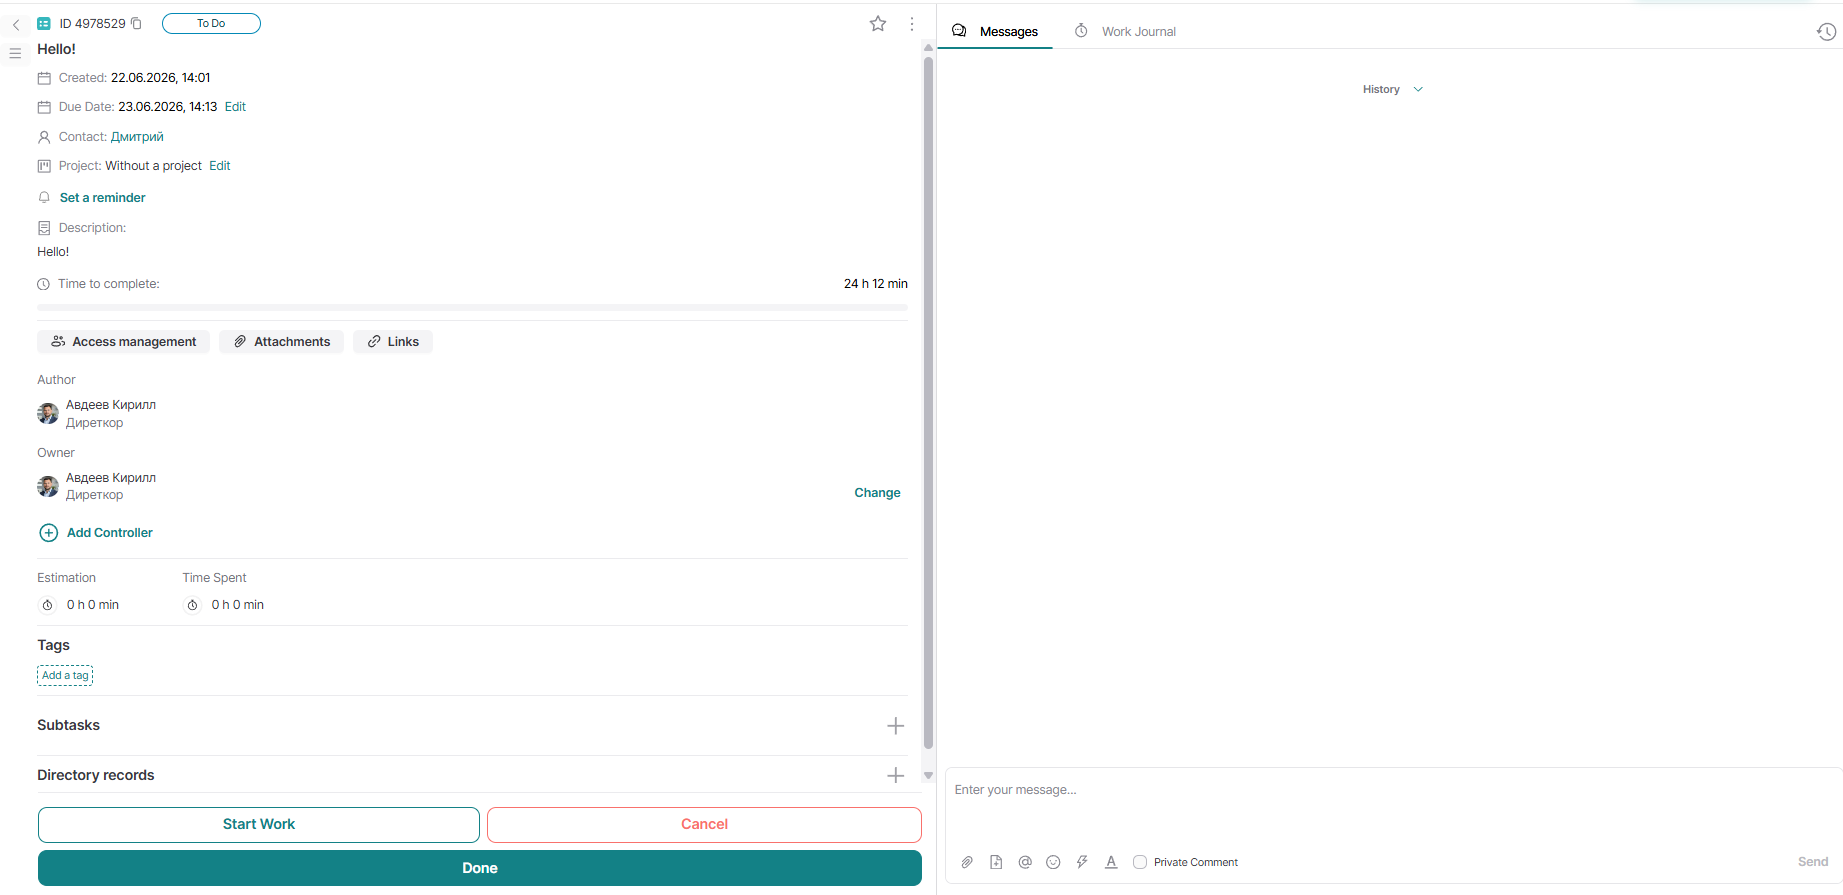
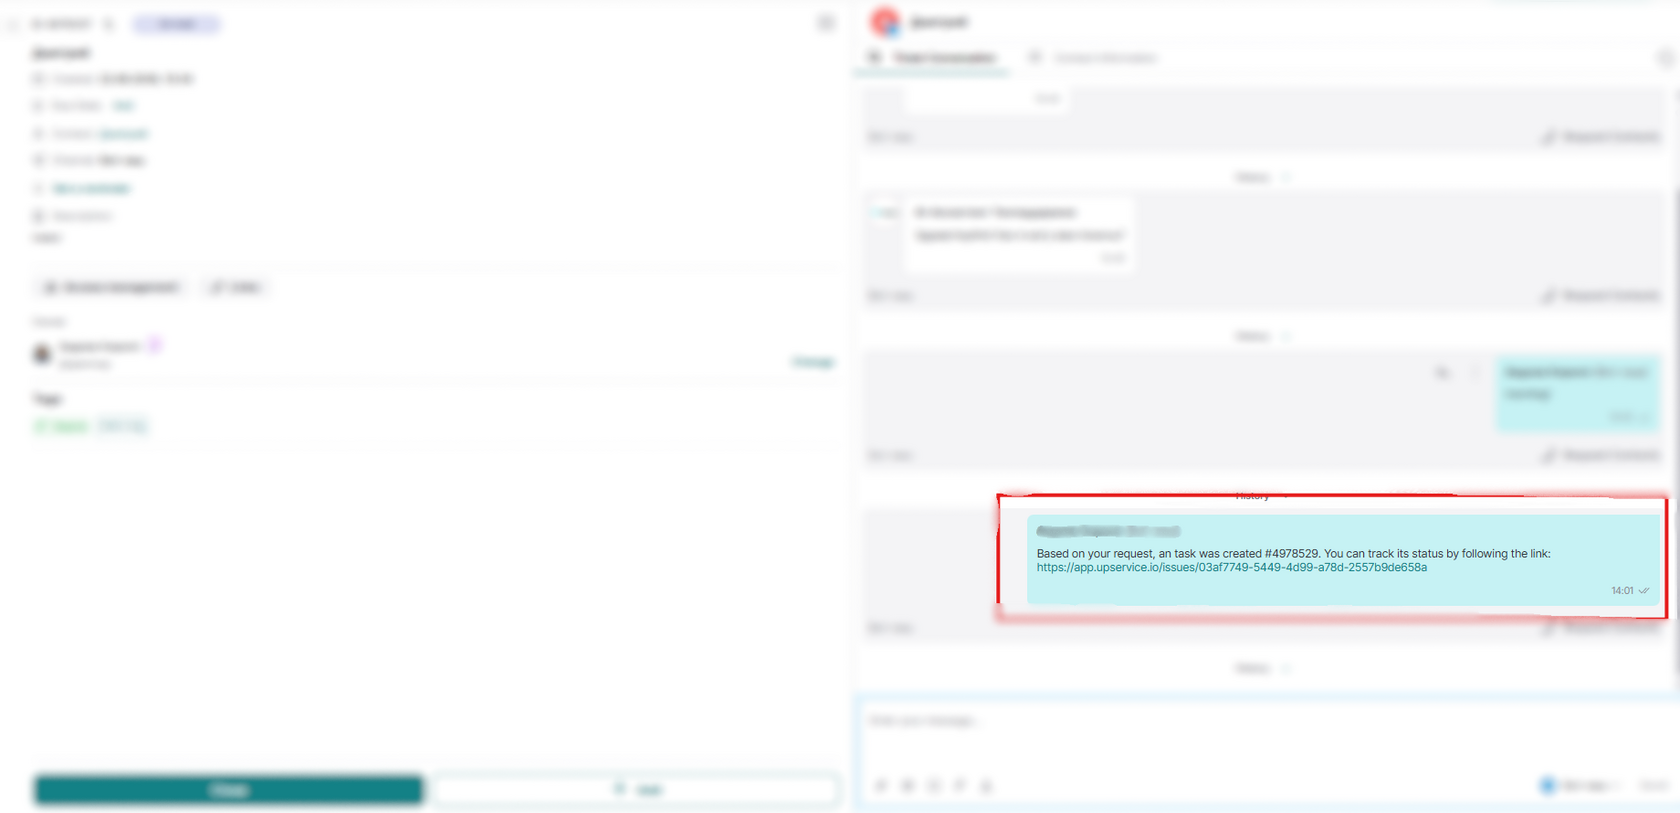
Returning to our ticket by clicking the back arrow, we see that a tracking link has been sent to our contact, through which they can monitor the progress of the task:
Now you can either manually move the task to the 'resolved' status, or wait until the client's SLA is processed, if you have one set up.
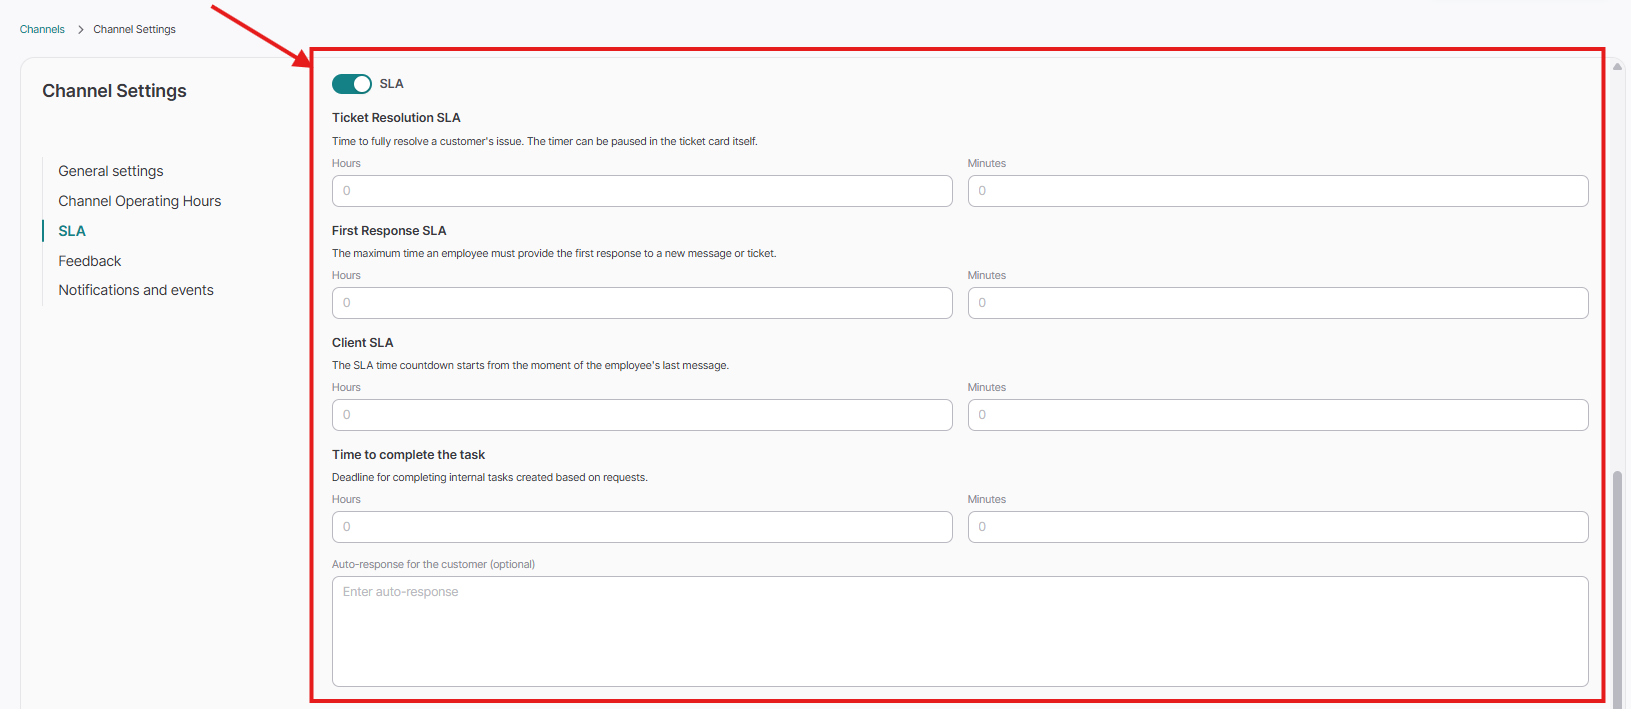
Client SLA is the time you give a ticket to be in the 'awaiting reply' status until it closes. That is, if you have a client SLA of 1 hour and the client has not answered you anything during this time, the ticket will automatically transition to the 'resolved' status. To configure the client SLA, you need to go to the "Settings" module and then to the "Channels" section:
And we will move our ticket to the 'resolved' status. Congratulations! You have processed your first ticket.
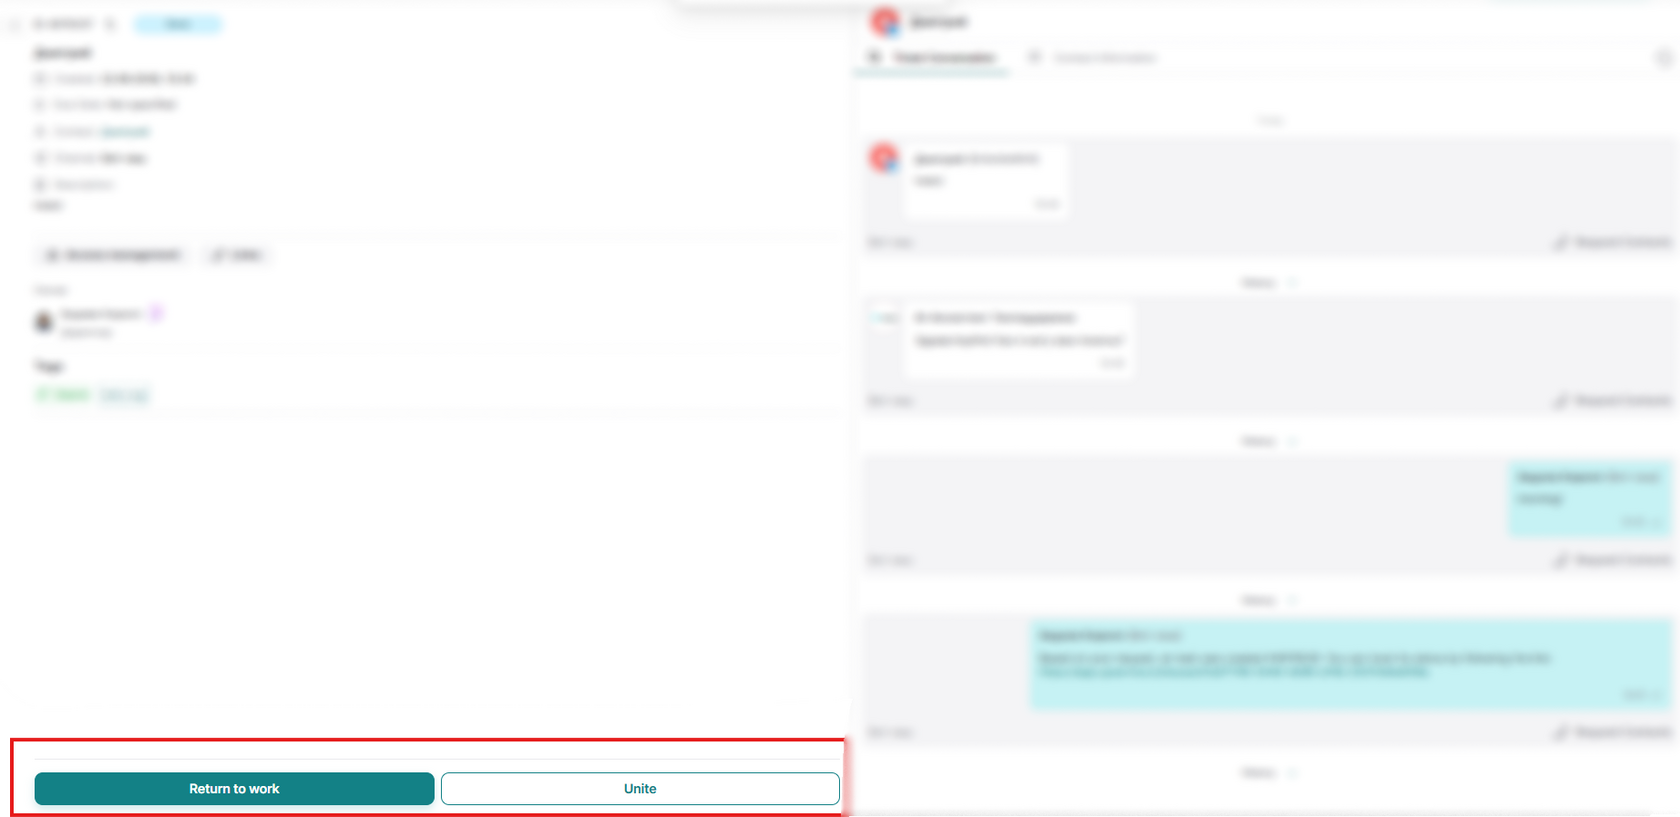
Tickets in the Done status can be Returned to work or merged with the current ticket, if, for example, it is a question regarding a previous ticket, but the client SLA expired and the ticket was closed.
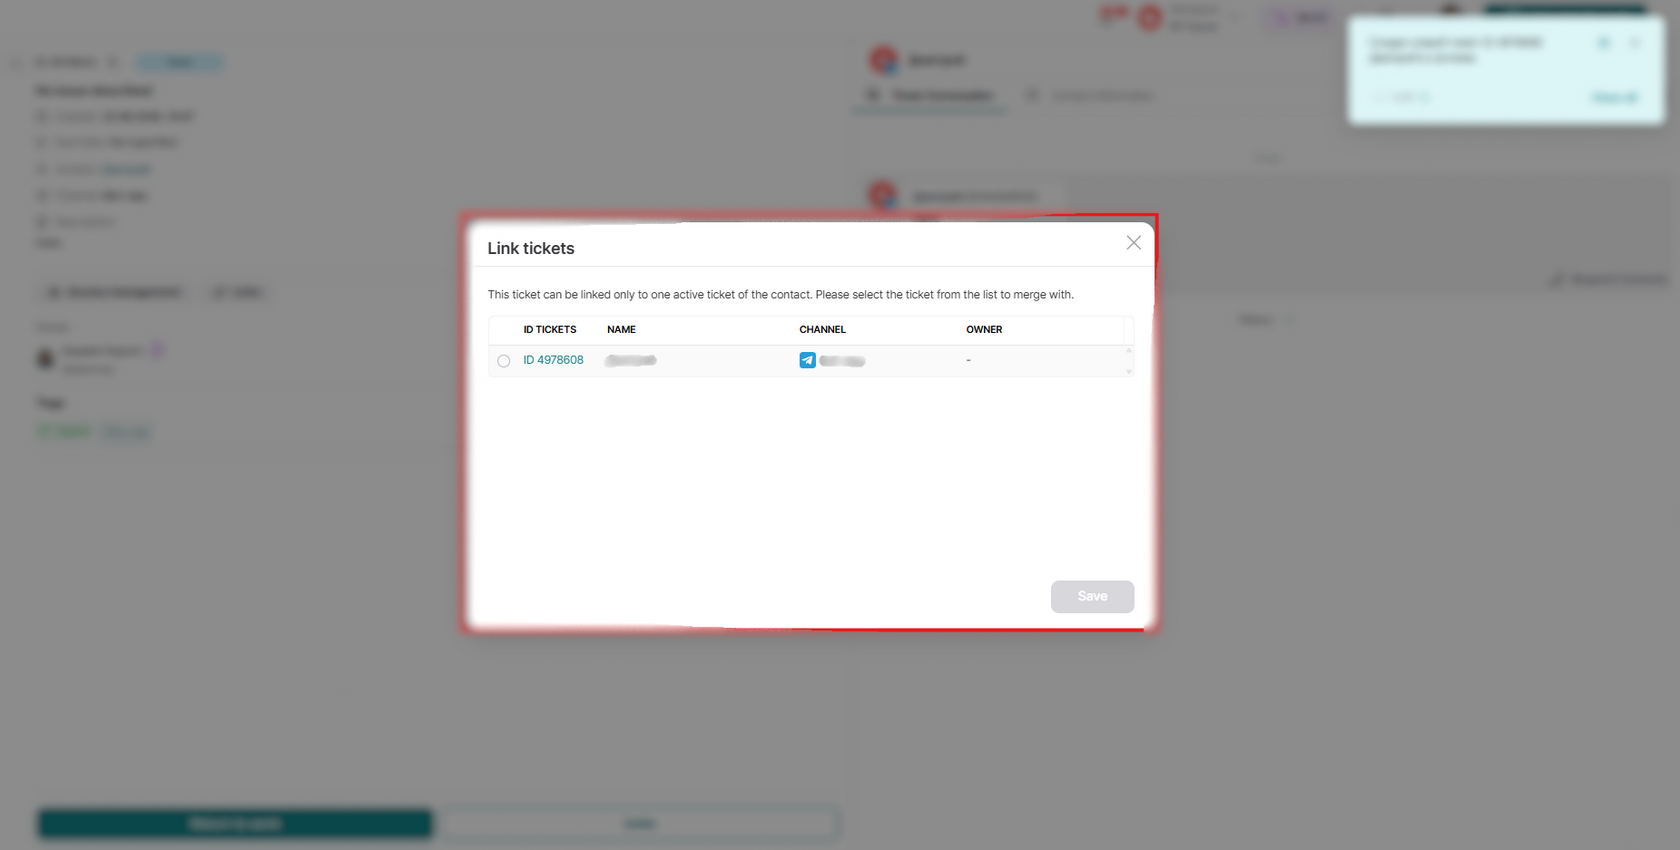
You can merge tickets only if you have another active ticket from the same contact:
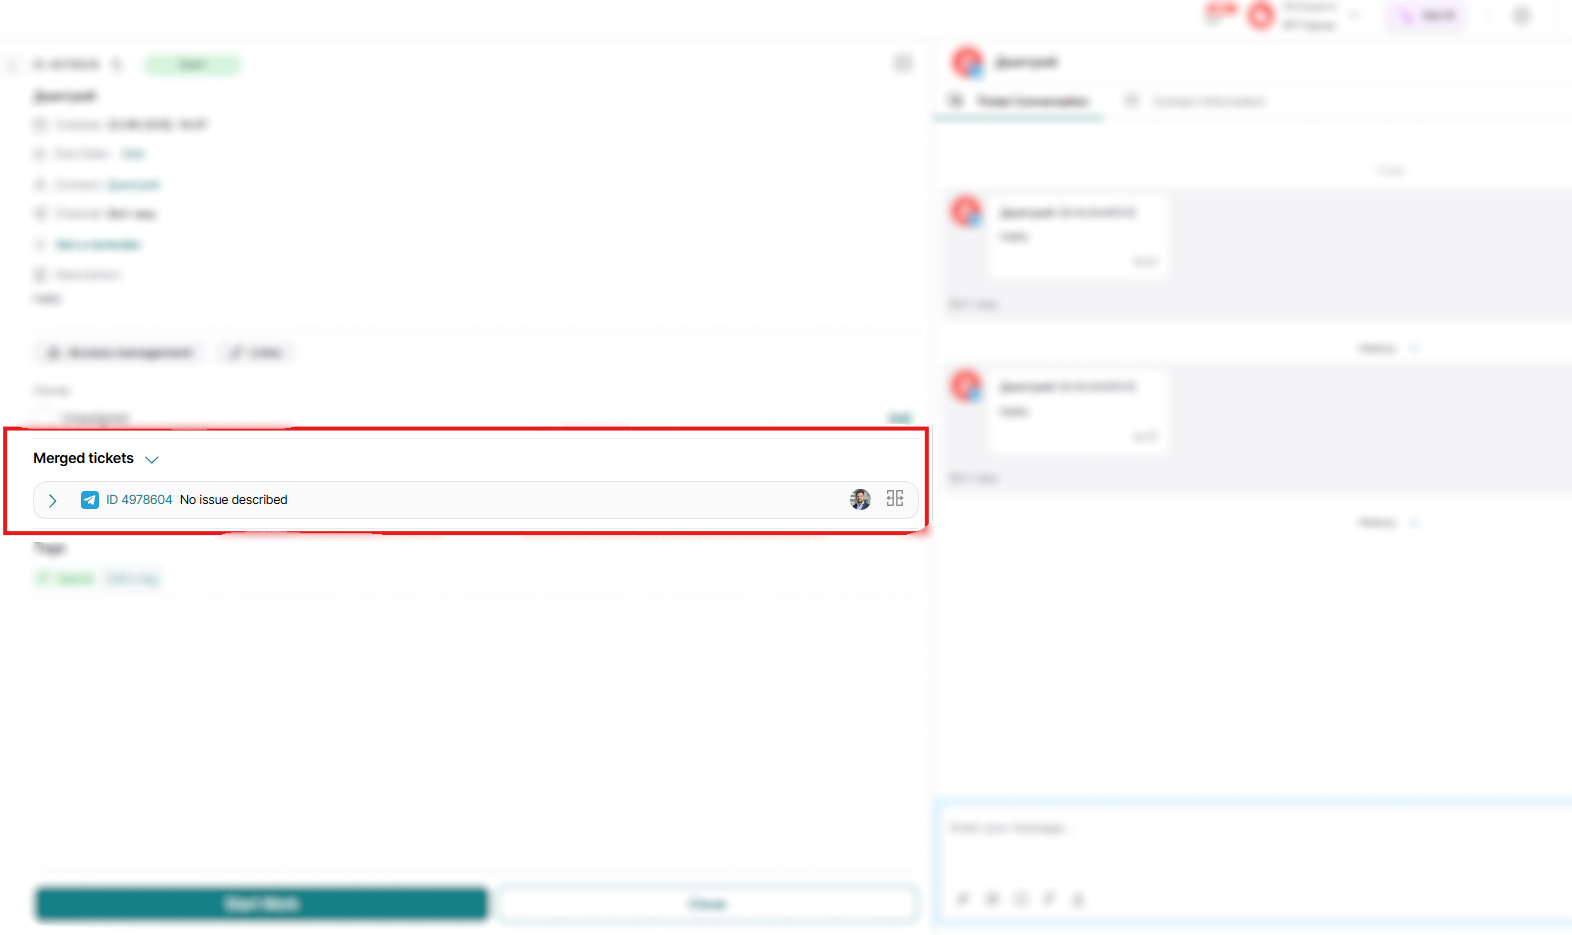
Merged tickets in the system can be seen at the bottom of the ticket itself:
Now let's look at a few other use cases for the ticket system in your work:
For example, if you don't need to create any task, but you simply managed to resolve the user's problem in a dialogue with them, then you can just move the ticket to the 'resolved' status by clicking the "Close" button:
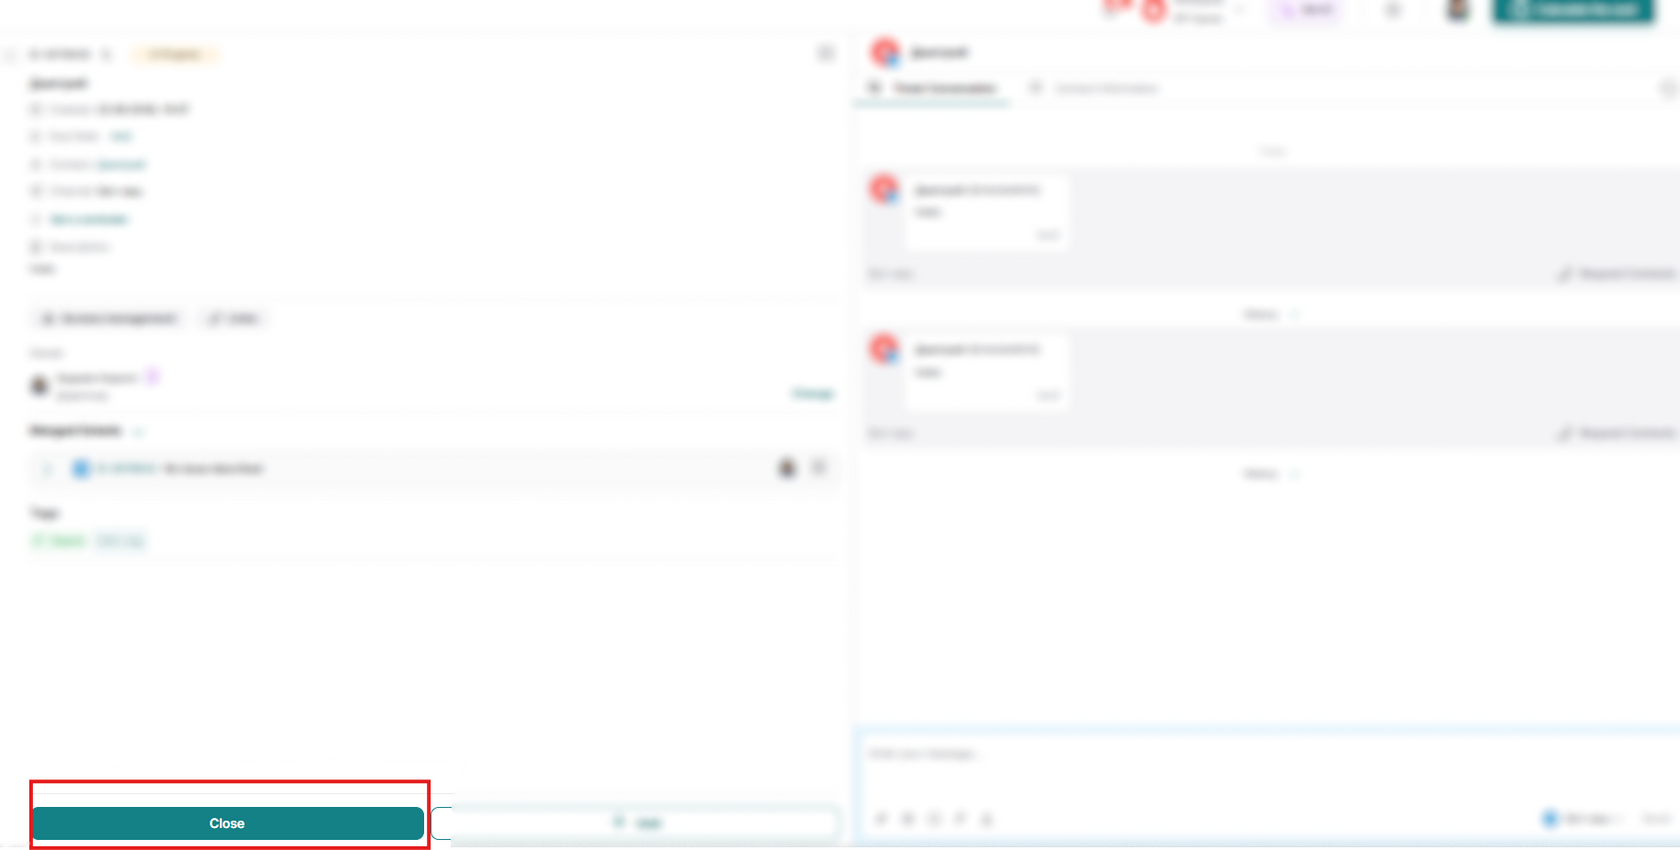
This way, you will also move your ticket to the "Done" status.
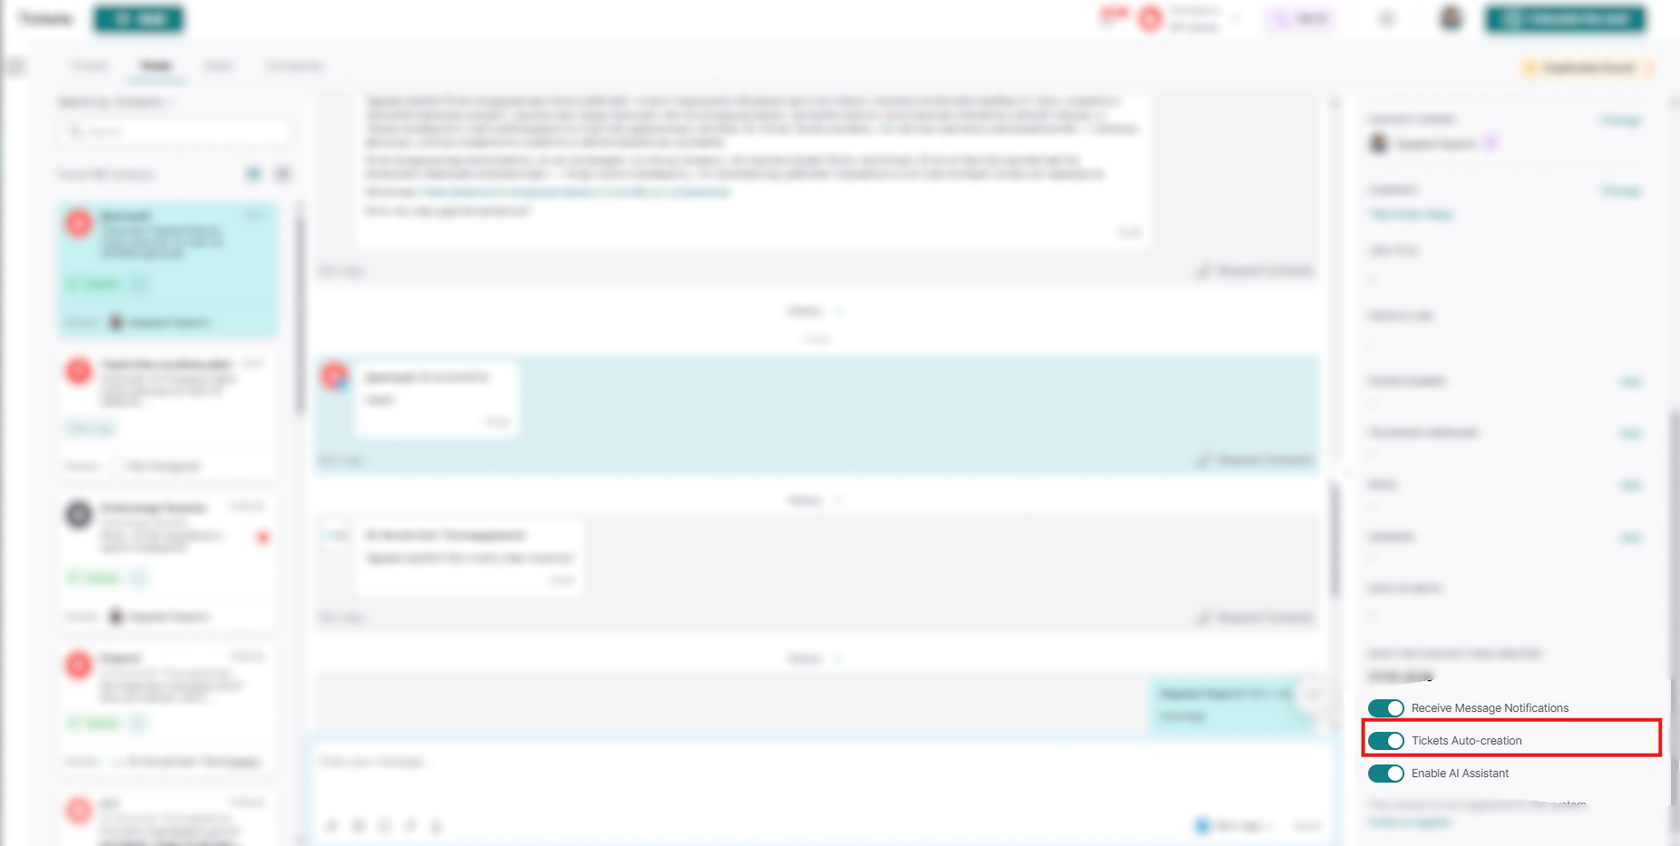
If you have contacts for whom you do not need tickets created, you can disable ticket creation for a specific contact by going into the ticket itself, finding the "Tickets Auto-creation" toggle in the contact information, and switching it to the inactive position:
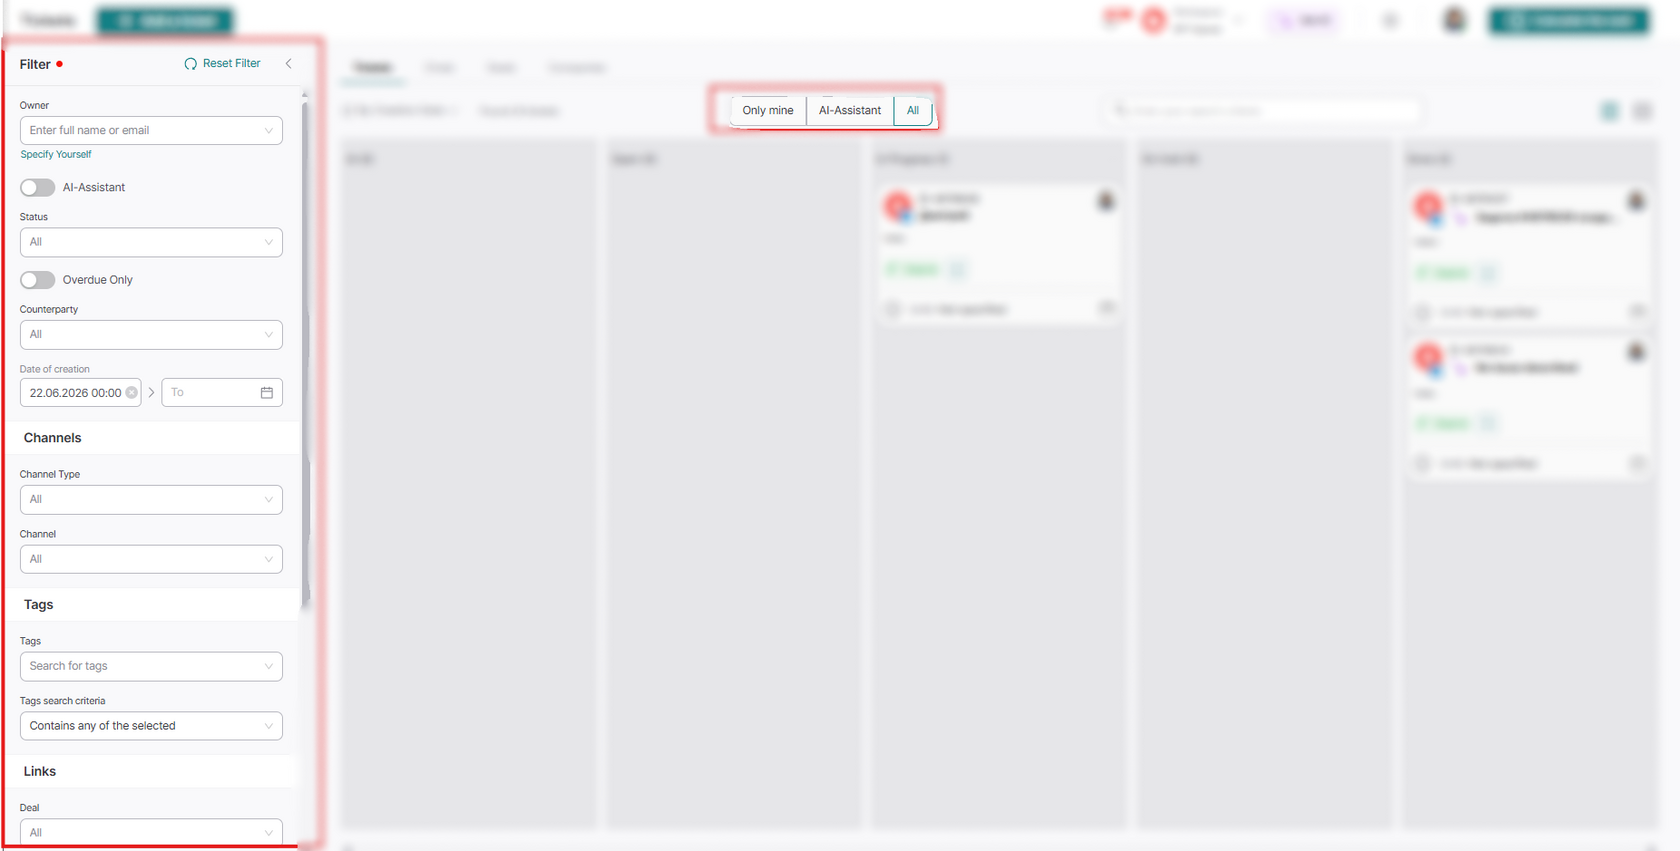
For faster and more efficient searching of the tickets you need, you can use filters in the Tickets section itself:
There are general filters by various parameters, for example:
- Owner
- Status
- Date of creation and etc.
Or use quick filters, sorting only your tickets, or all of them:
Display of tickets in the contact card
The "Tickets" block on the contacts page is intended to display all tickets associated with a specific contact.
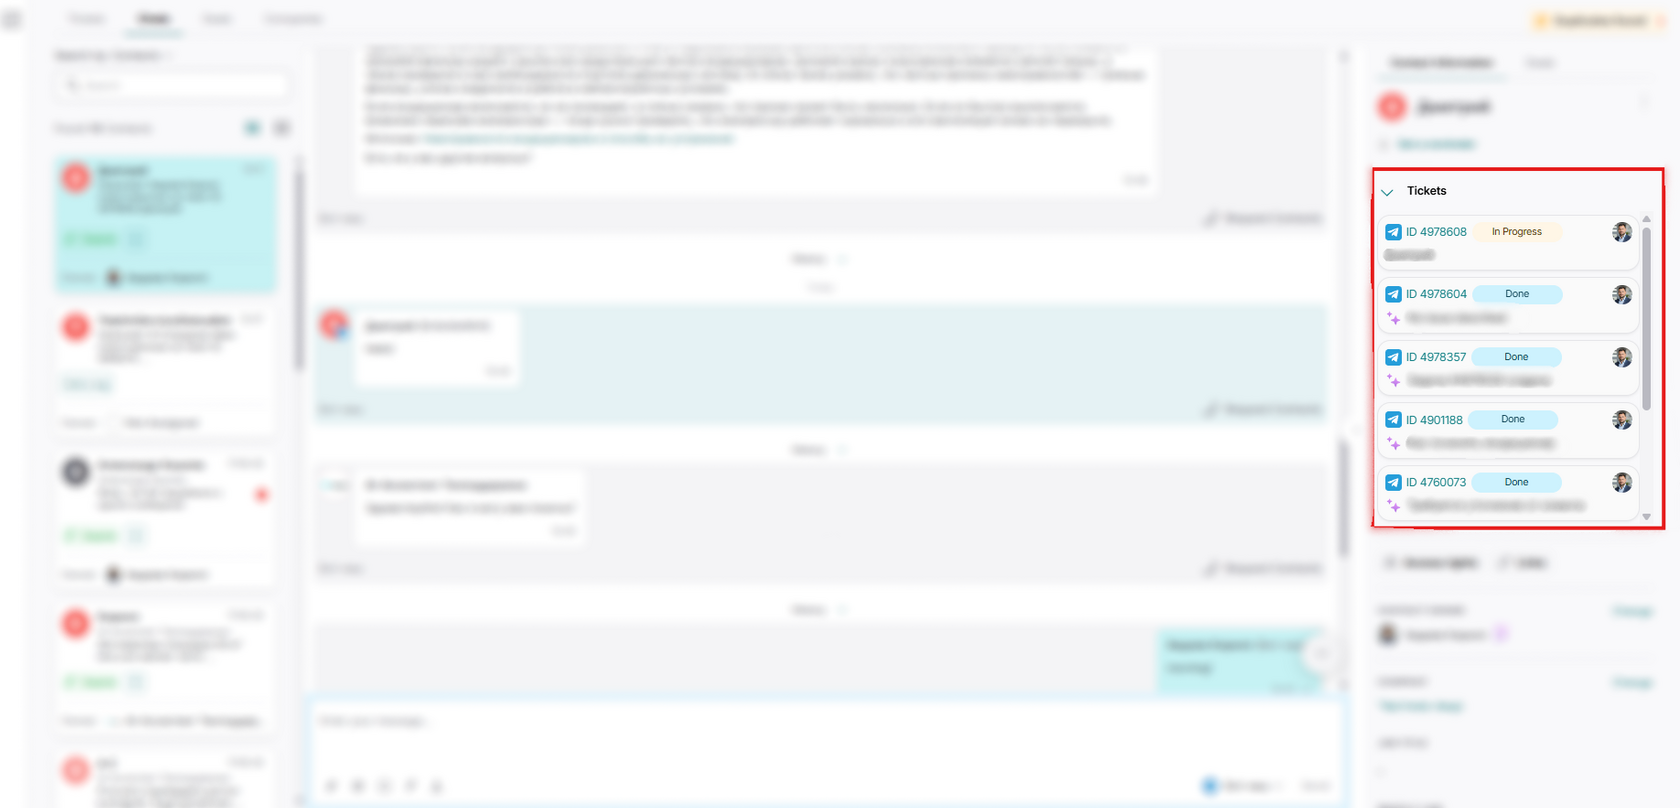
- By default, the block is open and displays a list of linked tickets.
- If the number of tickets is more than 5, a vertical scroll appears inside the list, allowing you to view all tickets linked to the contact.
- Clicking on the "Tickets" header collapses or expands the accordion.
- Tickets are displayed in order by creation date (newest first).
Each ticket in the list contains the following elements:
- Channel icon (email, Telegram, etc.)
- Ticket ID
- Ticket name — abbreviated; hovering displays the full name. After the ticket transitions to the "Resolved" status, the AI automatically generates a new name, taking into account the ticket correspondence.
- Ticket status
- Responsible person's avatar; hovering displays their full name
- User's role in the ticket (author, responsible, etc.)