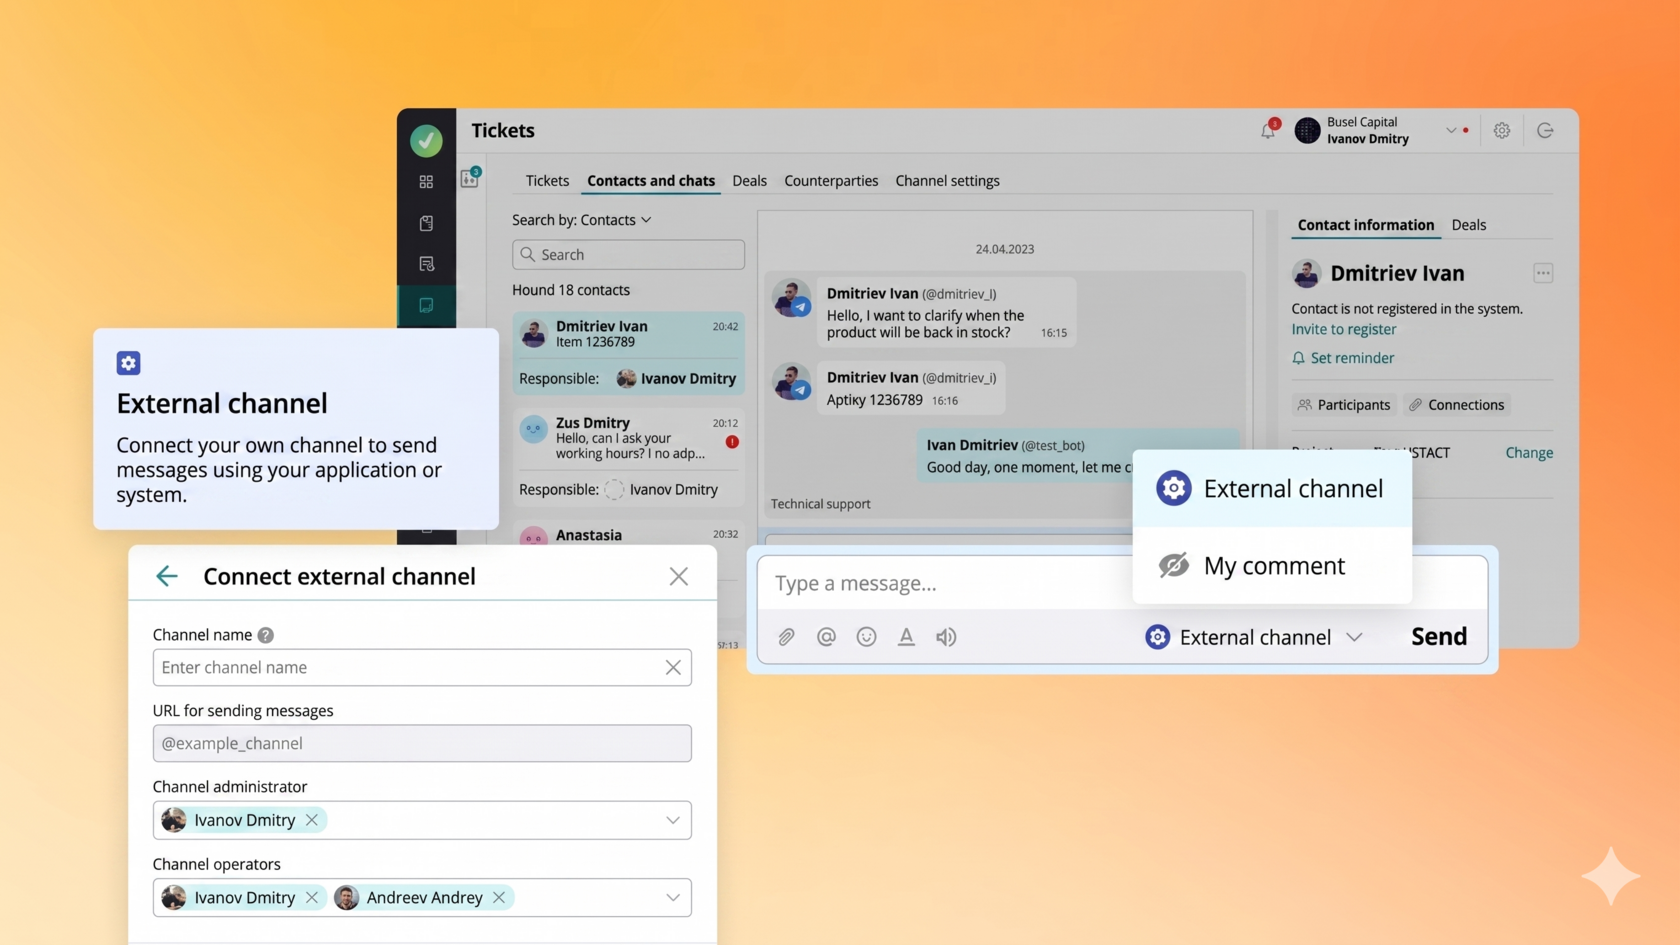
Custom channels — this is a tool that allows you to configure the receipt and sending of messages between your system and various external services (messengers, social networks, chatbots, and other platforms). Using them, you can centralize communication with clients, receive incoming requests, and send responses directly through the communication channels familiar to your clients.
Integration via external channels helps automate communications, speed up request processing, and improve the customer experience through convenient and fast message delivery.
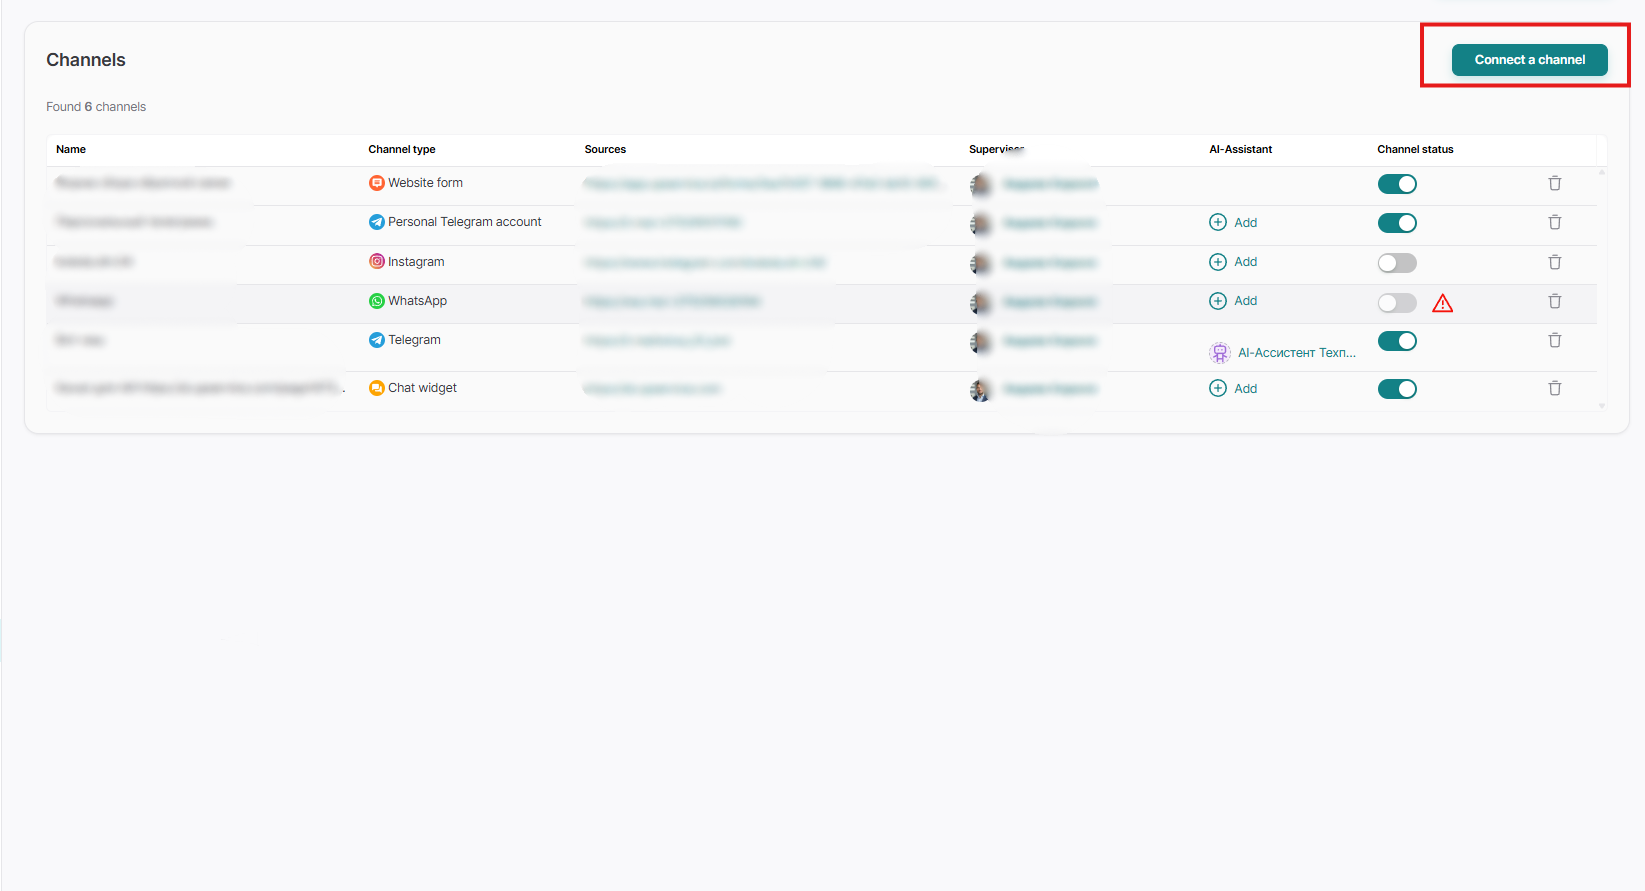
To set up the "Custom Channel" communication channel, you need to go to the "Settings" section, then navigate to the "Channels" tab and click the "Connect a channel" button:
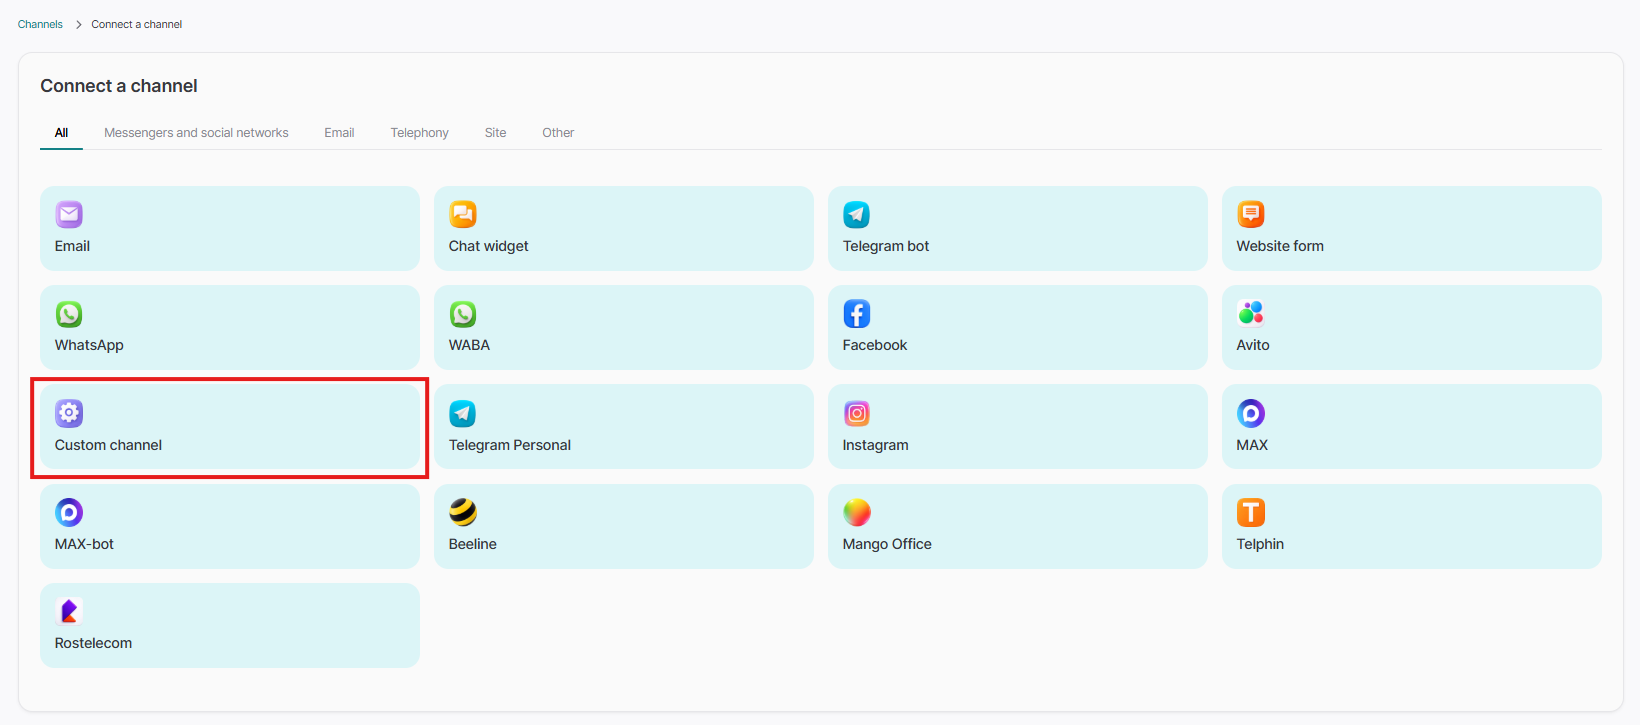
Select the "Custom channel" type:
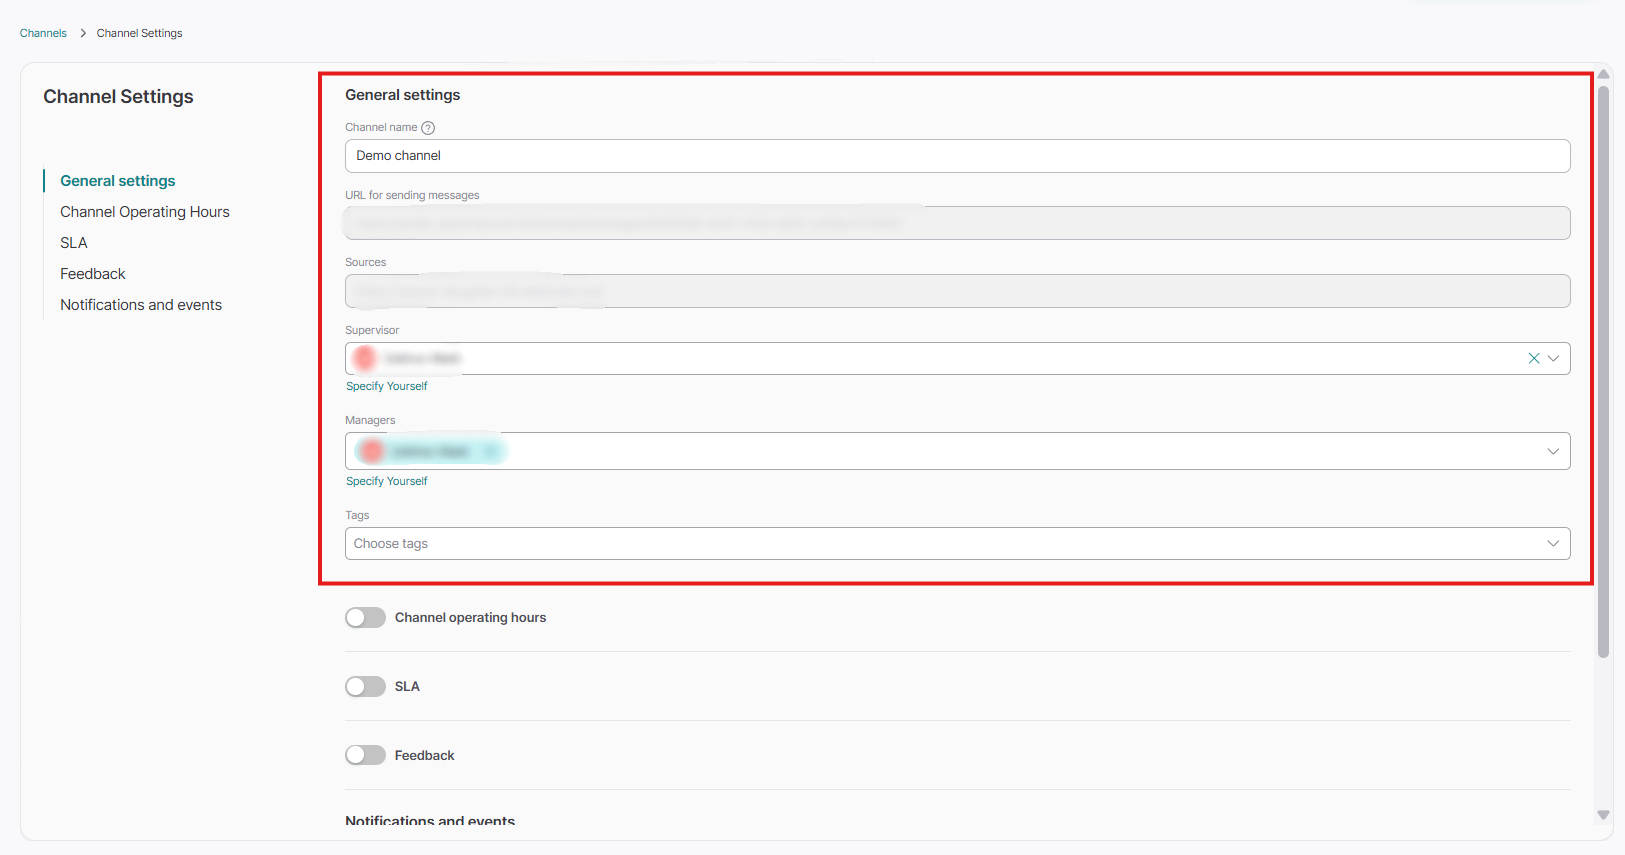
Next, we need to fill out the connection form:
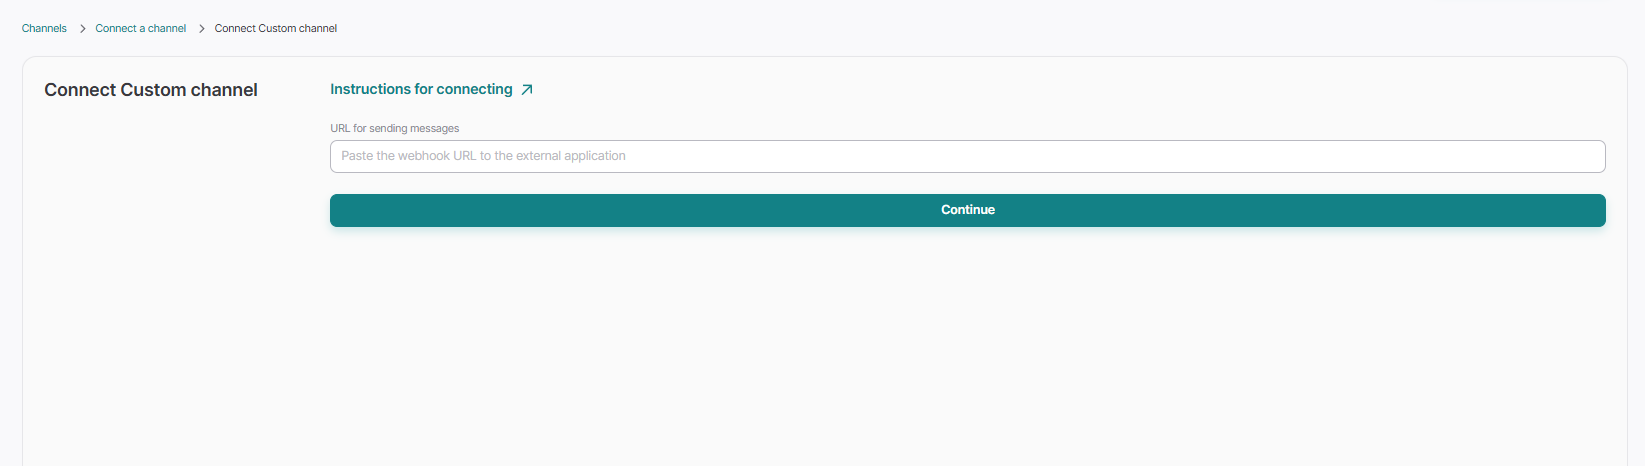
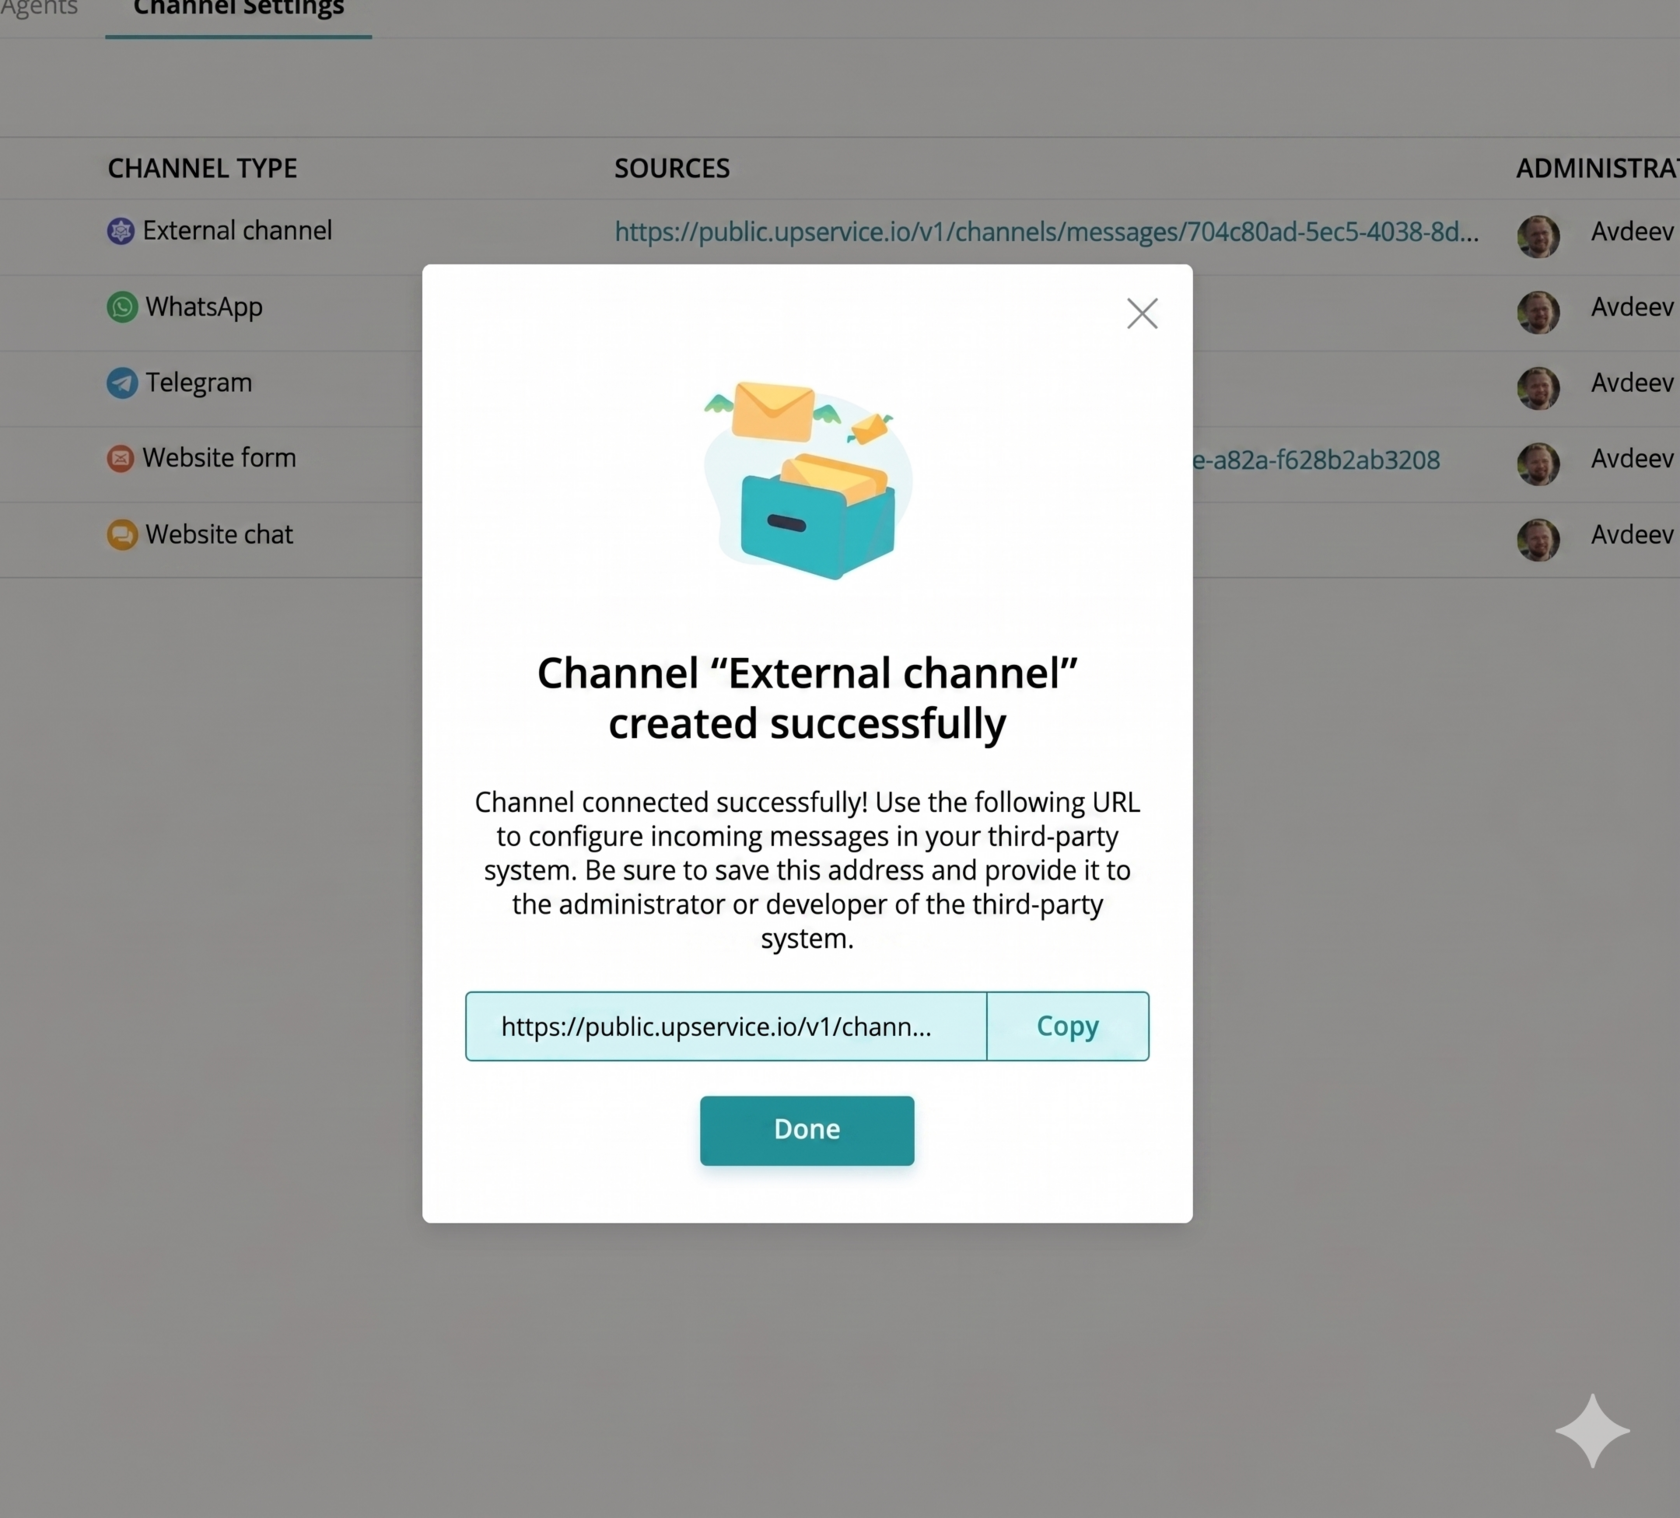
In the URL field for sending messages, you need to specify the URL provided to you by the third-party system. This is the exact address Upservice will send notifications to about new messages sent from Upservice. Click continue, and we are taken to the standard Upservice channel setup, where we fill out the following fields:
- Channel name — a name that reflects the purpose of the chat. For example, "Facebook for clients" or "Facebook for support". This name is available only to colleagues, clients will not see it;
- Supervisor — this is the only employee who can be assigned to this role. They have the right to add or remove operators, as well as change channel settings and communicate with clients;
- Managers — company employees who will communicate with the users of your site;
- Tags - if you specify any of the tags in the channel, then all subsequent contacts that will be created for you through this channel will immediately arrive with an ALREADY assigned tag. This will be the tag that you selected at the channel creation stage;
To set up the operators' working hours, drag the "Channel operating hours" slider to the right.
In the working hours settings, select the Time zone that will correspond to the working schedule of your company. It is important to select the time zone that matches the location of your office or the place where you provide services.
Next, specify the working days and time when your employees are available to provide consultations in the chat and also immediately set up the "Automatic response outside of business hours":
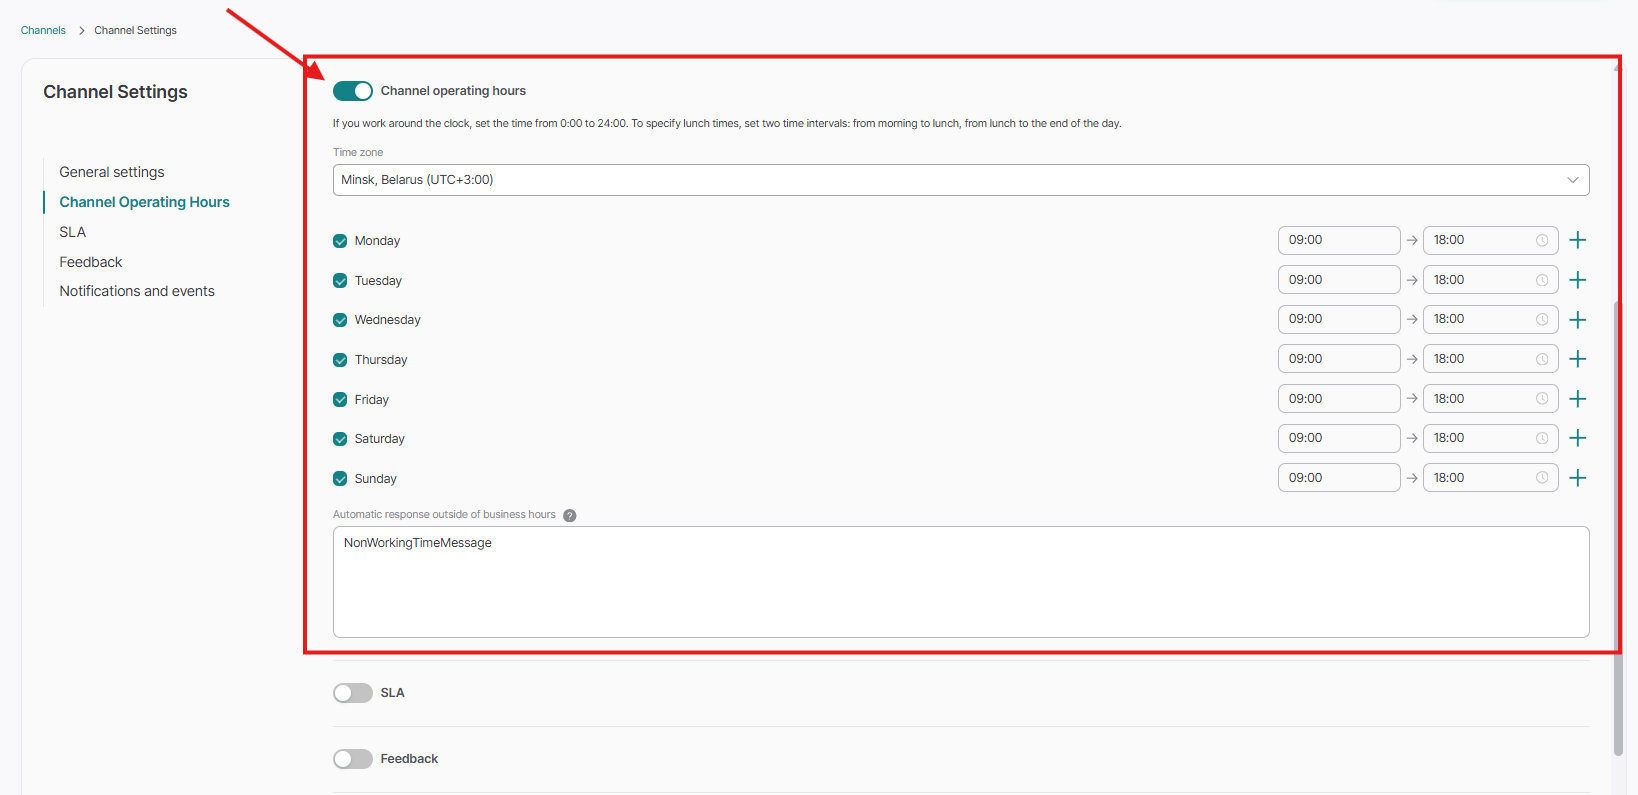
If you work around the clock, set the time from 0:00 to 24:00. To specify the lunch time, set two time intervals: from morning until lunch, and after lunch until the end of the working day.
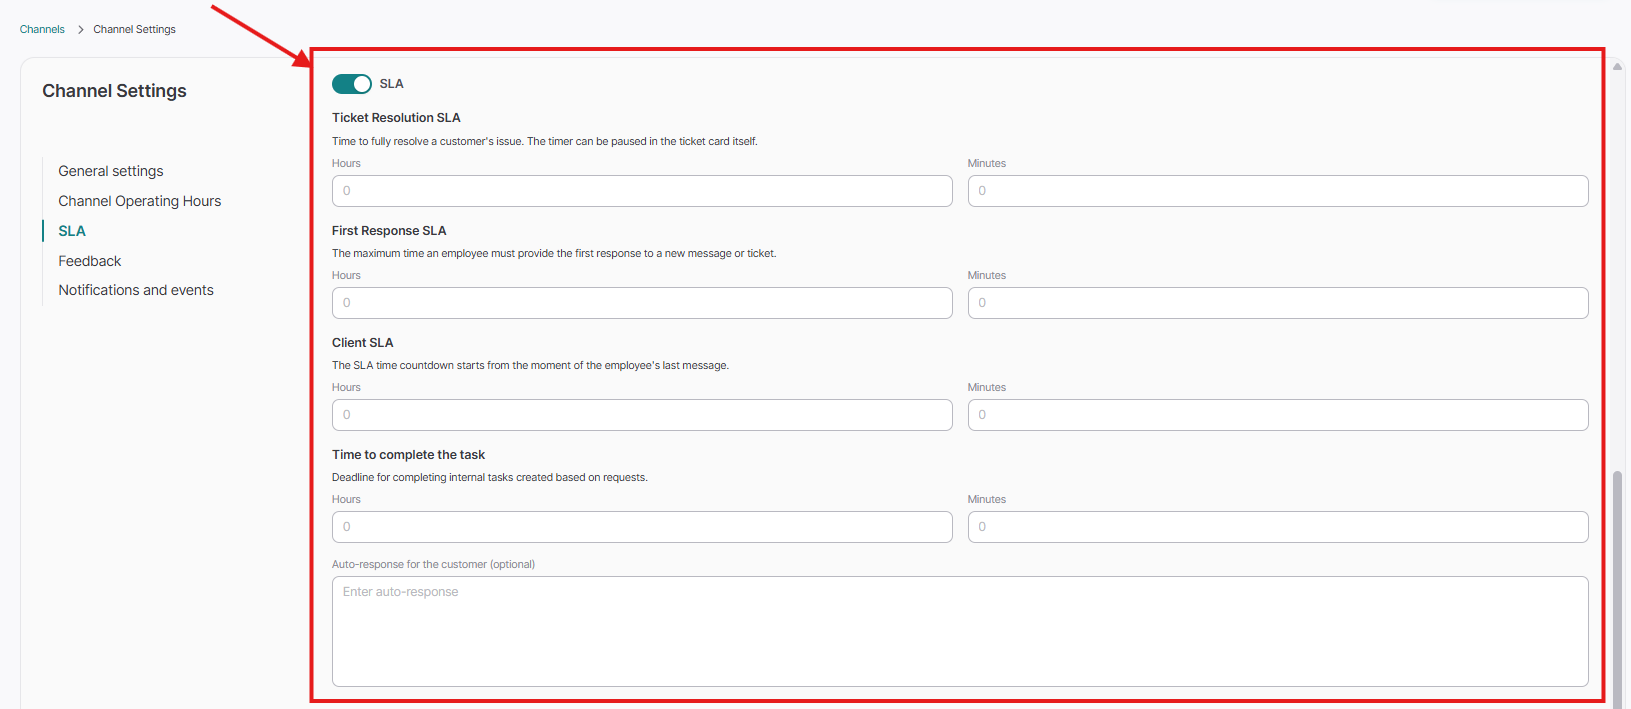
If necessary, enable the SLA function and write down the "Auto-response for the customer". To do this, click on the slider next to "SLA" and type the auto-reply in the field below.
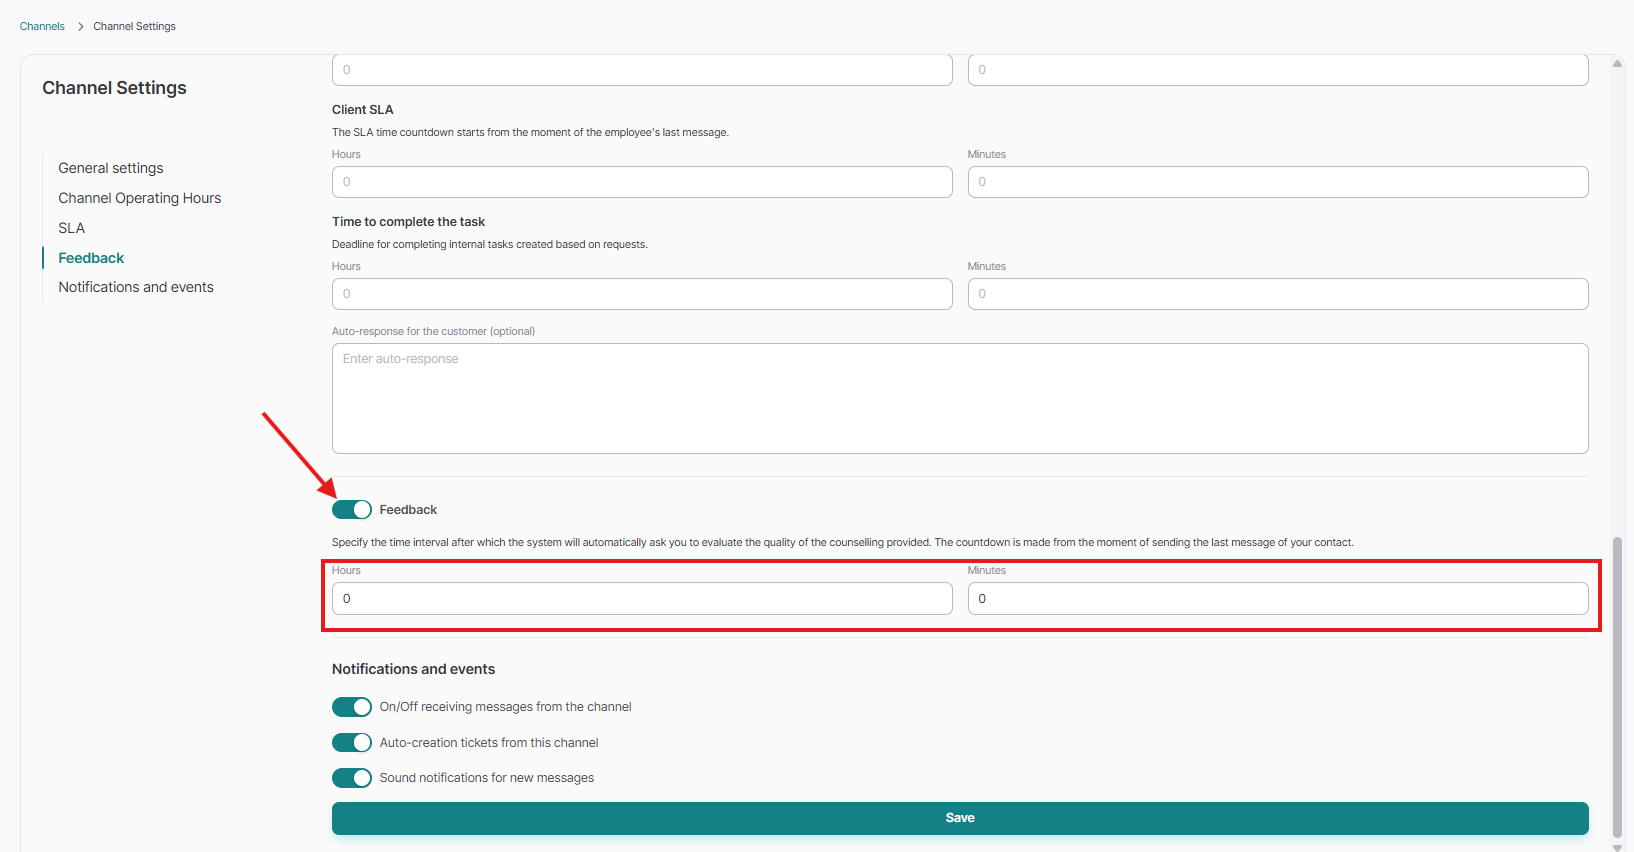
Set up Feedback from your clients.
To do this, activate the "Feedback" slider and specify the time — after what period the system will automatically ask to evaluate the quality of the consultation provided. The evaluation will be sent after the time you specified into the contact, counting from the last message of the client. But if the creation of tickets for this channel is connected, then the evaluation will be sent after you close the ticket with this contact.
Next, click the save button, and we receive our unique address, which must be passed to the third-party system developer so that we can complete the setup of incoming messages in your third-party system:
A newly received message via an external channel appears in the contacts section:
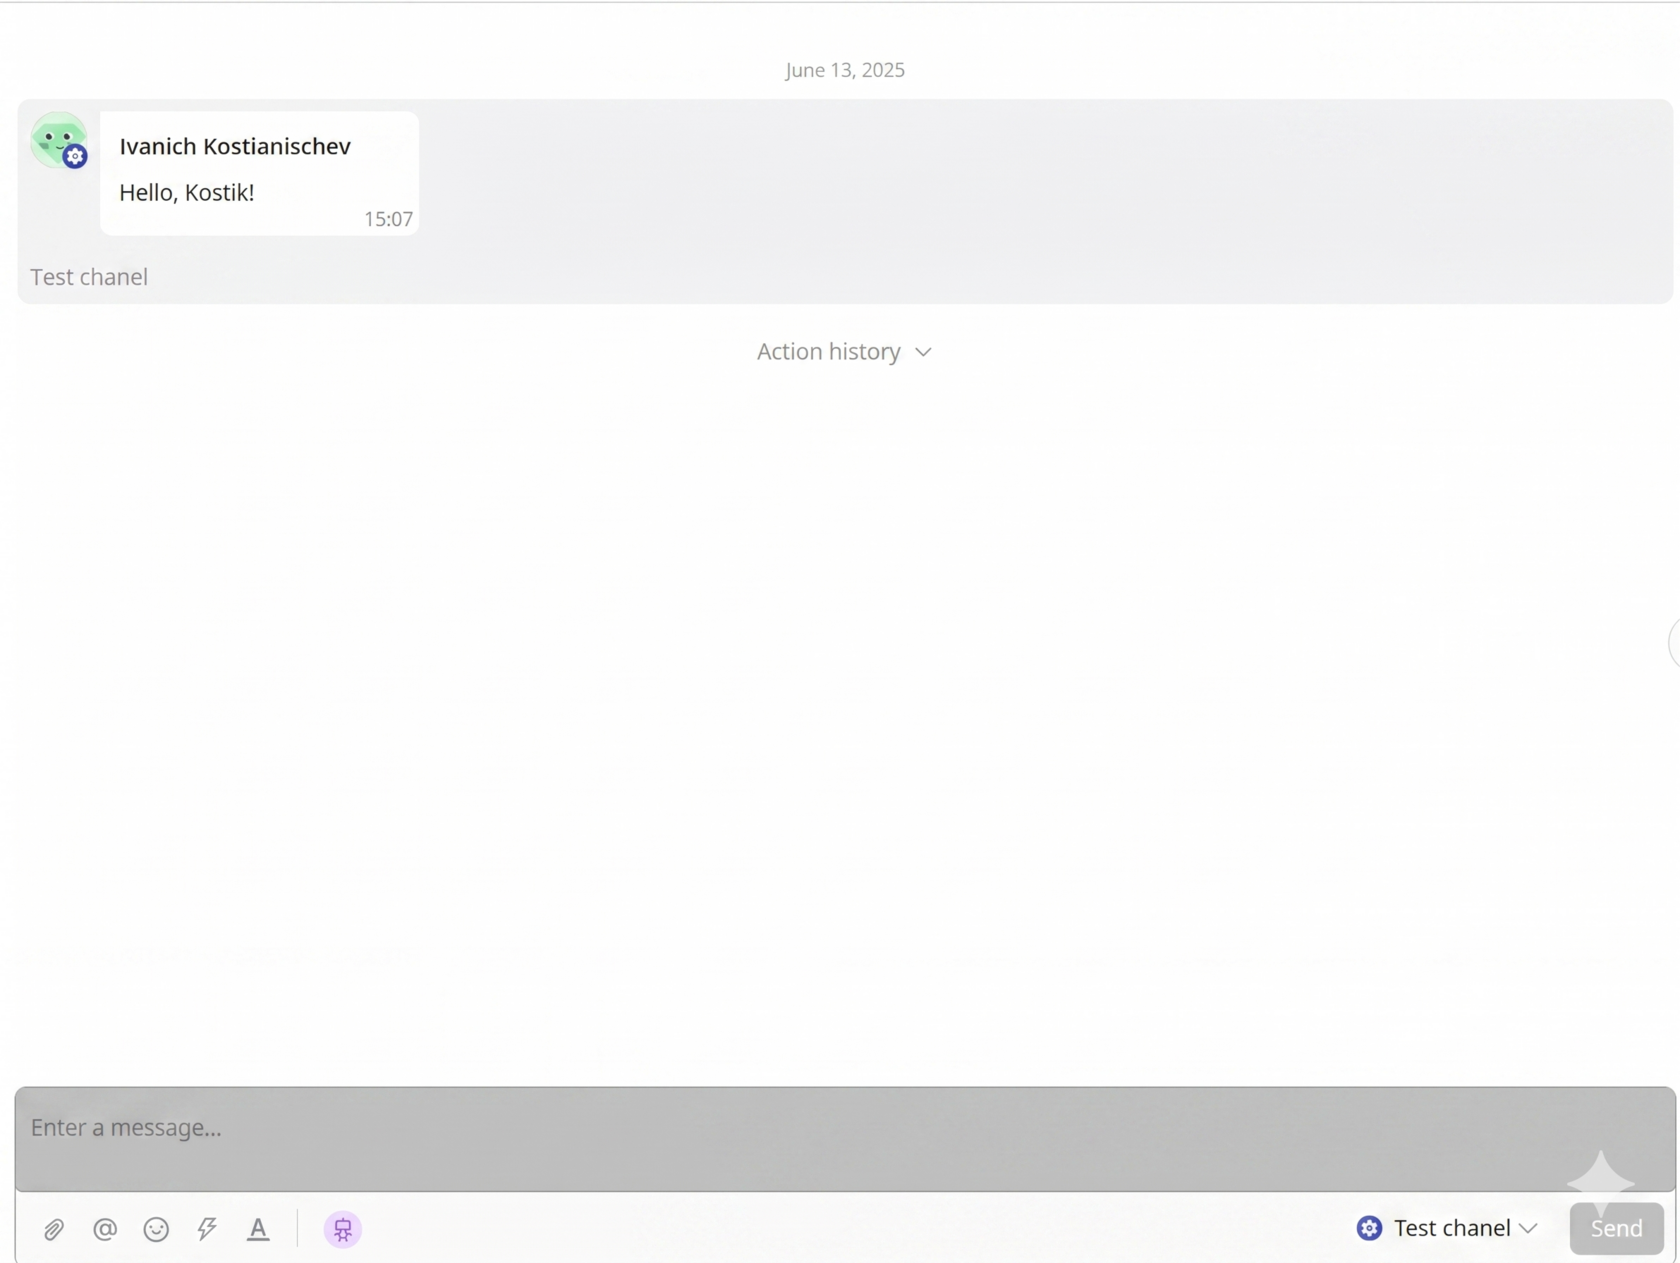
Now you have successfully set up the receiving and sending of messages between our system and another external service.