We understand that each company has its own rules for assigning responsible parties based on various circumstances.
In the "Automation" section, you can assign responsible parties to tickets based on specific parameters. How do you do this?
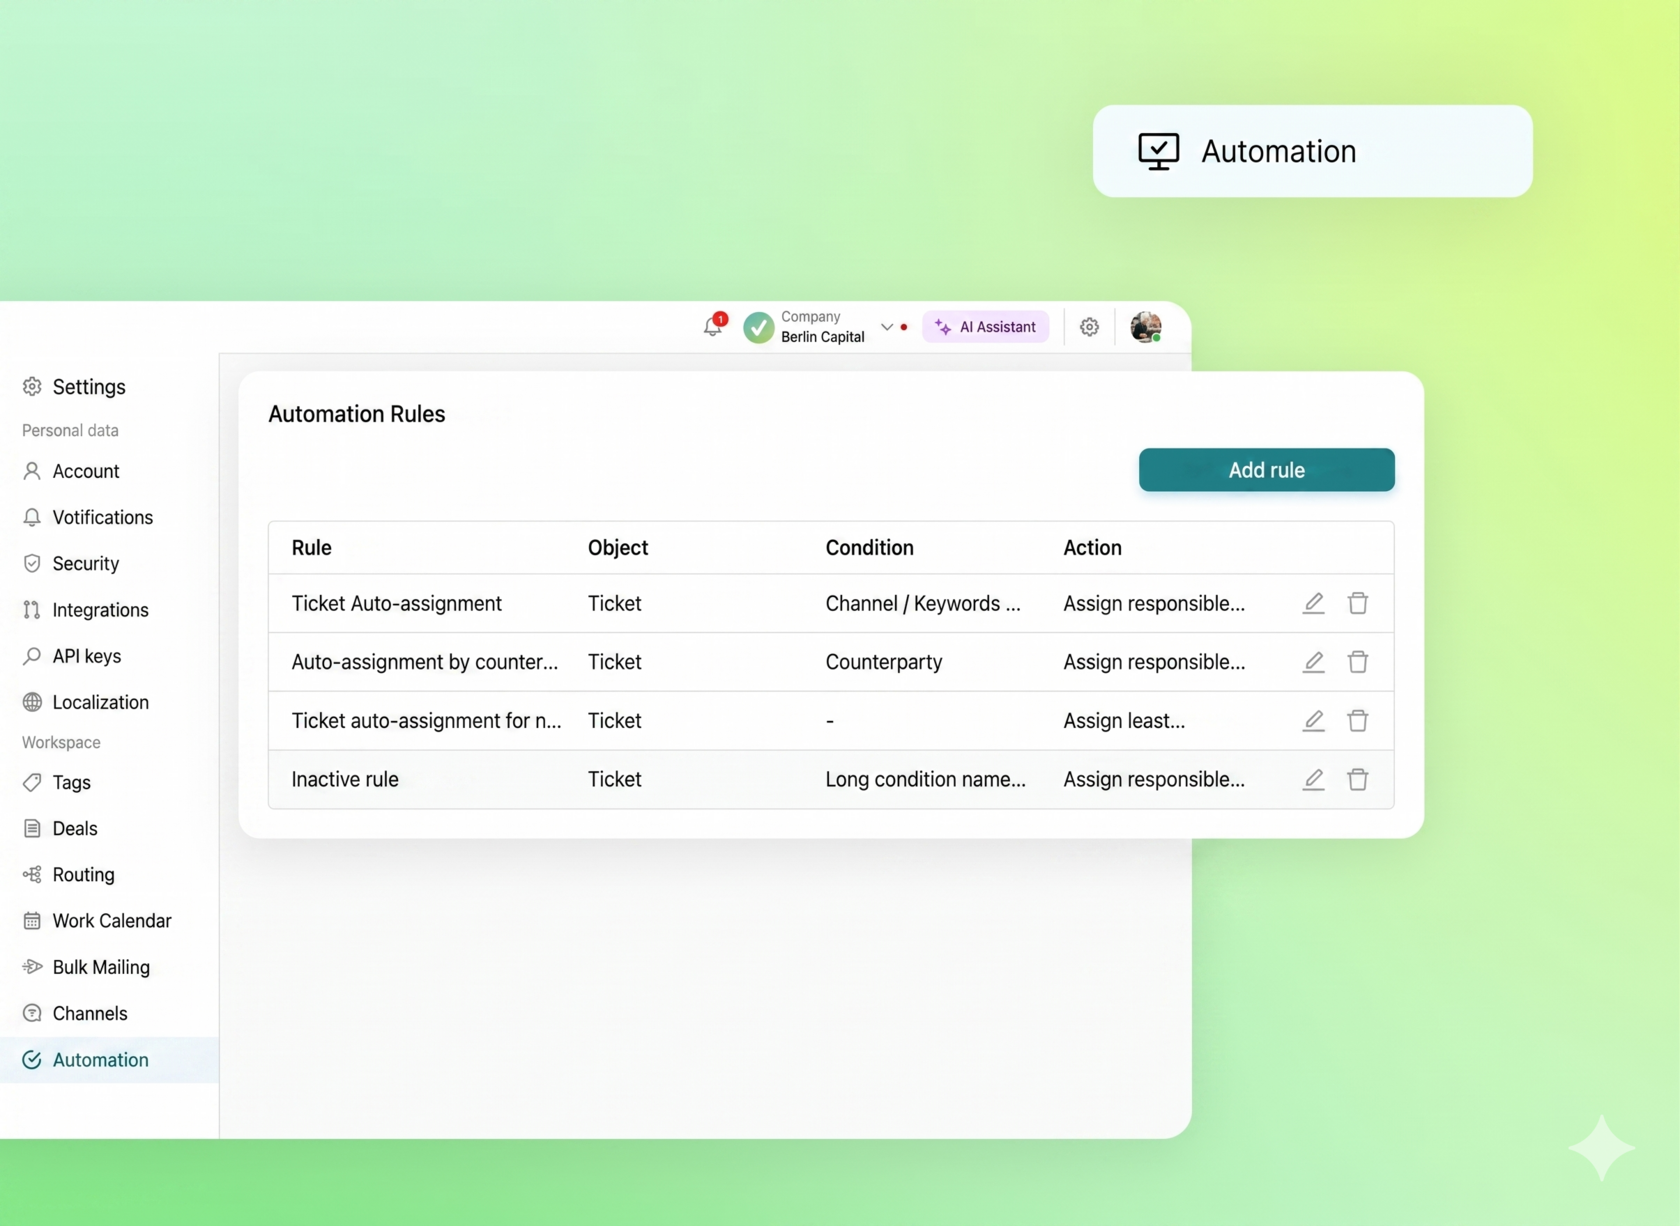
First, go to Settings -> Automation:
Next, you can add a new rule or edit a previously created one:

To create a rule, you need to click the "Add Rule" button and fill in the following fields in the side window that appears:
- Rule name
- Trigger (an event that triggers a rule)
- Condition (a condition that determines when a rule applies)
- Select the required communication channels (the channels from which you will receive inquiries from users)
- Action (What to do if the trigger is triggered and the conditions are met)
- Select a responsible person
In this article, we'll cover creating a rule using "Keywords." For example, you might want all emails containing the words "Agreement," "Document," and "Minutes" to be assigned to a specific person responsible.
To do this, select Trigger -> Keywords. Enter the keywords, and then select the person responsible.
After entering all the necessary information, click "Create."
After entering all the necessary information, click "Create."

Please note:
- Automation rules are executed from top to bottom
- If the AI assistant is enabled for a channel/contact, the automation rules do not apply.
Let's now take a closer look at how this rule works:
- The rule works for all channels from which tickets are created.
- You can search by words, phrases, or to include several words at once by placing a "+" sign between them.
- Added words will be searched in the ticket description.
When a ticket is created and it contains the keywords you specified, a responsible person (the "Selected Responsible Person") is assigned.
This means that if you need a specific responsible person to work with a specific list of keywords, you can do so using this rule.