
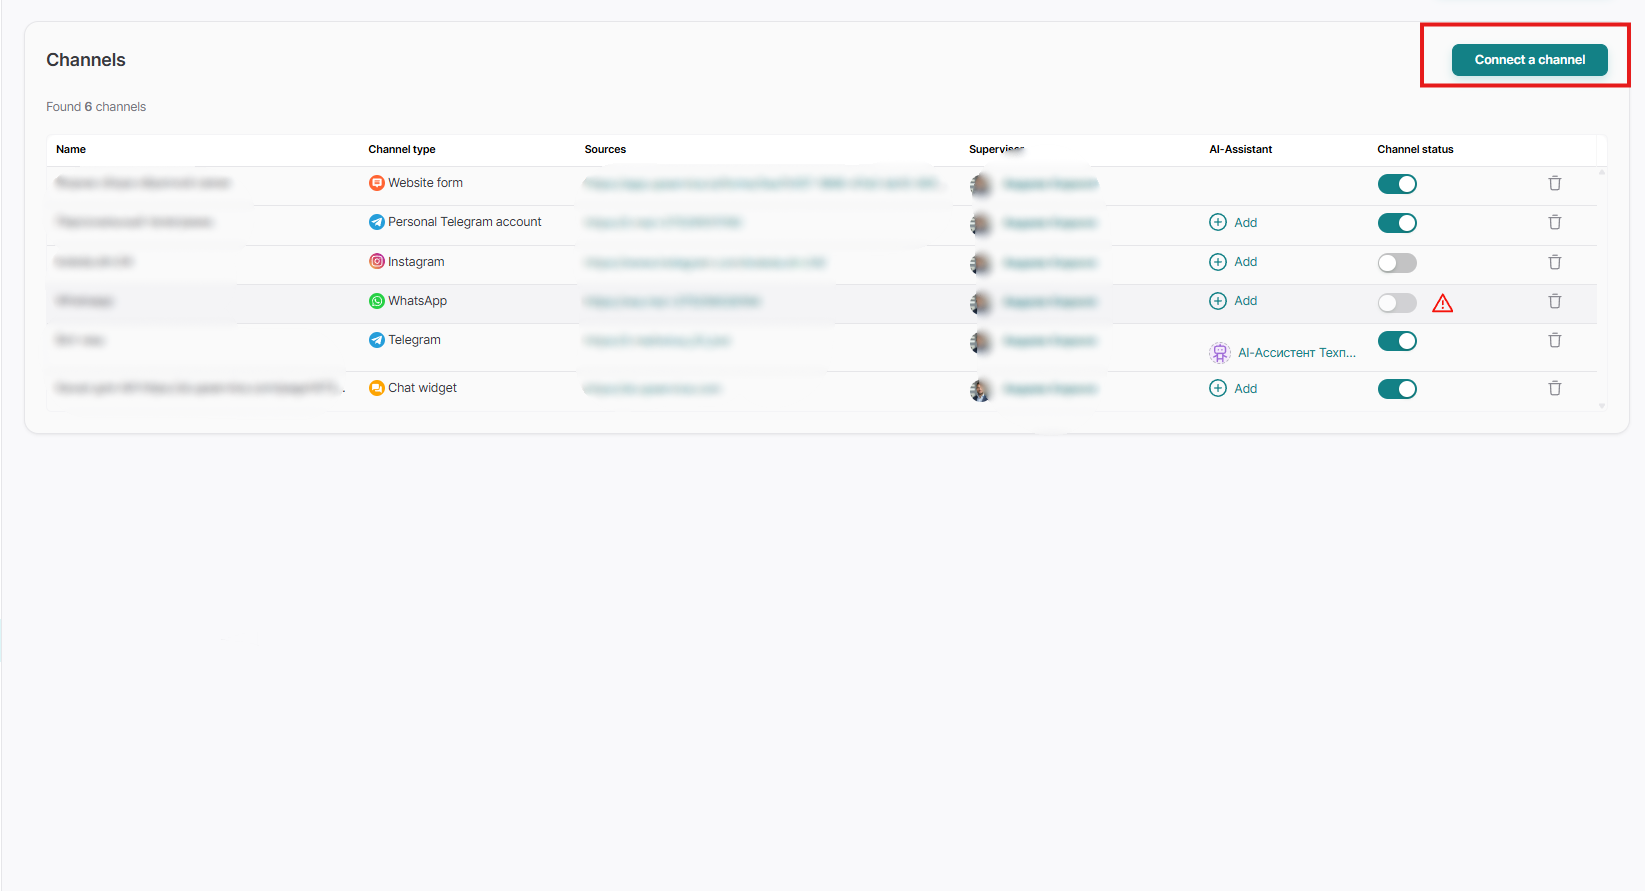
To connect (create) an online chat for your website, go to the "Settings" section, go to the "Channels" tab, click the "Connect a Channel" button:
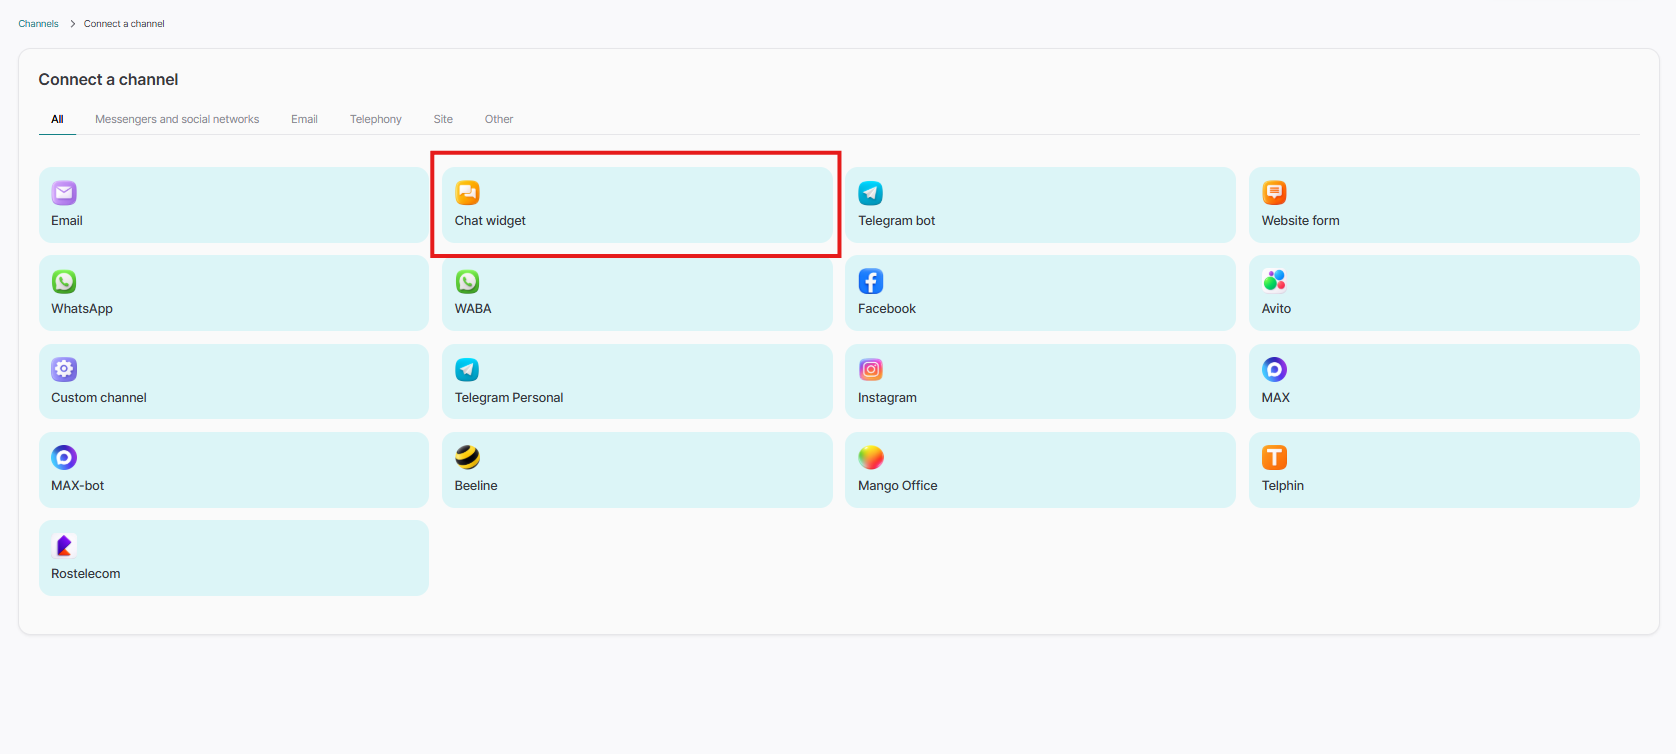
Select the channel type "Chat widget"
Fill in the fields:
- Channel name — a name that reflects the purpose of the chat. For example, "Facebook for clients" or "Facebook for support". This name is available only to colleagues, clients will not see it;
- Supervisor — this is the only employee who can be assigned to this role. They have the right to add or remove operators, as well as change channel settings and communicate with clients;
- Managers — company employees who will communicate with the users of your site;
- Tags - if you specify any of the tags in the channel, then all subsequent contacts that will be created for you through this channel will immediately arrive with an ALREADY assigned tag. This will be the tag that you selected at the channel creation stage;
To set up the operators' working hours, drag the "Channel operating hours" slider to the right.
In the working hours settings, select the Time zone that will correspond to the working schedule of your company. It is important to select the time zone that matches the location of your office or the place where you provide services.
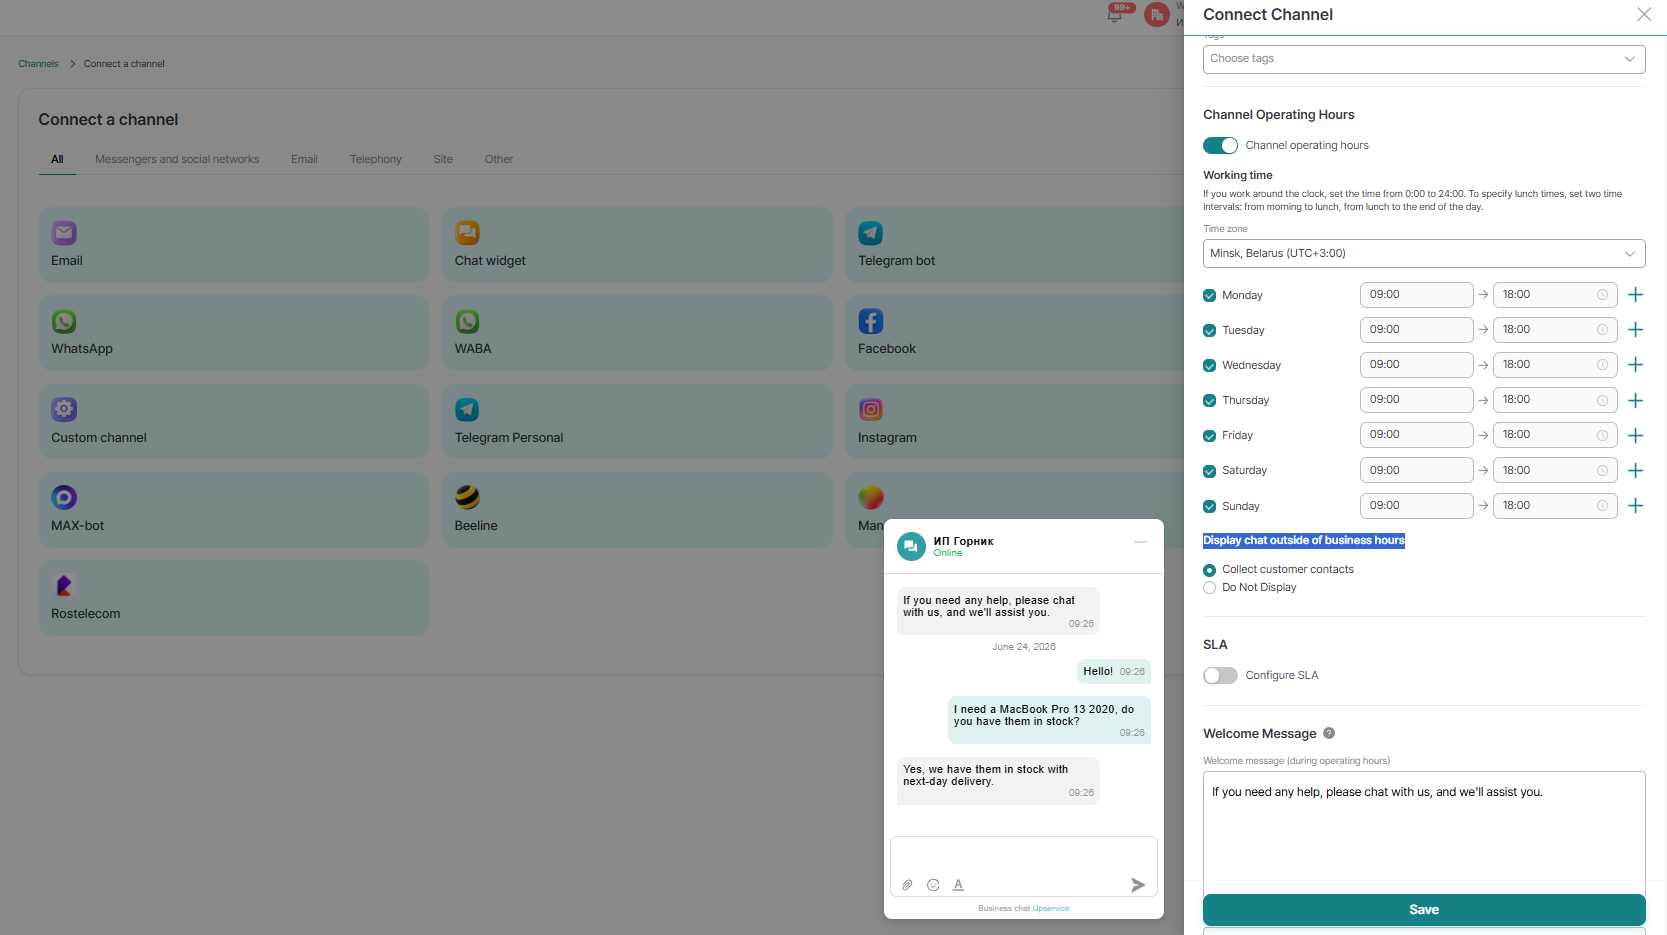
If you work 24/7, set the time from 12:00 AM to 12:00 PM. To specify lunch time, set two time intervals: morning and until lunch, and after lunch and until the end of the workday.
You can also display chat outside of business hours and collect customer contact information at times when you are unavailable or do not display chat at all during these hours.
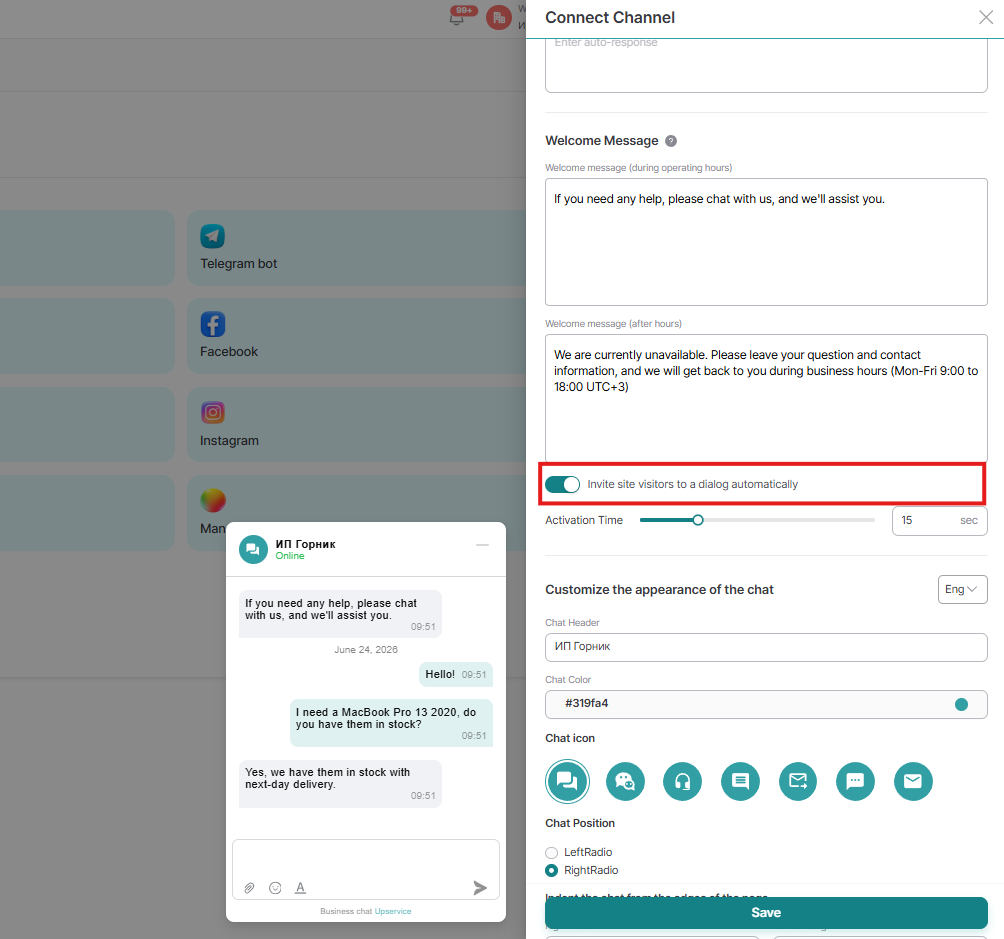
Welcome Message – This message will be sent automatically after a user on your website opens the chat. Greet them, offer your help, or set up a "Welcome Message" for after-hours use:
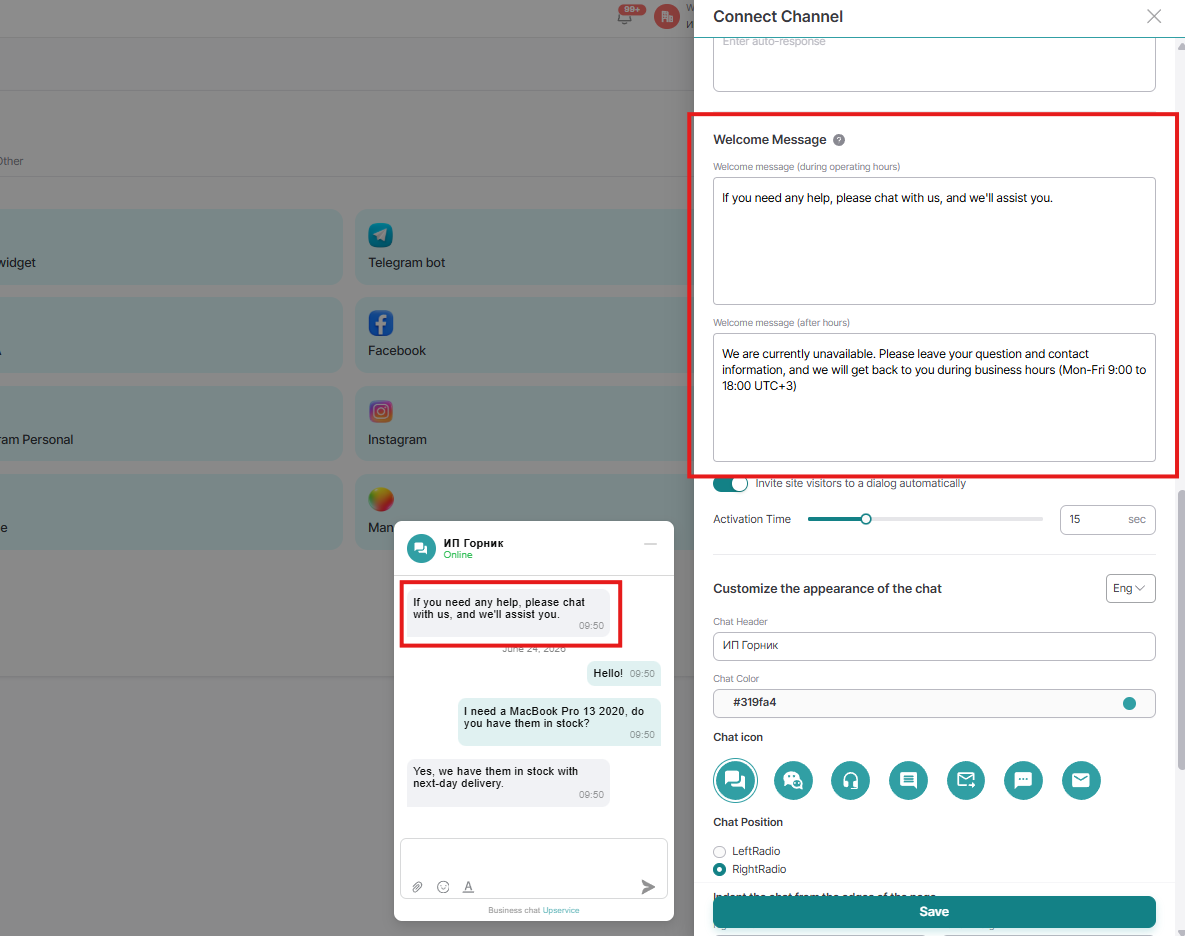
You can enable the "Invite site visitors to a conversation automatically" feature. To do this, drag the slider next to this feature to the right:
If necessary, enable the SLA function and write down the "Auto-response for the customer". To do this, click on the slider next to "SLA" and type the auto-reply in the field below.
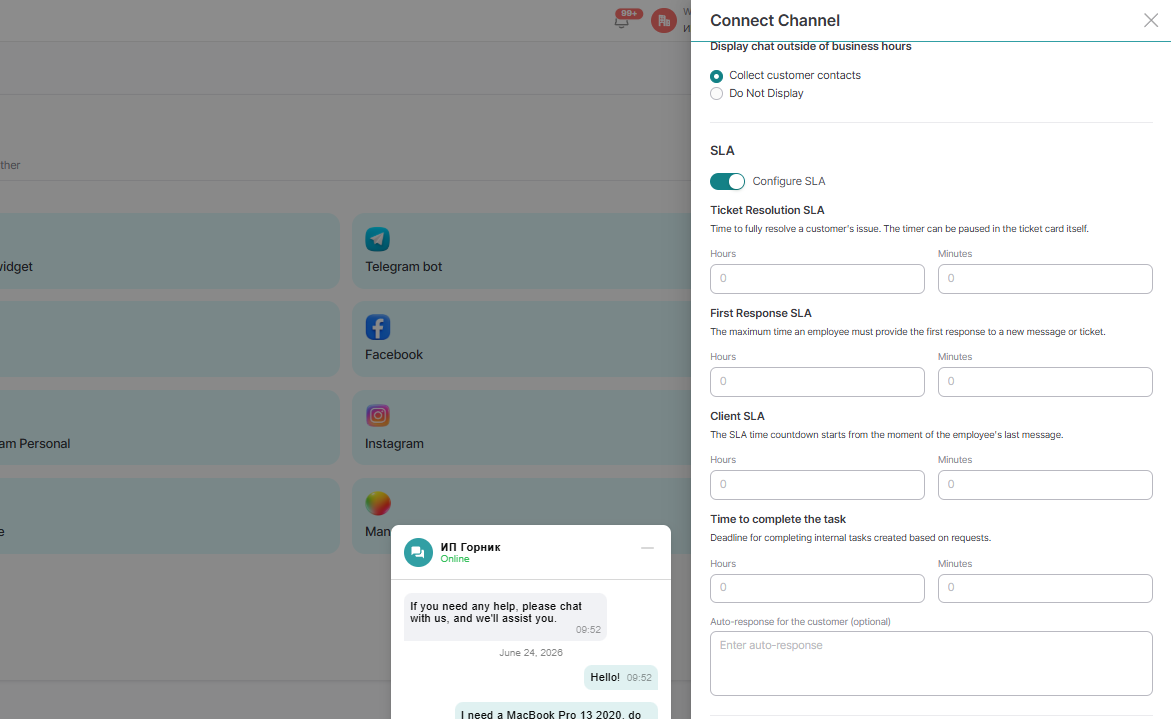
Auto-response for the customer - an auto-reply is an excellent feature for those who have a constant influx of requests from clients and may not have time to process everything at once. The auto-reply will be sent automatically after the client's message, after the amount of time that you specify. It depends on the operator's SLA time. Let's set the operator's SLA to 5 minutes, for example.
In this case, if the operator does not have time to answer the client within 5 minutes, then an automatic response will be sent to him automatically:
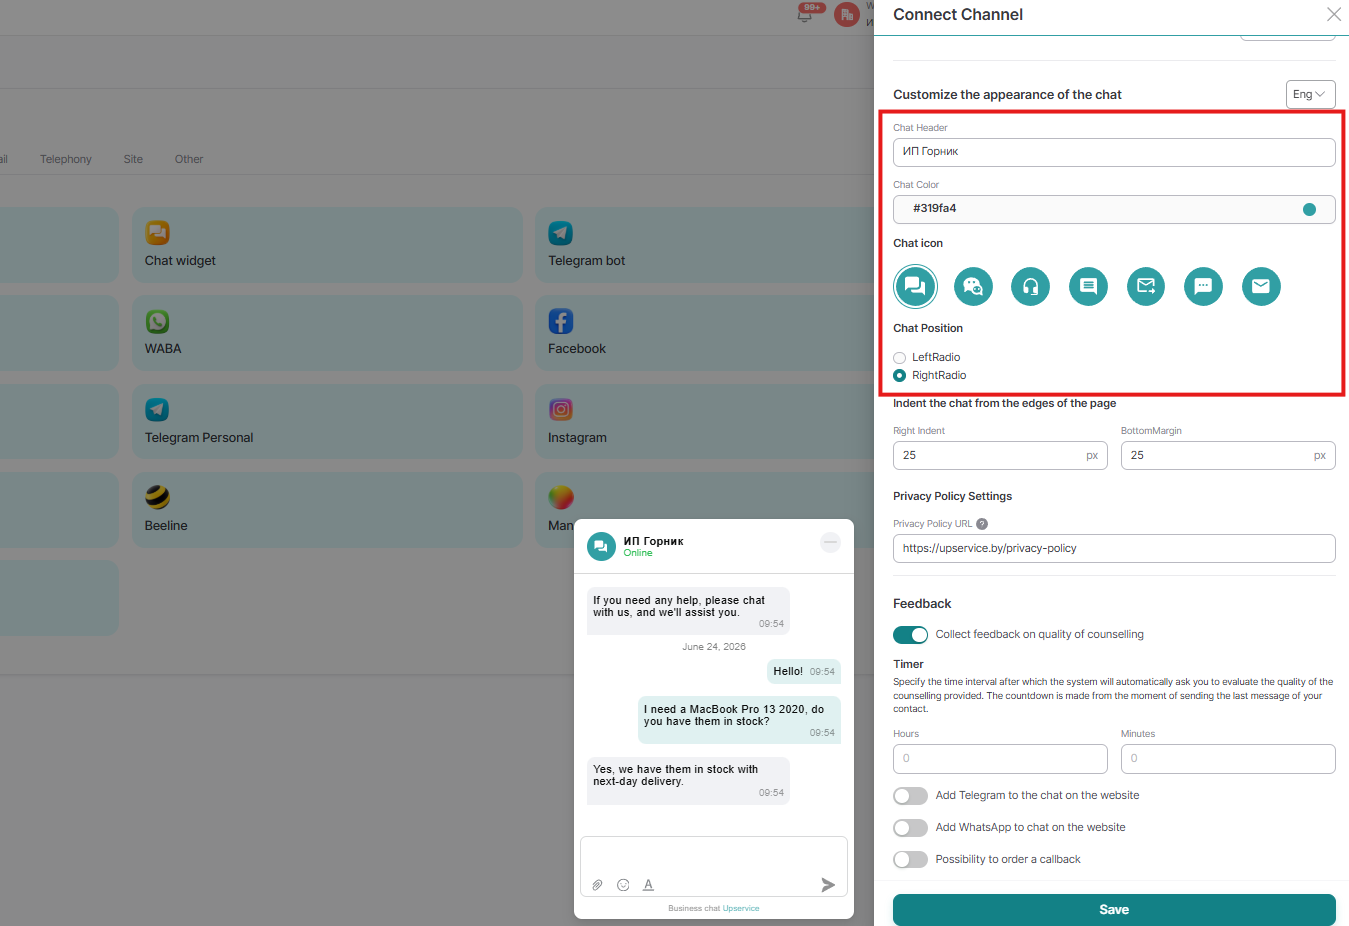
Next, you can set your individual chat settings, such as:
- Chat Header
- Chat Color
- Chat icon
- Chat Position
By default, an automatic welcome message is enabled. It appears some time after a user visits your site. You can set the time after which the message appears. If "Invite to the site automatically" is not selected, the user will not see a welcome message. In this case, only the chat icon will be displayed:
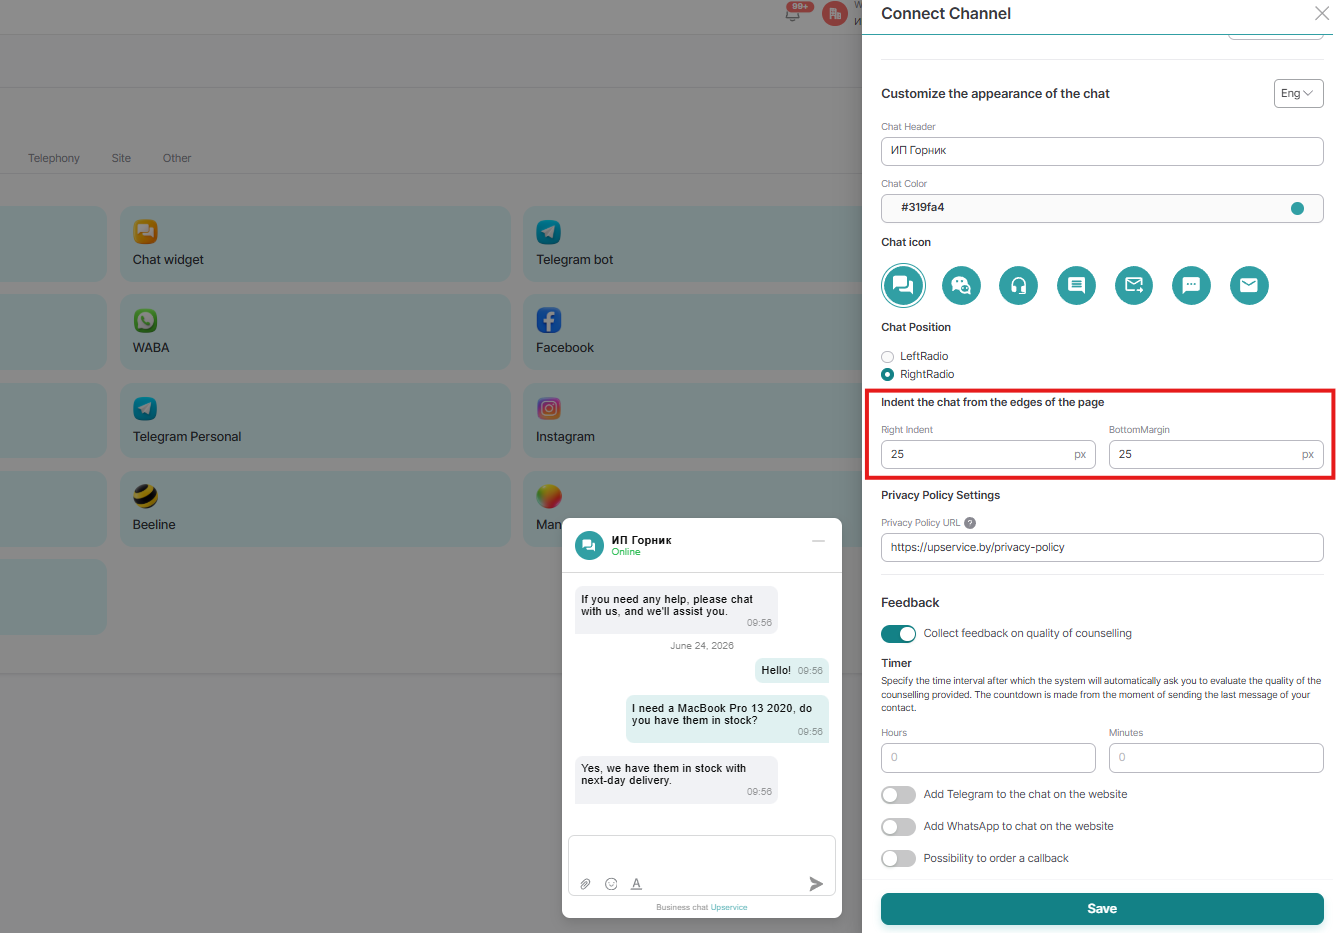
Set the padding in pixels to prevent the chat from blocking important elements of your website:
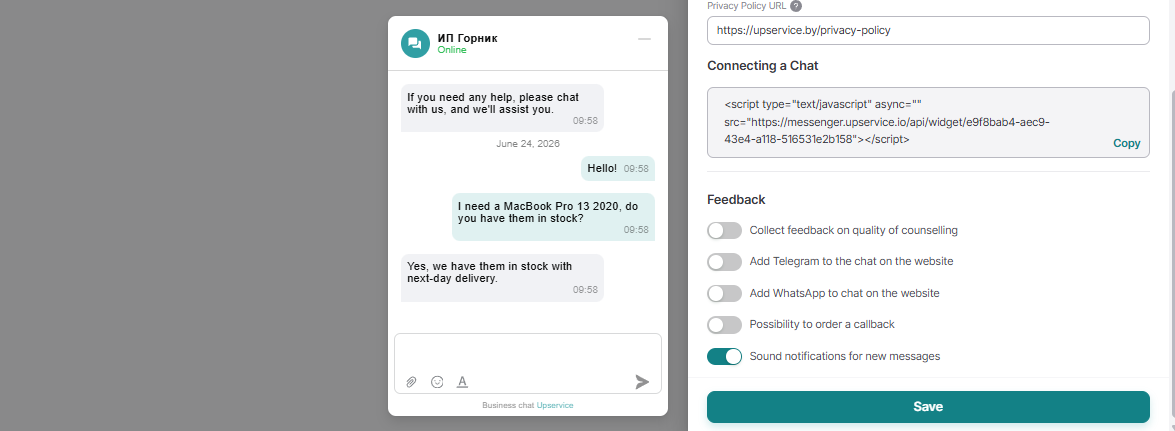
Set up Feedback from your clients.
To do this, activate the "Feedback" slider and specify the time — after what period the system will automatically ask to evaluate the quality of the consultation provided. The evaluation will be sent after the time you specified into the contact, counting from the last message of the client. But if the creation of tickets for this channel is connected, then the evaluation will be sent after you close the ticket with this contact.
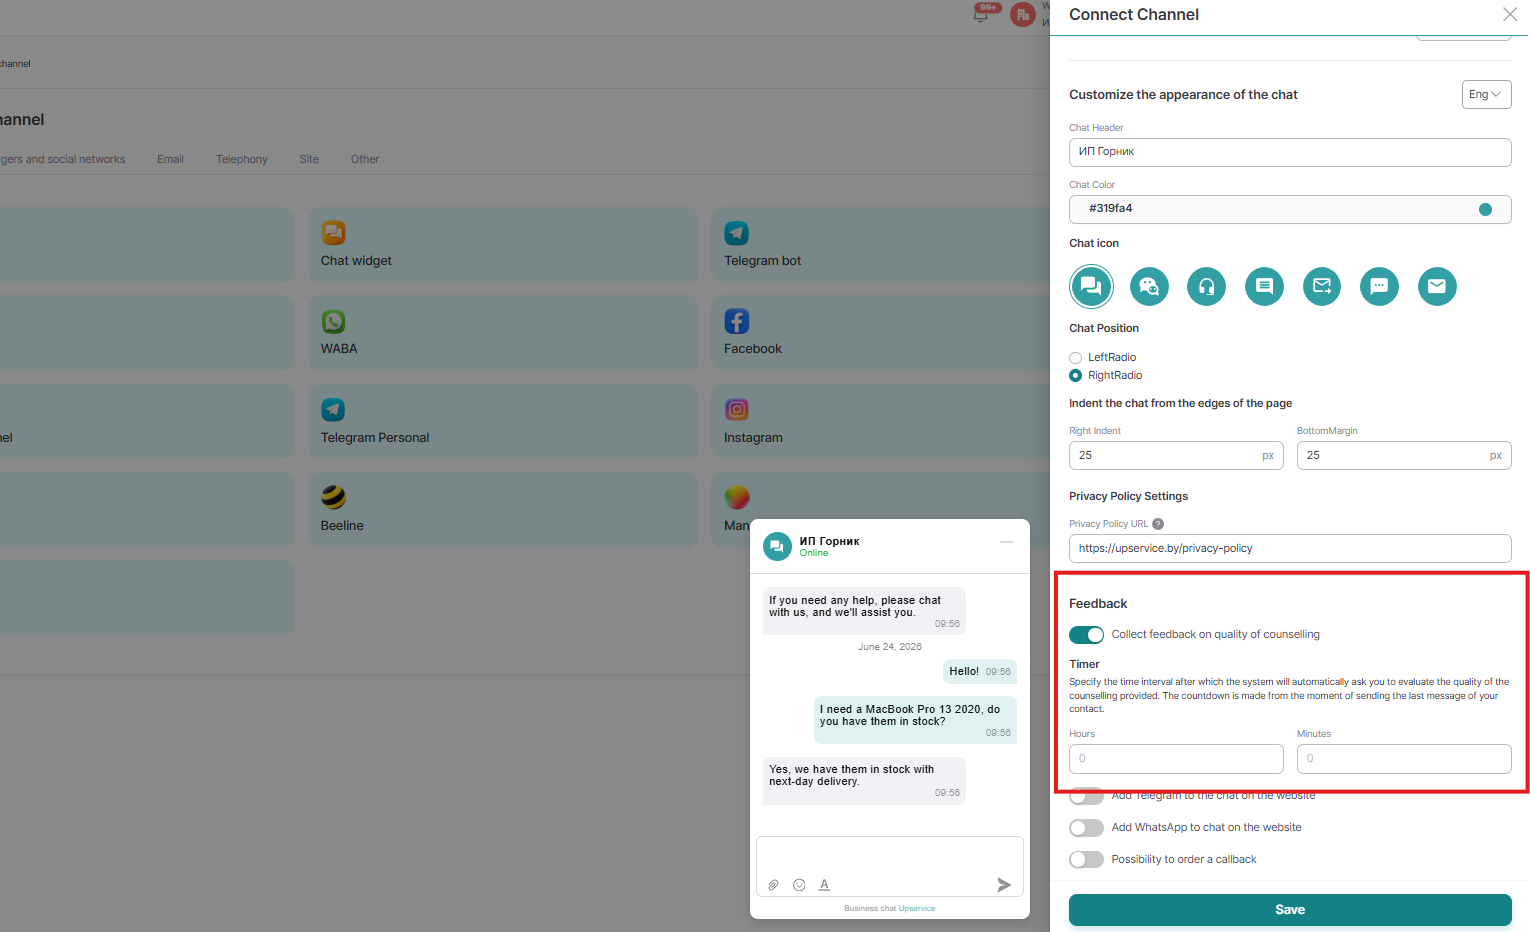
The countdown to submitting the feedback form starts from the moment your contact sent their last message.
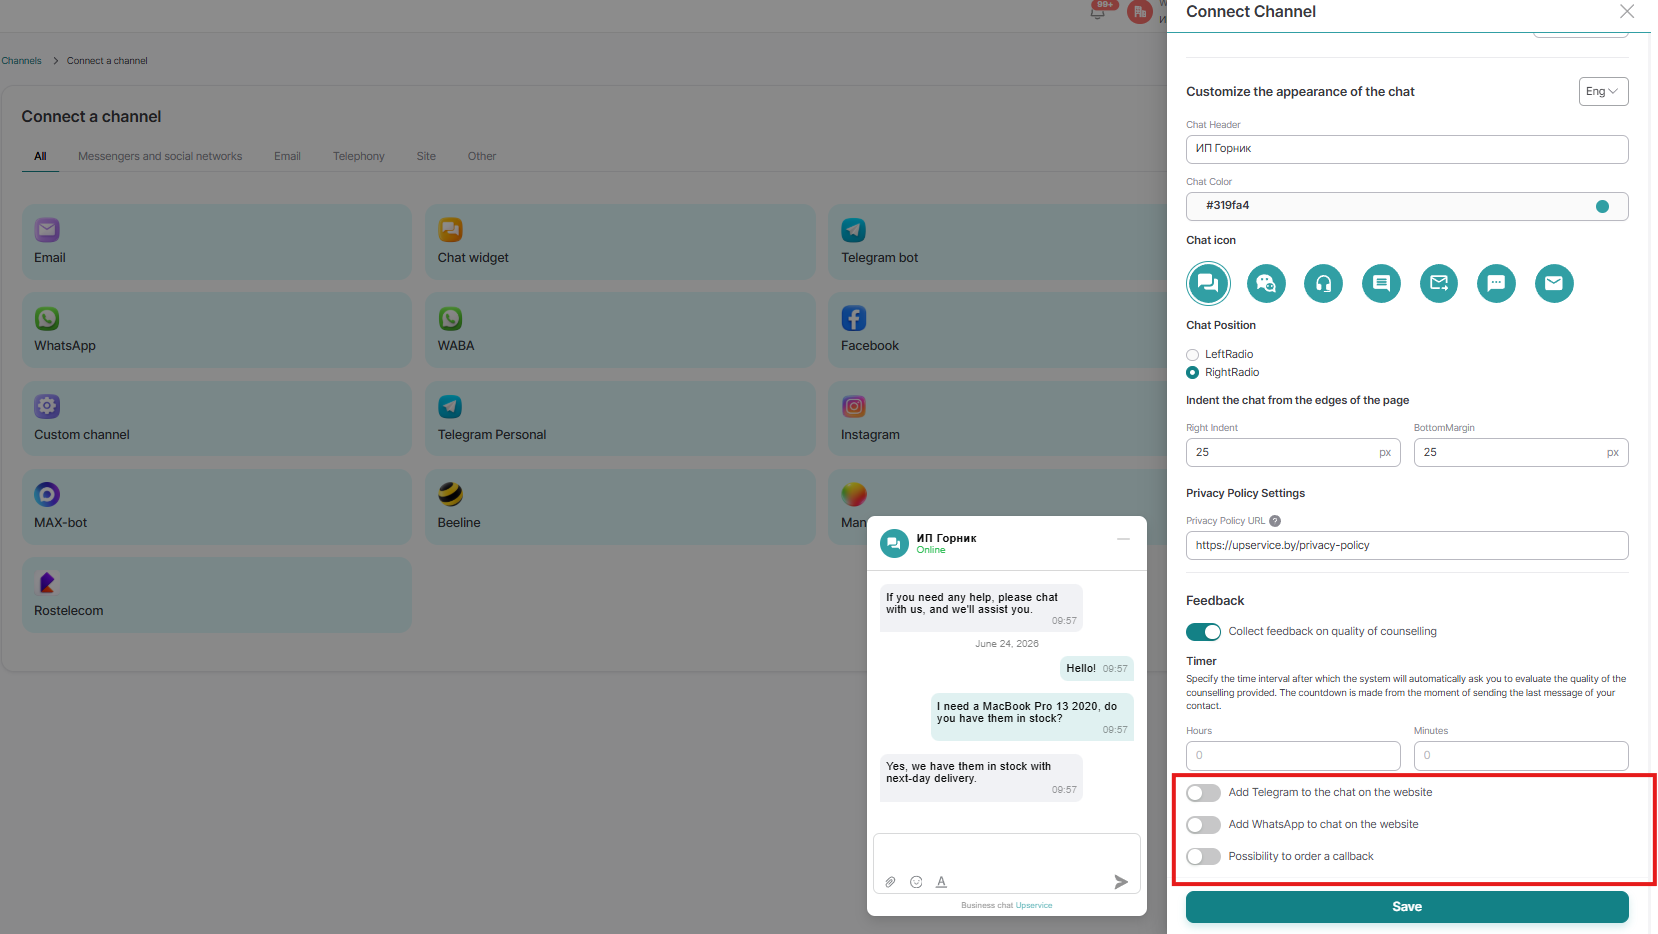
If needed, you can enable the feature and add Telegram, WhatsApp, and "Callback Request" to the chat on the website:
Click "Save" and go to your website to insert the generated code:
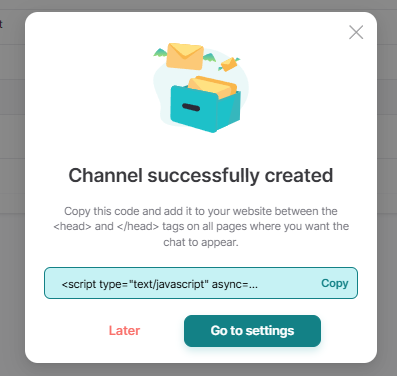
Connecting Upservice online chat to your website
After filling out all the fields in the chat creation form, you'll receive a code. Copy it.
This script must be inserted into the source code between the <head> and </head> tags on the pages where you want to see the online chat:
If needed, you can create different online chats for different pages of your website. For example, you could place one chat in the product catalog and assign operators to the sales department. And place a second chat on the company information page and assign operators to the accounting department.